- Details
-
Created: Tuesday, 02 November 2004 06:35
Editor: Here we are with Bill’s final word on studio design. Is that even possible for a lawyer? Anyway, get ready for a rousting good talk on equipment, safety, and comfort.
Equipment in General
No matter the size of the stones you work, you need a system to move them from your truck to your shop and from your shop to your table. The size of stones you work isn’t important. Just remember: it’s the smaller stones that usually hurt one’s back, because if you don’t have a mechanical aid handy you may try to lift them yourself.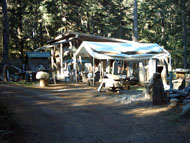
When I asked on learningstone.net for advice, the near-unanimous recommendation was to install some variety of an overhead crane or hoist. A hoist can be installed on a trolley that runs on an I-beam along the width or the length of your shop.
I was convinced of that need until I made a brief studio tour of some full-time sculptors. None of their studios had hoists or gantry cranes. Alexandra Morosco relies on a Harbor Freight – type hydraulic table (for the 1100 pound capacity table: $279.99, but less on sale). Because at their lowest height, it is easy to move medium-weight stones onto them. The tables allow one to lift heavy stones without assistance and to change the height of the table depending on the size of the sculpture. Stacy Shure suggests attaching 3” of wonder board to the top, fastening it with bolts, and then laying down a layer of carpeting. Tom Small uses the crane installed on the back of his truck (designed and fabricated by Jeff Brash). Tracey Powell uses an engine hoist, to which he added over-sized 8” wheels (but be sure to keep engine hoist level, for stability. Harbor Freight sells foldable shop cranes of this type for $199.
But when building your studio from scratch, allowing for a crane system is not difficult. For example, when CR Schiefer’s old shop burned down (he is another learningstone.net contributor – and a 78-year-old sculptor), the beginning of his new shop was a framework of steel girders, which projected out 15’ past the shop walls. This allows him to drive under the projecting girders, and drop off (or pick up) 2 or 3 ton rocks. CR highly recommends the “drive under” feature, and emphasizes the importance of keeping the roof high enough to lift really big pieces of rock: not necessarily just tall pieces, but also pieces that might be long or wide.
If you install double sliding barn doors, then you can back a pick-up truck under the I-beam, and use the trolley to load/unload stone inside your studio. A one-ton hoist ($199. for an inexpensive brand) mounted on a trolley from a six-inch I-beam would satisfy the needs of many of us, although before installing one, check out the load rating for your I-beam. Keep in mind that a long I-beam, if unsupported in the middle, may tend to sag. One sculptor’s solution was to install an I-beam rated at 4 tons atop two free, used telephone pole halves buried 4 feet in the ground. The poles are spaced 16 feet apart and the I-beam is 30’ long. He bolted the I-beam to the telephone poles and to the sides of the studio frame. To it he added a chain hoist, and a trolley. See a hoist rigged for action in a sculptor’s studio at www,granitesculptor.com/studio.html.
Other options are available, such as one sculptor’s solution of an Air Force surplus gantry crane that is on wheels. Its owner states that it moves around rather well unless a stone chip gets under a wheel. The entire gantry can be turned 90 degrees so the trolley can run right to left as well as front to back in relation to the shop floor. Another option is a forklift (old models are available for under $5000.) that can do much of the lifting.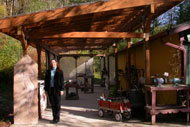
Clive Murray-White has built five or six studios, and has come up with a solution he thinks is ideal: a ceiling-mounted bridge crane. Visit www.lkgoodwin.com/more_info/ceiling_mounted_steel_workstations.html, or see Millsom Hoists www.millsomhoists.com.au/. He points out that a ceiling mounted bridge crane costs just a fraction more than a concrete floor, and you avoid the need for a scissor lift table (as you could build your temporary workbench up to exactly the height you may want). You can move both workbench and work to any spot you want to in the whole studio, and you can control the light conditions very precisely by attaching lights to the crane, which can then be positioned as you wish.
No matter what system you use, you’ll need webbing, chain, or line to attach your rock to your lifting system. See www.grainger.com for webbing, or buy non-stretch halyard line from your local sailing equipment vendor.
Compressor
Compressors are noisy. You’ll want to close yours off from your main shop area. You’ll want one that delivers 10 to 20 cu. ft. per minute (check your equipment specs to see what is required) with a 60 to 80 gallon tank that delivers 90 psi. The compressor needs to be rated for continuous duty: if it doesn’t say it is - it isn’t. Suz Gentiluomo points out, however, that regardless of whether marketed as “continuous duty,” if you work your compressor so hard it doesn’t shut down, it will overheat. That will load up the compressed air with more water, rusting your tools, and cutting your c.f.m. down because it takes more pressure to push water down the line. (She suggests buying a used, refurbished compressor from Dickinson Equipment, near the Ballard bridge in Seattle).
Since you’ll periodically need to service your compressor, you’ll need enough space around it to be able to do so without inconvenience. In addition, compressors may overheat unless given adequate “breathing room”.
Water condensation in compressors can harm your tools. As you probably already know by now, you should be using the hand drain valve to drain water from your compressor when you use it. But draining alone isn’t sufficient to keep the air as dry as it should be. For perhaps $40, you can buy an in-line centrifugal force air dryer. And for perhaps $100, you can add an “automatic blow-down valve”, which allows you to set the frequency and duration of your “blow down.” For example, you can set it so that every 15 minutes, for a duration of four seconds, the “blow down valve” will purge most of the water from your system. (For suppliers check out www.mscdirect.com, and www.grainger.com.) Jeff Brash combines his “blow down” valve with a light timer-type switch, so that it isn’t blowing water out of his system at 3:00 a.m. Other, more expensive and complicated solutions are available for those who suffer water angst.
Dust Collector
You can install a dust collector system, although the commercial systems made for sawdust don’t filter down small enough, and those made to filter stone dust are too expensive for most of us.
In a former studio, Ken Barnes used an 8’ x 10’ “containment box” for his dirty work. He used water as a cutting lubricant, which kept the dust to zero. He used a lot of water, but he was in an urban area and had no access to a drain line or sewer line. Because he couldn’t have water running down the sidewalk, he had to develop a recycling system. He cut a sump in the concrete floor and put in a sump pump, which pumped the water into a 35 gallon plastic drum. (He also re-poured the floor to create a slope to the sump). From there he pumped the water into a line that led to his grinder and block saw and outside to his garden (with valves for each option). He put a nylon stocking over the intake, to keep out large stone chunks. When polishing, he’d attach a direct fresh water hose. He worried that the stone dust in the water might somehow wear out his tools sooner, but in fact, he says, his tools die for other reasons before they get worn out due to water abrasion.
With this system, Ken ended up with a fair amount of mud on the floor, but he hosed it down from time to time, and shoveled it out of his sump as needed. He says the system worked great, and it kept his 8’ by 10’ “wet room” totally free of dust. The wet room had concrete walls on three sides, with a very heavy duty shower curtain on the 4th side. He installed heavy duty lighting that could be varied for polishing, and lots of shielded and GFI protected outlets. Ken reports that he now is in a bigger, and in many ways better, studio, but he still wishes he could have as nice a grinding/polishing setup.
Another possible system, suggested by Tim Bunton: install several misters in the ceiling on a length of PVC pipe (the PVC pipe can be fed by a garden hose), and turn it on periodically when the “box” gets dusty. The misting system will quickly knock all the dust out of the air and allow you to continue working, but won’t leave you wet, cold and wearing a rubber suit. Some sculptors find, however, that misters “just make everything muddy.”
Another possible solution (suggested by Simon from Australia, again on learningstone.net) to solve your neighbor’s problems with your dust is to suck the dust out of your studio with a simple dust extractor fan. The dust is ducted to the outside of the workshop and directed downwards through a set of fine mist water sprays which catch all of the dust. The excess water falls into a wash trough. The sediment settles from the water into the trough to be scooped up and disposed of. The problem: it wastes water, unless you pipe it to your garden.
Utilities
Natural gas or propane may be required for space heating, or a water heater. Specialty contractors may be a better choice for installing this equipment than do-it-yourself attempts by the non-experienced.
Water from a remote hose may be sufficient, but additional fixed faucets will add to the flexibility and convenience of the space. Don’t forget to use non-freeze hose bibs outdoors.
And to run all of those tools, you’ll need electricity. Not all the tools can be run by a single sculptor at the same time of course. A single 20 amp circuit would serve dozens of outlets for hand tools, if the codes allowed it, but separate circuits for each outlet would allow flexibility in locating portable electric heaters, or if you invite friends over for a group project. When a compressor and electric heaters are running simultaneously, and a hoist is activated, there might be a chance of tripping a 100 amp main circuit breaker. Larger may be better, and allow expansion, but there is a cost factor. Carefully evaluate your loads and processes in determining the size of your service.
Remember to install utility connections (electricity, air, water) for your outside workspace.
Safety and Comfort
Standing on concrete all day can be hard on one’s legs. Some sculptors let the rubble build up around their work area – although that can make it hard to move your table if it is on rollers. Anti-fatigue mats for concrete do make a difference over time (try Costco). Standing on concrete is just too hard on the feet and knees. Suz Gentiluomo recommends cross-pieces on your sculpture stands for foot rests.
In winter when your studio is cold (or when you are working outside on a cold day), running water-feed tools with cold water can make you cold and miserable. So Jeff Brash recommends running your hose from your hot water heater. (You may need a mix of hot and cold water for the right temperature.) (Ed. Note: see Dan Michael’s solution in the Mar/Apr ’04 issue of SN)
Don’t forget storage: your studio will look nice and big until you start filling it up. And don’t forget to check out the drainage for your site. (Keep your site drainage separate from the run-off from your water-fed cutting and polishing, to avoid clogged pipes.) Rain and wash-down water seem to like whatever low spots are available.
Conclusion
Echoing Tom Small’s statement at the beginning of this article, studio design is all about one’s philosophy. You’ve got to separate what you want, from what you need. Figuring out what you need, surprisingly, isn’t that easy, at least for an angst-suffering guy like me. By setting out some of the factors here, I’ve tried to make that decision a little easier for all of us.