
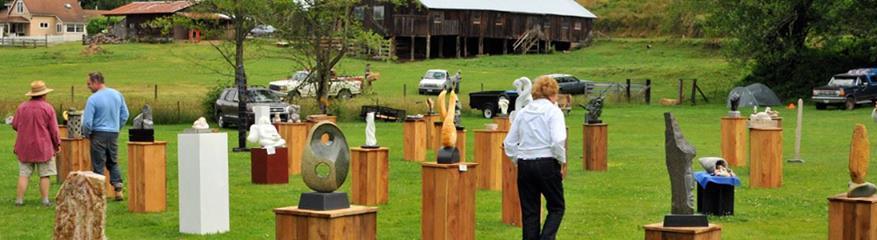
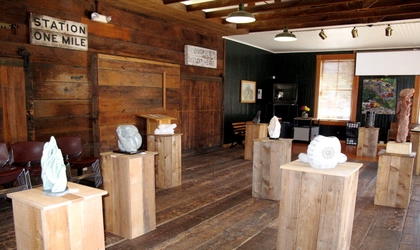
Take apart cedar pedestals are a response to several needs:
- Can be outside in the rain and standing in a wet grassy field for a day or two.
- Able to take a small amount of abuse and not need to be repainted after every time they are handled.
- Takes up minimal storage space - especially if you are an artist with a hatchback or mini van and want to show 4-6 pieces of sculpture, or a non-profit that wants to display 40-60 items.
- Easy to assemble and take apart and does not require a lot of skill or tools.
This design has proven itself starting in 2011 and over the course of a one day workshop in October 2013, 8 members build over 17 pedestals. This article tells you about how to build your own.
Below are the instructions and diagram. ([Click Here] to download a PDF of these instructions)
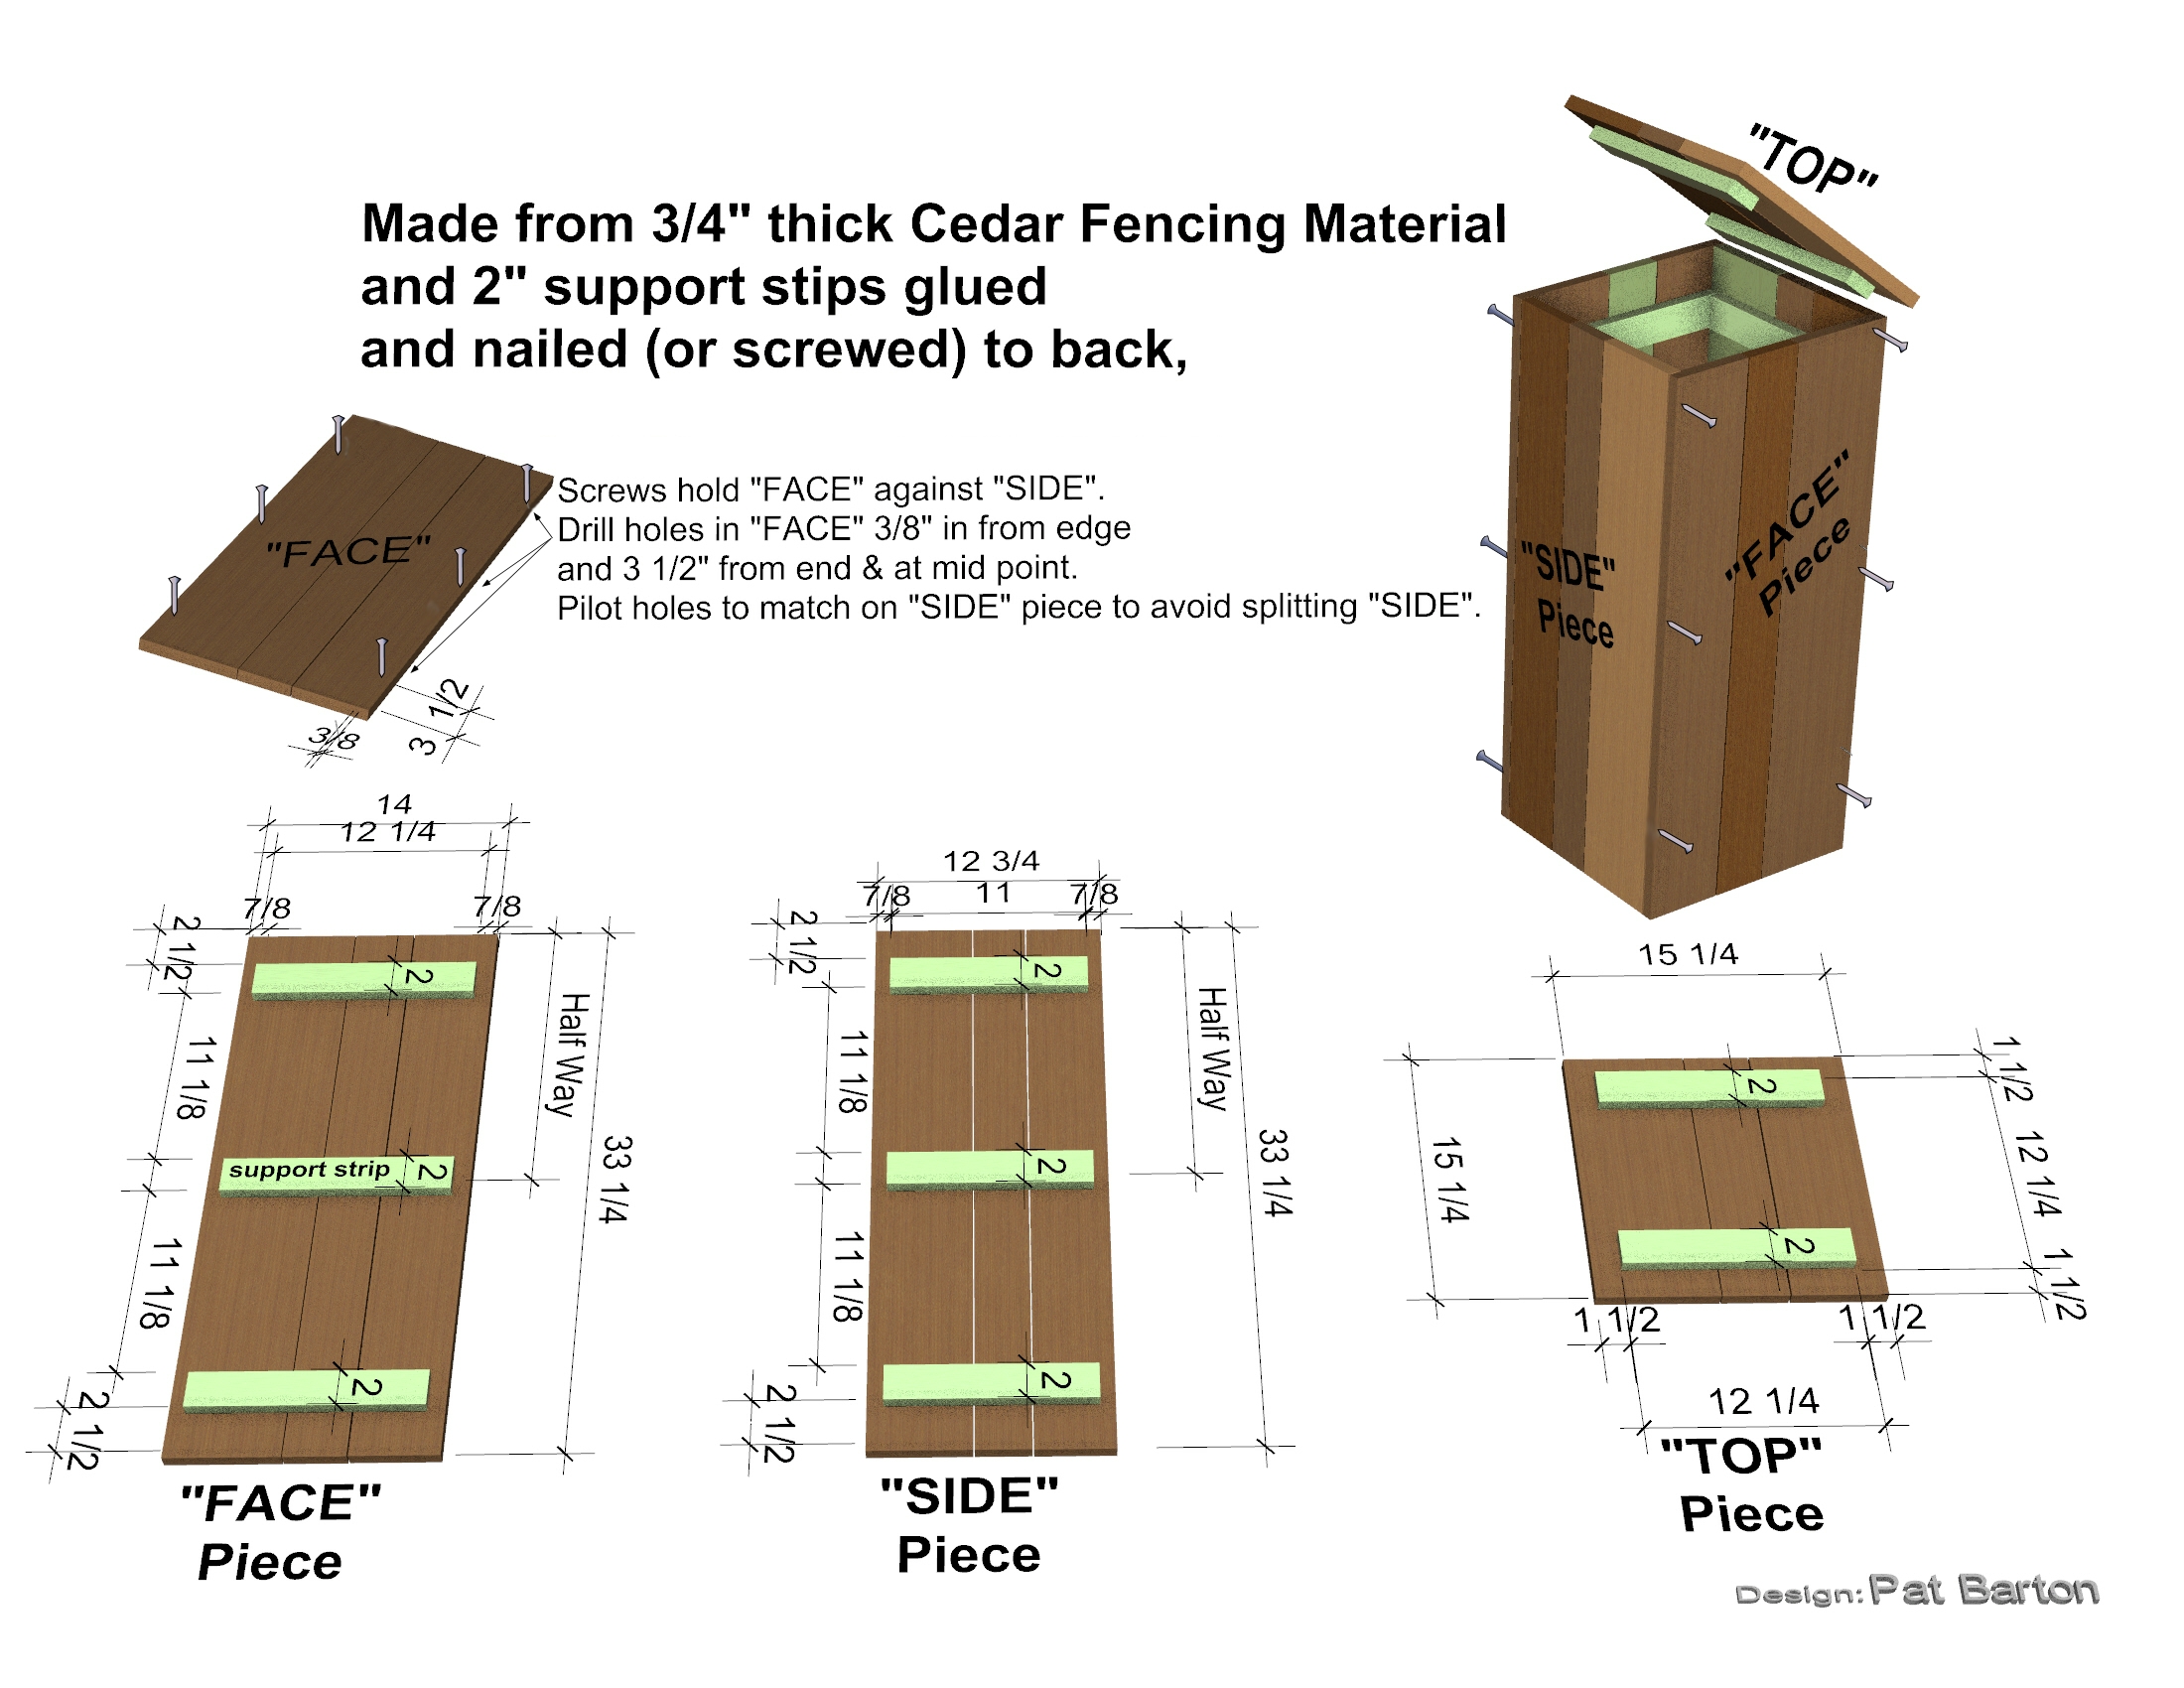
(Click for full image)
Tools Needed
- Measuring tape
- Safety glasses
- Pencil
- Square
- Chop saw
- Table saw
- Screw gun / drill
- Drill bits
- Brad nailer and 1 3/8" brads (or you could use screws if you don't have a nailer)
- Throw away rubber gloves. They will keep the glue off your hands.
Materials needed
- The lumber should be a full 3/4 thick x 5.5" (or 6") x 6' long, fence lumber, with at least 1 rough cut surface. The rough cut surface will form the outside of the pedestal, giving it a durable rustic appearance. Many stores are selling fence material that is 5/8" thick which would not hold the screw as well, and would tend to twist. You will need 6 to 10 per pedestal, depending upon quality of wood. For those who live in other parts of the world, other types of wood would also work. If you live in the Pacific Northwest contact: Sound Cedar in Mount Vernon WA, (800) 468-608. They supplied the lumber for our pedestals, ask for Robert Desmarais and let him know you are from Northwest Stone Scvulptors Associaion and are building these cedar pedestals. He'll provide a discount for members.
- Glue: I use Gorilla Glue. Other glues will also work.
- Screws to hold "FACE" piece to "SIDE" piece: I use 2" long outdoor deck screws.
- 1 3/8" brads (or screws if you don't have a nailer)
- Bungee cords to secure pedestal parts when disassembled.
- Storage container to store screws when unit is disassembled.
- Clear deck sealer to seal wood if desired.
Safety First
To some, these thoughts on safety may seem redundant or unnecessary, but years of experience and some research show that not only mentioning safety but actually reading a list like the one below people make less mistakes and makes life better for everyone, go figure.
- Always read and follow the manufacturer safety rules. Do not use a tool that you don't know how to use.
- Wear safety glasses.
- Use hearing protection.
- Work in a lighted area.
- Do not work around power tools with loose clothing that could get caught in the power tool.
- Think about what you are doing and what the power tool is doing. Do not become distracted.
- Do not remove the safety guards on your saws.
- Use a push stick when using a table saw.
PEDESTAL CONSTRUCTION SEQUENCE
- Purchase lumber, glue, and fasteners.
- Lay out lumber in a dry, ventilated space to dry.
- Cut lumber to length for the faces and sides.
- Rip the “support strip” parts to 2” width. These strips can be cut from waste material.
- Cut the support strips to length.
- Lay out the “SIDE” and “FACE” pieces. Rip the lumber to create the desired width for the “SIDE” and “FACE” pieces.
- Mark where the support strips are fastened to the “SIDE” parts and “FACE” parts. If you are doing more than a couple pedestals, you may want to construct a jig to speed up production.
- Apply the glue where the support strips will be placed. Either wood glue or “Gorilla Glue” works well.
- Center the support strips so that there is clearance on each end for the attaching FACE to SIDE. Fasten (with either 1-3/8” nails or screws) the support strips to the SIDE or FACE part.
- Pre-assemble the parts to check that they fit. If the support strips are to long trim with a hand saw.
- Drill holes in the FACE parts so that the screws are inline to fasten the FACE to the SIDE parts.
- Line up and hold in place the FACE and SIDE then drill a pilot hole in the SIDE part using the hole in the FACE part as a guide. This will prevent splitting of the SIDE part when screwed together.
- Assemble the parts. Be careful not to run the screw head past the surface of the lumber. Cedar is very soft. This should also be remembered each time the pedestal is assembled.
- Measure and cut the lumber for the “TOP” piece (lid).
- Cut support strips for the lid.
- Glue and fasten the lid parts.
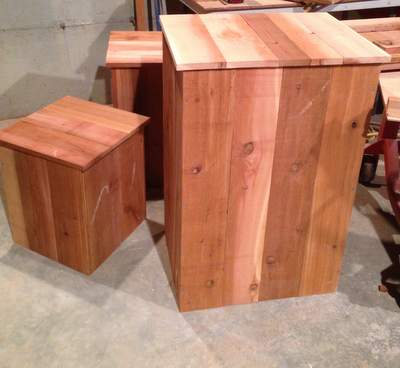
- Label all of the parts so that the pedestal can be re-assembled the same way each time. For Example: Corners 1-4, 11,22,33,44.
- Put your name or mark on your pedestal parts including the lid. I also assign a number to each of my pedestals so that the lids and other parts don’t get mixed up.
- When the pedestal is broken down I store the parts with the support strips out and hold the parts together with a bungee cord.
- A clear deck sealer could be put on the parts to prevent fading, if desired. Thompson's water seal works well.
Pat Barton Nov 2013

Take Apart Cedar Pedestals by Pat Barton is licensed under a Creative Commons Attribution-ShareAlike 4.0 International License