- Details
-
Last Updated: Sunday, 05 August 2012 19:12
This article emerges from a lunch time question and answer discussion about power tools with Steve Sandry posing the questions, and Jason Johnston, Tom Urban, and Brian Bennan expressing their opinions on power tool performance.
For working in hard stone, and for doing certain detail work in any kind of stone, many of us have found power tools essential. Though power tools will help you accomplish the job of stock removal and finish work quickly, there are some drawbacks which include personal safety, noise, dust,just to mention a few. These issues can be fmther covered in future articles. So on to the discussion with Steve (S) posing the first question:
S: Which size compressor should one have?
Tom (T): Most compressors will run at 90 pounds of air pressure which will run most air tools (pneumatic), but you must check the CFM rating (cubic feet per minute) on the tool or the box it comes in and make sure your compressor exceeds the CFM requirements of that tool. A 5 HP compressor will usually generate enough CFM though even some 3 HP units will generate enough. Watch out for air grinders that require 20-50 CFM like you might find at Boeing Surplus or other iudustrial suppliers. Pneumatic air hammers from Trow and Holden use about 4 CFM. Working alone is no problem but running two or more will require an industrial compressor with high CFM oulput.
S: Why use compressor power as opposed to elecrric power?
T: Longevity of the tool. Air tools, when properly maintained, last longer than electric tools.
Brian (B): If you learned to sculpt with hammer and chisels, then switching to an air hammer is the next progression. It can save your body when working large pieces.
S: You would get more raw power with electric tools, would you not?
B: For cutting, yes!
S: If you were going with electric for your first tool, go with what?
B: Angle grinder. You can use the grinder with abrasive disks for sanding, or with a diamond blade for slice and dice stock reduction. Fast stock removal.
S: That's true! Jason, what power tools do you like to use?
Jason (J): I use a lot of air grinders at the foundry, with carbide bits to do detail work. Die, pencil, and angle grinders.
S: So do you find yourself using these to carve here?
J: Yeah! Heel right at horne with them. I know how much air pressure to use
and with which carbide bits to use to create details like fingernails. I started using an angle grinder with a diamond blade to get it going, then the pneumatic chisels for large stock removal, then the grinders to not damage the surface of the stone. I've been working mostly in alabaster.
S: So you can actually do pneumatic carving in alabaster?
T, J, B: Sure.
B: You can do very delicate detail work using a small air hammer like the bantam or the Cuturi E. Turning dowu the air pressure and using small chisels enables you to do delicate and detail work.
S: What new tools did you see or use here at the symposium?
J: The rotary chisel in a die grinder. I didn't think it would work at first. The triangular shape cuts really smoothly, so you can pull out concave shapes as well as make texture. I used them in soft stone. I tried it on a harder stone and it rattled a bit unless I ran it at a real high RPM. (Die grinders run approx. 20,000 RPM.)
T: That was running the smallest bit on a 1/4" shaft. The bigger ones can walk you across the stone. They are better for wood. They advertise them for marble, but I think them best for softer stones. On the long nose die grinder you can get more control than with the short die grinders.
B: I found that the chisel Alphonso was using for detailed work on tile face of his Madonna was a treat to see. He took a small flat chisel and ground it into a carving drill. He then placed it between his hands and spun the chisel like a drill. He used it to create the deeper details in the corners of the eyes, the mouth, the nostrils, and the depths of her hair curls.
S: So let's wrap it up talking about grinders. They seem to be a major tool around here!
T: It's the main power tool for a sculptor. The angle grinder is. Do steel, stone, sand wood, it's the tool for them all.
S: It's like a table saw for a wood worker. That's good, so what elements do you look for in an angle grinder?
B: Amperage for power, the higher the more powerful. Comfort in the grip, placement of the switch, weight and balance.
S: Is there a safety factor between a paddle switch or a top mounted push switch?
T: That's a personal preference.
S: I find a top switch to be awkward.
B: What happens to me is that I tend to choke up on my grinder and I hit the top switch with my glove and it shuts off the grinder while I'm working. So then I have to stop what I'm focused on and restart the tools and begin again.
T: To me what's important is the quality of the machine. For $20 you can get a 4.5" grinder from Harbor Freight and it will get you going. If you are going with one speed (10,000 rpm), we've had good luck with Hitachi and Black and Deckers.
S: Industrial grade?
T: Yeah! The Hitachi is very useful; it's rated at almost 7 amps (good power). But when you go to variable speed angIe grinders, which is the best way to go if you can afford it, we've had pretty good luck with the Milwaukees.
B: To have an angle grinder that you can put on a silicon carbide grinding stone, that's rated to run at 6500 RPM, you need a grinder that you can cut down the RPMs to match the manufacturer's maximum wheel speed. This warrants a variable speed grinder. You don't want your grind stone flying apart because you're running it at 10,000 RPM.
S: The other situation is using sandpaper. You burn it up if you run it too fast!
T: Everything (abrasives) run better slower. ZEK wheels run better at 67000 RPM. The 4-5" dry diamonds are designed to run at 10,000 RPM to keep them cool. Slowing them down can wear out your diamond blade prematurely.
B: What I heard from Joanne Duby was that the adhesives used on abrasive discs to hold the abrasive to the disc, break down under high heat. So when you run them real fast you break down the adhesives and you lose the abrasives. With the Trim Cut discs, if you run them too fast you can melt the backing disc and they won't grind or sand evenly. So I turn down the RPMs and they last a long time. They run best at 1000-1500 RPM.
S: So I'm going to reiterate: You recommend the Hitachi and Black and Decker for one speed grinding and cutting; and the Milwaukee and the Metabo for variable speed work.
B: I was watching Michael Jacobsen use a small circular tile saw to make repetitive cuts even curved cuts. He prefers using it to an angle grinder. There's something awkward about using an angle grinder for cutting.
T: Different tools for different jobs. Michael's doing cuts on a fairly flat surface. If you have a piece standing up in front of you, thattile saw would be quite uncomfortable to use; not so with the angle grinder.
S: So how was he making those decorative curved cuts?
T: With a smaller diameter you have less blade that penetrates the stone, the easier it is to make curved cuts.
B: I have a number of different sized diamond blades for that purpose. I can control the depth of my cut by the diameter of the blade and the clearance to the body of the grinder.
S: That's a good point! Parting comments
B: An electric drill is also an important power tool!
S: Don't forget the electric drill!
B: Masonry drill bits for drilling holes in your stone, like for pinning and mounting your work. Then you can upgrade to a hammerdrill for the harder stones.
T: Make sure you run the carbide tip bits at a slower RPM or you cook the bit (crack the carbide). Drill speeds vary by size of the drill. 1/2" drill rarely goes over 500-600 RPM. 3/8" drill runs l 000-1500 RPM. 1/4" drill runs 20002500 RPM so don't chuck a large bit in a 1/4" drill and drill at 2000 RPM or you'll bum up the bit.
B: Drills can also be used with a buffing wheel to polish your sculpture.
S: You can also put die grinder bits in a small drill to play around with and use it like a die grinder. (Play to Steve is really what we call work!)
T: One other tool I find useful is the silicon carbide stones that have 1/4" shanks and fit in die grinders. Those things are so handy for doing unique shapes.
J: Yeah! that's what I've been using all week. In a die grinder, then I use a penci I die grinder which I love.
So we end on that note, the love of tools. Thank you for your interest, and if you'd like to hear more about tools or have some specific questions, please send me an email to This email address is being protected from spambots. You need JavaScript enabled to view it. mail to: 8025 W. Pt. Madison Rd, Bainbridge Island, WA 98110
- Details
-
Last Updated: Sunday, 05 August 2012 19:12
If you are entering art competitions with your sculptures, and need to ship them to the exhibit or to customers, you need a sturdy, reusable crate. These foam lined crates will protect your precious sculptures. Remember that old Sampsonite commercial? Gorillas handle the freight. The following instructions will take a little of your time, but trust me, it is well worth it.
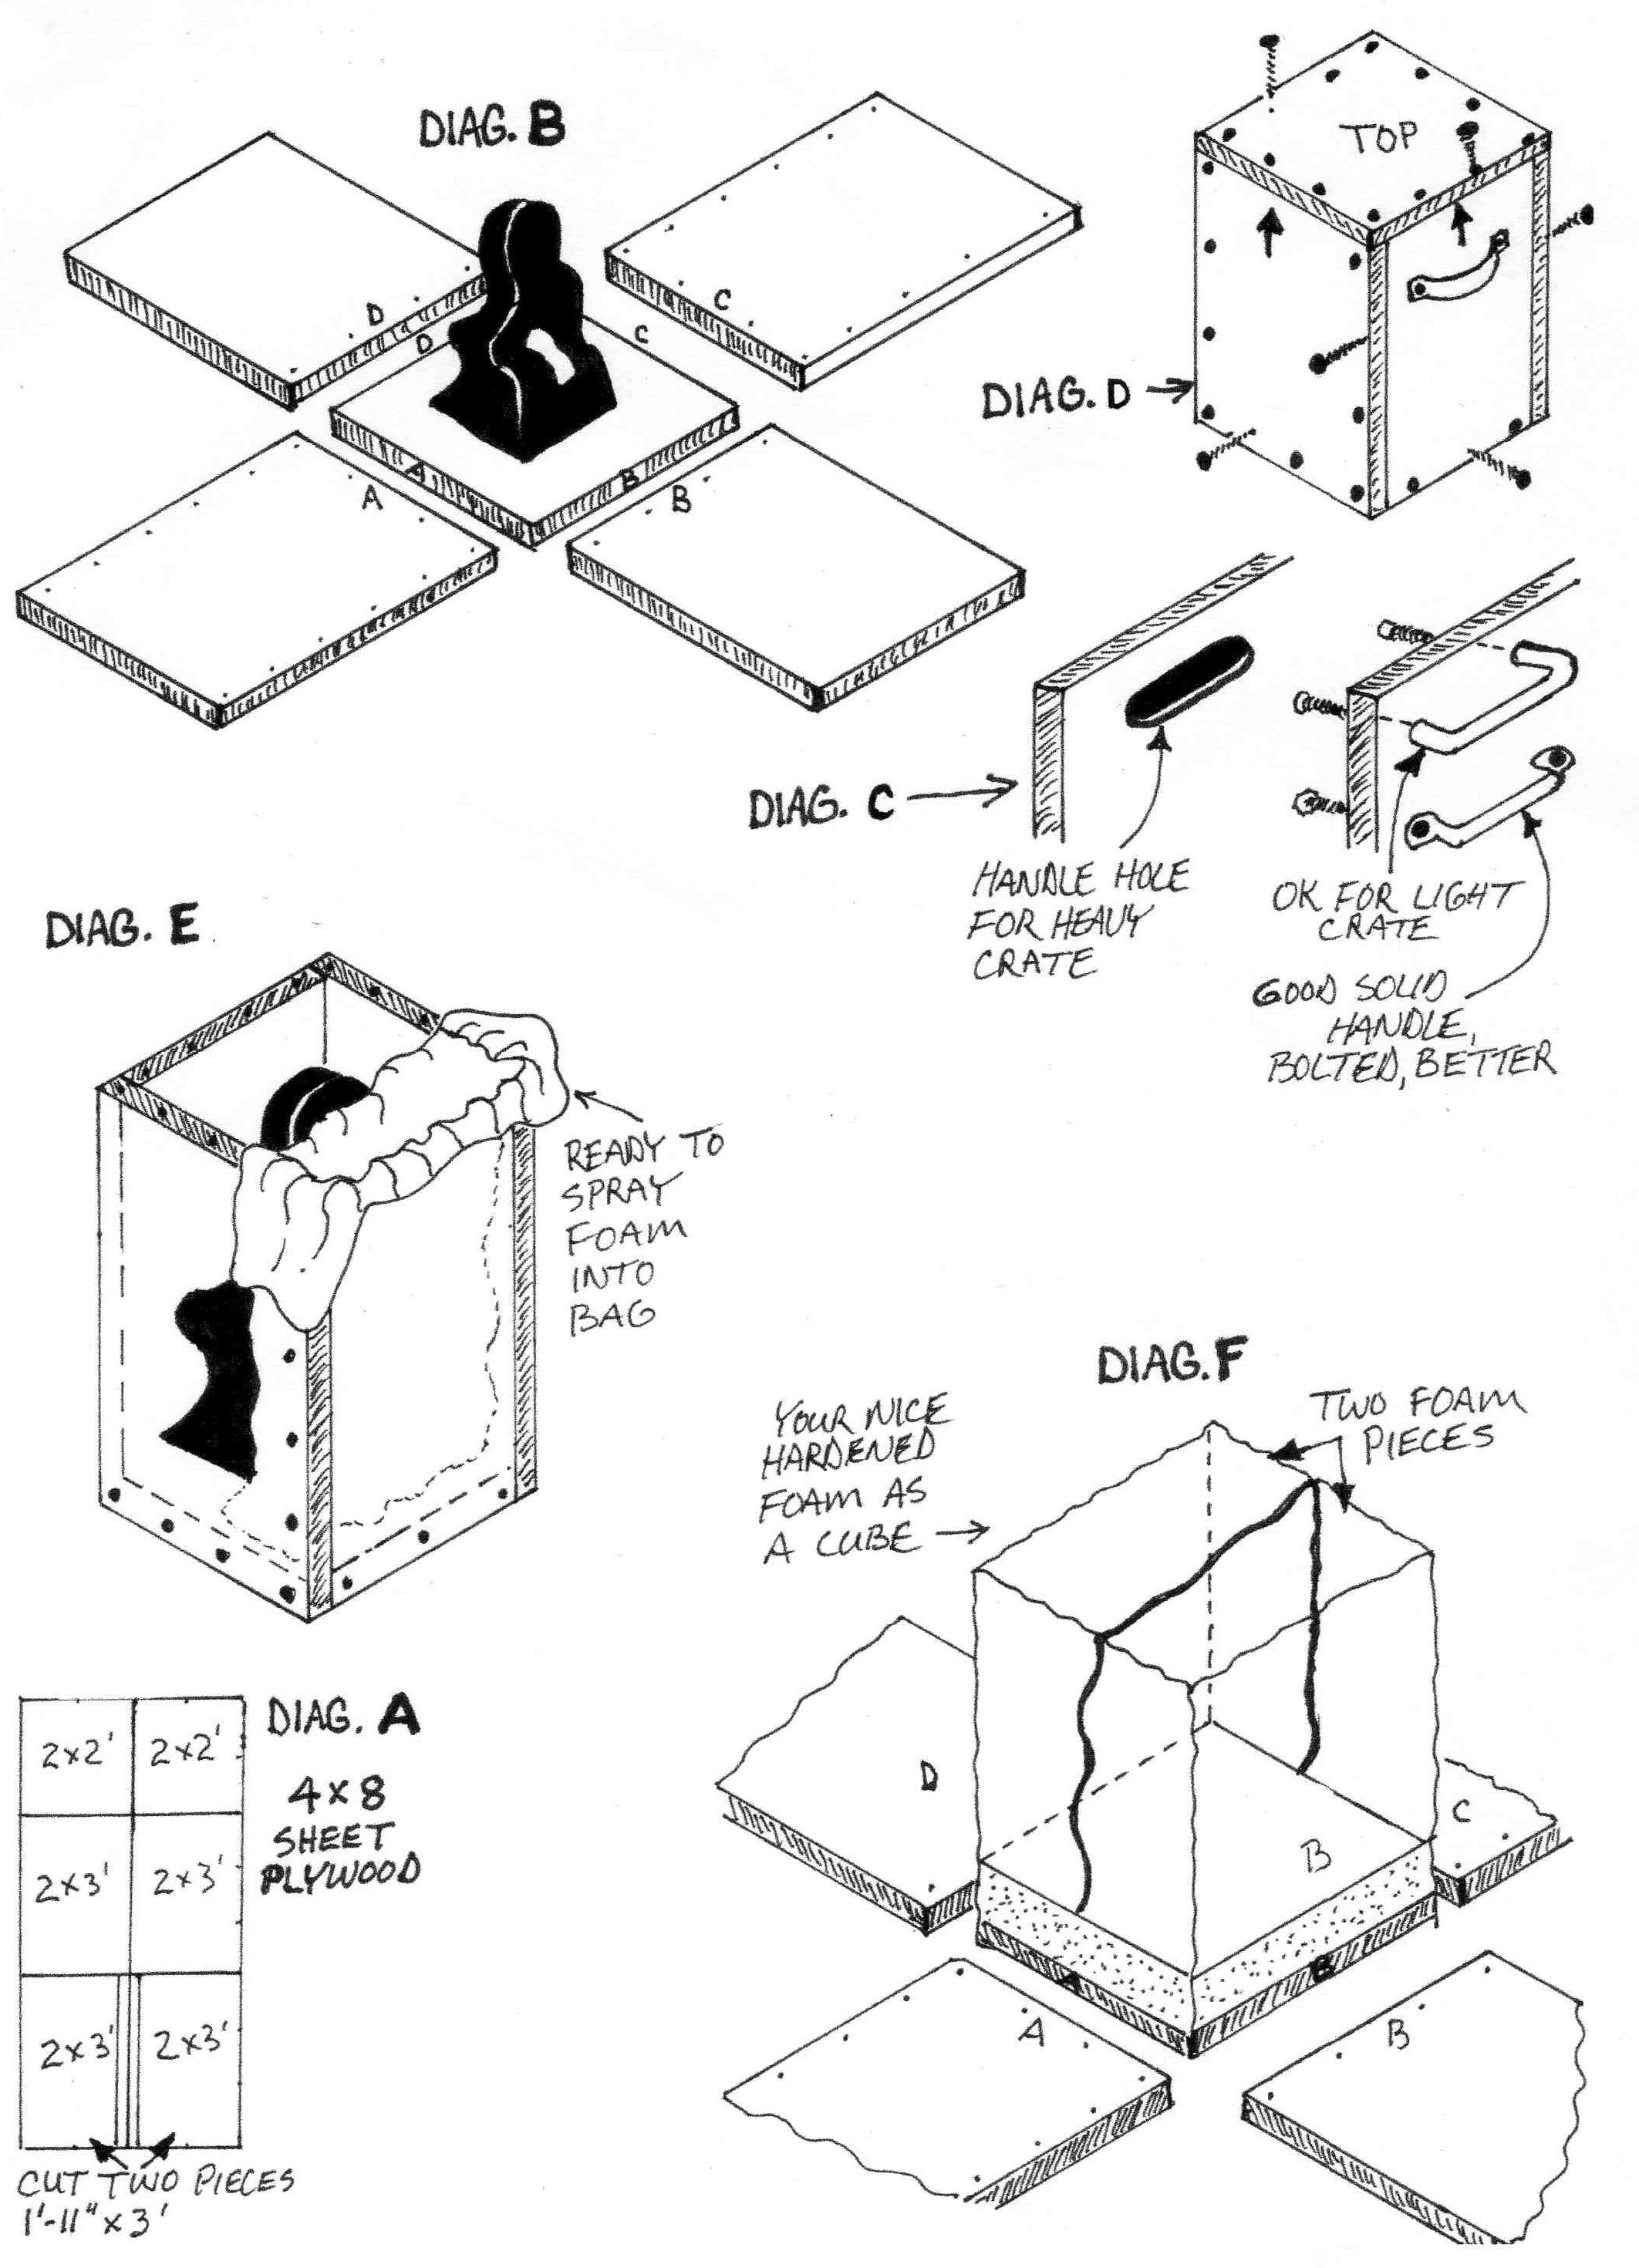
Materials
Plywood, Use a middle grade, not the splintery stuff. I recommend using 3/8 or ½ inch for smaller crates, those up to 15 X 15 X 24 inches. Use ½ to ¾ inch plywood for larger crates. Also consider the weight of your sculpture. The heavier your sculpture, the sturdier the crate needs to be.
- Great Stuff Foam (there are other brands)
- 12 Gallon White Trash Bags
- Disposable Rubber Gloves
- Wood Screws 1 & 3/4 Inches Long
- Several Pieces Of Two To Three Inch Thick Styrofoam
- Two To Four Cupboard Handles (depending on crate size)
- Electric Drill
- Jig Saw
- Sand Paper
1. Cut Plywood
You will need a full sheet of half-inch plywood for this 2 X 2 X 3 foot crate.
You can cut your own pieces, but the big stores like Lowes and Home Depot will also do it for a dollar or two per cut.
2. Lay Out Plwood Pieces
Allow two or three inches between the sculpture and the plywood, including the bottom for the dense Styrofoam.
The walls will fasten around the bottom piece.
Mark A, B, C, D on the sides and their corresponding edges on the bottom so you and the receiver will know which sides go where when reassembling the crate.
3. Handles
For handles on small crates, use the cupboard door handles, make sure to fasten them from inside the crate.
For large, heavy crates, cut hand holds in the plywood sides. After drawing the hole outline, drill a hole at one end for the jig saw blade and cut out the hand hold. Make it large enough for a gloved hand. Sand any rough edges.
4. Screw Sides Together
Using a bit a size smaller in diameter than the screw, drill holes the length of the screws into the upper corner and into the adjoining piece. Set the first screw, but not too tight. Then align the bottom and drill and screw that.
Repeat until the crate is assembled at all the corners. Now drill and set screws between the corners, about two or three inches apart.
5. Surround Sculpture with Foam
Visualize that you are making a Styrofoam mold around your sculpture. Note: If you are not sure how much Great Stuff foam expands (about 5 times), squirt some onto a piece of paper, let it dry and use this to estimate how much foam to spray into the plastic garbage bags.
Block off deep cuts with rags taped onto the sculpture. Otherwise, the dried foam cushioning will not pull away easily. Snug is good.
With the crate screwed together, set your sculpture onto the fitted Styrofoam bottom piece. Gently push your sculpture into the Styrofoam a little to allow for settling. Put a plastic trash bag down along the sculpture. Do not get the foam on your sculpture!
With rubber gloves on, spray the foam into the bag starting at the bottom. Screw the top on if you want the foam to flatten against the top. Let dry. You can always add more. If it expanded too much after drying, just trim it off.
Repeat this procedure on the other side if sculpture is fairly flat or a simple design. Make three or four sections if more complicated. Be very careful when doing the last bag or top bag if you have one. Too much expanding foam can break open the crate.
6. How to Un-Pack
To remove sculpture from the crate, unscrew the top and sides. Mark each foam section with the corresponding sides: A, B, C, D and top.
Anyone repacking will know which foam goes where. Gently pull each foam section off. Each bag will have formed perfectly around your sculpture for a secure fit. Leave the bags on the foam, but trim extra plastic off.
Note. Be sure to write the unpacking and repacking directions and glue to the under side of the lid. If your sculpture sells or is shipped to a client, request the return of the crate for using again.



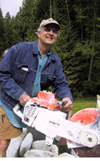 While attending the Camp Brotherhood symposium last year, I admired not only the work, but also noted the tools other sculptors were using. Like others, I became enthralled with Tom Small and his beautiful detail work in basalt using electric die grinders. One of his grinders was variable speed and did not have the screaming intensity that I associate with die grinders. Always willing to share information, Tom obligingly doffed his dust mask and answered my questions regarding the tool: variable speed die grinder by Metabo, 6.2 amps, 7000-27000 rpm, and electronic speed control. Tom was also using diamond, silicon carbide stones and tungsten carbide burrs to carve and smooth the facets in his basalt pieces.
 Tools help us open the stone and reach for the image. The best ones enable and enhance the creative process. This column endeavors to be a clearinghouse of tools. If you have questions or revelations, email to