A surprising tool in the sculptor’s kit is paint. Never having tried this before, I reached out to NWSSA members for information. Oregon-based sculptor MJ Anderson came through with details and inspiration. This article is based on our conversations and my experiments.
Colors.
MJ has been known to incorporate metallic paint colors such as gold, silver, and copper (as well as flat black, gray, white, bright blue, and red!), usually to unify a textured area, transform a problem spot in the material, or sometimes to add as a needed, integral part of the sculpture. She also applies metallic leaf to her work, which is another, longer story. Metallic paint formulas impart a delicious luminance to stone. I tested metallic gold, silver, copper, graphite gray, gold flake, black, and brown.
My first piece to paint was a busy relief sculpture of a gingko bough that I carved in honeycomb calcite. Once polished, the leaves and stems were virtually invisible against the background. I used brown paint to deepen the shadows, making the high-gloss leaves and branches pop.
Materials and environment.
MJ recommended working with oil-based enamel paints like Testor brand metallic paints on stone. She has also used oil-based varnish sprays. The effects can be subtle, beautiful, and rich. She uses both bottled and spray paints but prefers sprays. I found I liked bottled paint on this one piece but can see the advantage of sprays for unique colors and effects. You’ll need lots of rags (cut up t-shirts or sheets work well), clean paint thinner, Q-tips, nitrile gloves, and mixing sticks. You need a clean space to work in (no dust). Air temperature of 50-75 degrees is good. Too hot and the paint will dry on your rag before you can get it onto the stone. Good ventilation is important: you don’t want to kill brain cells or ignite fumes into flames.
Process.
These steps assume that you have sanded, buffed, and finished your piece to your satisfaction before beginning applying paint.
Step one. Cover the piece/area with the stone impregnator sealer that you normally use (511 Impregnator, for example). You do this first so that the petroleum-based impregnator will not interfere with the oil-based paint later. Apply it according to product directions and/or your preference. Once applied, dried and cured, you can proceed to step two.
Step two. The basic technique involves two rags—one with paint on it and one with thinner. You swipe on the paint with one rag and then swipe off with the thinner rag. You keep up this swipe on/swipe off process until you achieve the color density or effect you desire. Having some thinner on your paint rag before you dab it into the paint is good to help keep the paint more transparent. Being relaxed as you work, trusting your instincts and taste, you’ll add the subtle warming, shadowing or luster you need in the piece.
Tips and Test.
When using spray oil-based enamels or varnishes, MJ recommends spraying the paint into the cap of the can. Wipe the paint out with your paint rag and then swipe it onto the sculpture. She likes using paint thinner to thin the paint and make it more transparent. It may take you longer to build up the color or effect you want but the control you have with a more transparent paint is essential.
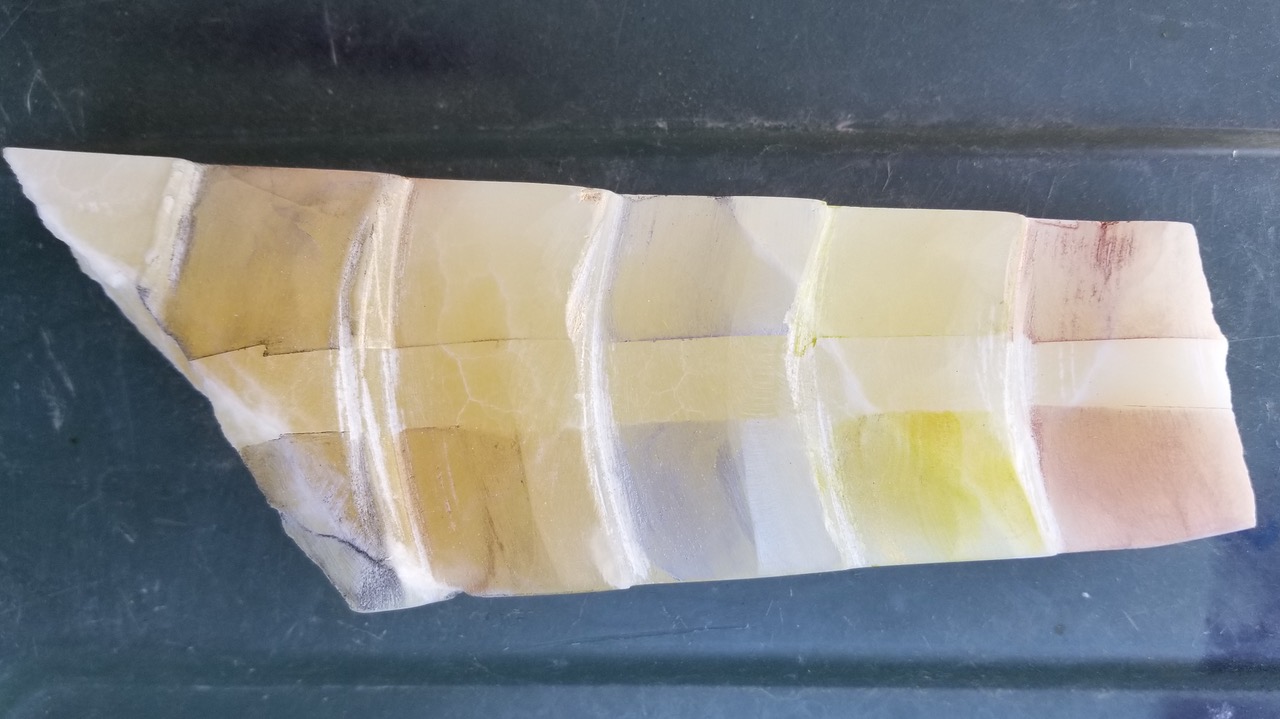
Colors on this side of the test stone (L to R) are liquid metallic black, gold, silver, gold flake, and copper.
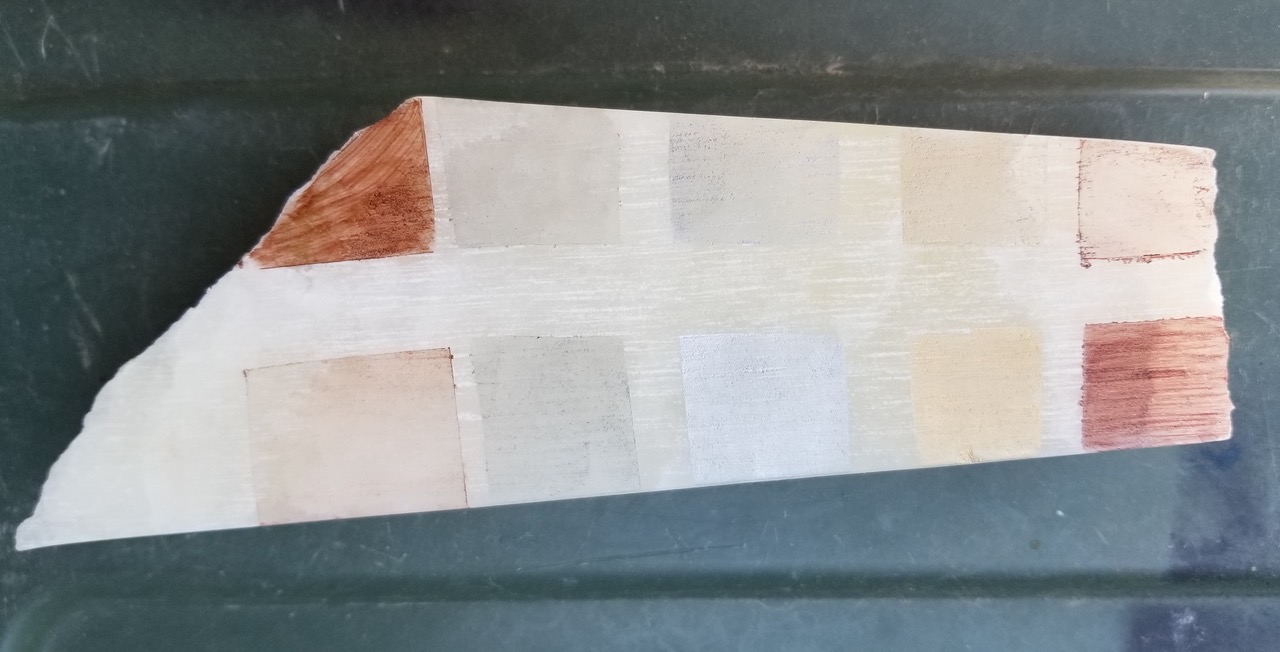
Colors on this side of the test stone (L to R) are liquid brown, metallic sprays of graphite, silver, gold, and brown.
I found that first creating a test stone with a variety of colors was very helpful. I took a shard of faded honeycomb calcite, carved some quick grooves into it with my angle grinder, and sanded the surface to about 400 grit. I then used 511 impregnator sealer on the stone. I taped off little test areas on the front, back and sides of the stone. Then I applied a variety of colors and paint types (liquid and spray). I painted one square the ‘solid’ color and the square next to it the ‘swipe on/swipe off’ version with 3-5 swipes. I made notes so that I can later remember what section included what color or treatment. Taking off the tape once dry, I could directly compare the untreated stone with the various colors and swipe levels. I immediately realized that some of the colors could enhance other existing sculptures in unique ways, beyond the specific piece I am working on now. I keep the test stone and notes with the box of paints and thinner for future reference. Sculptors, have fun experimenting.
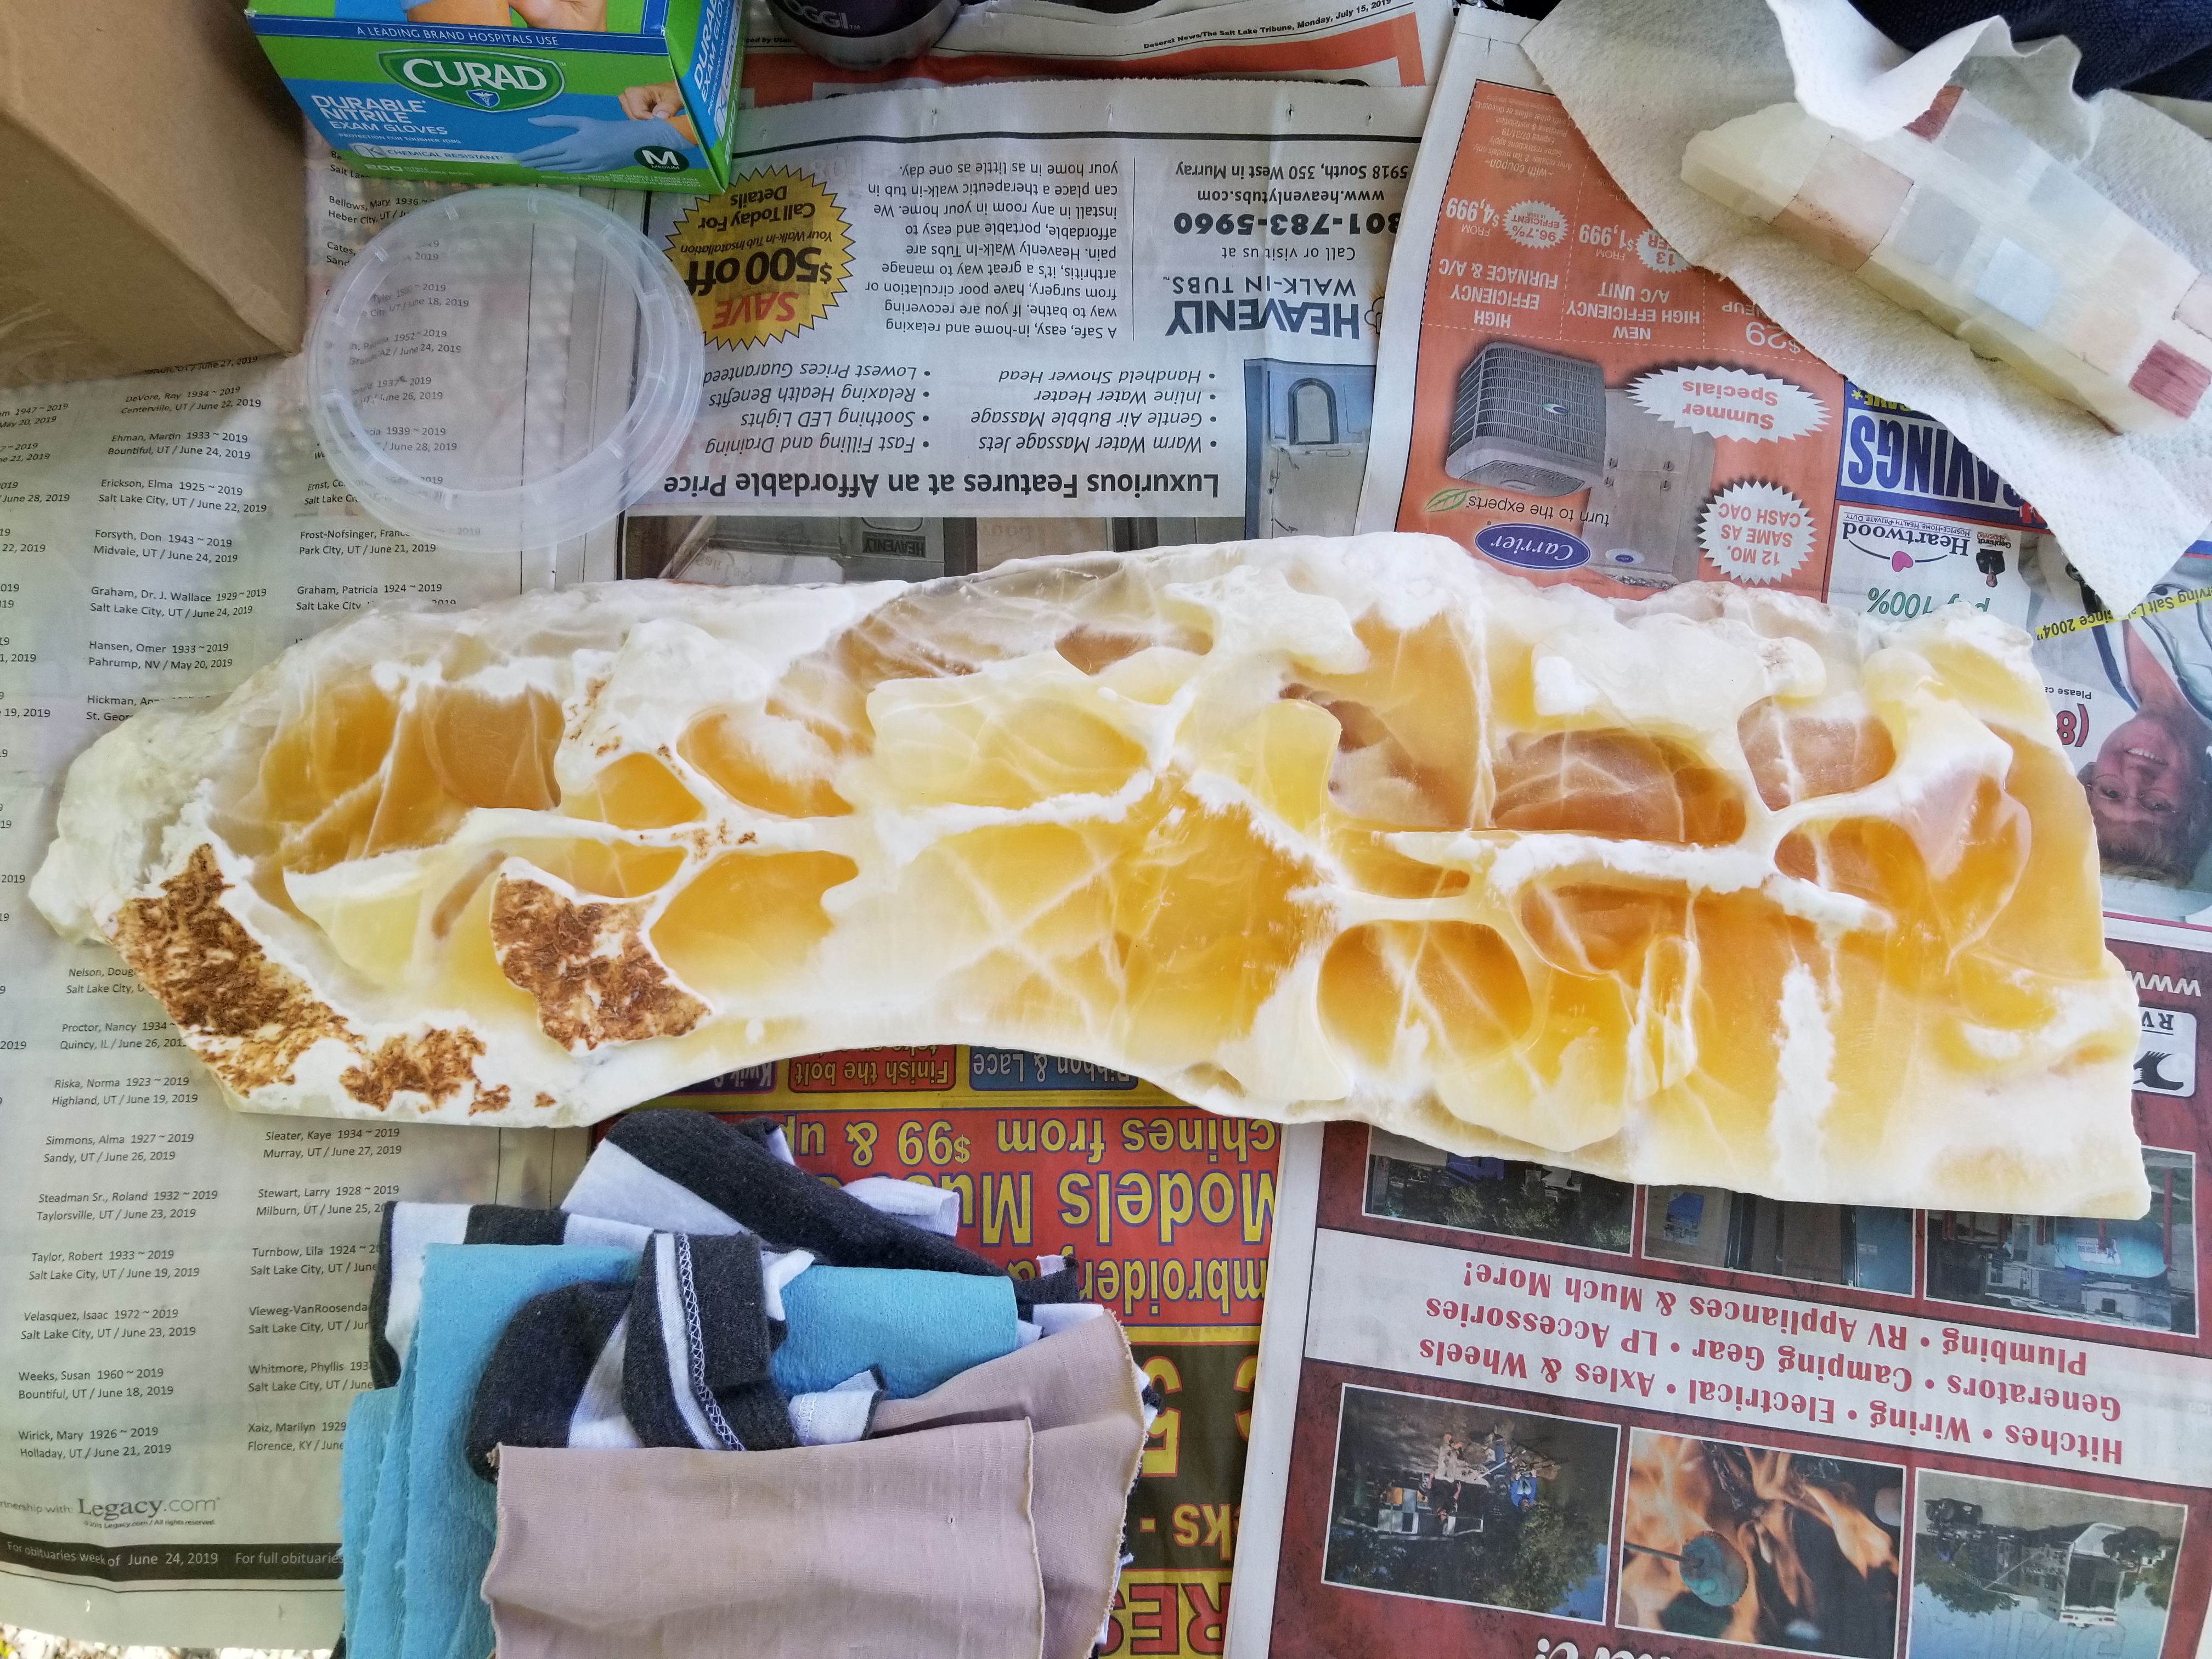
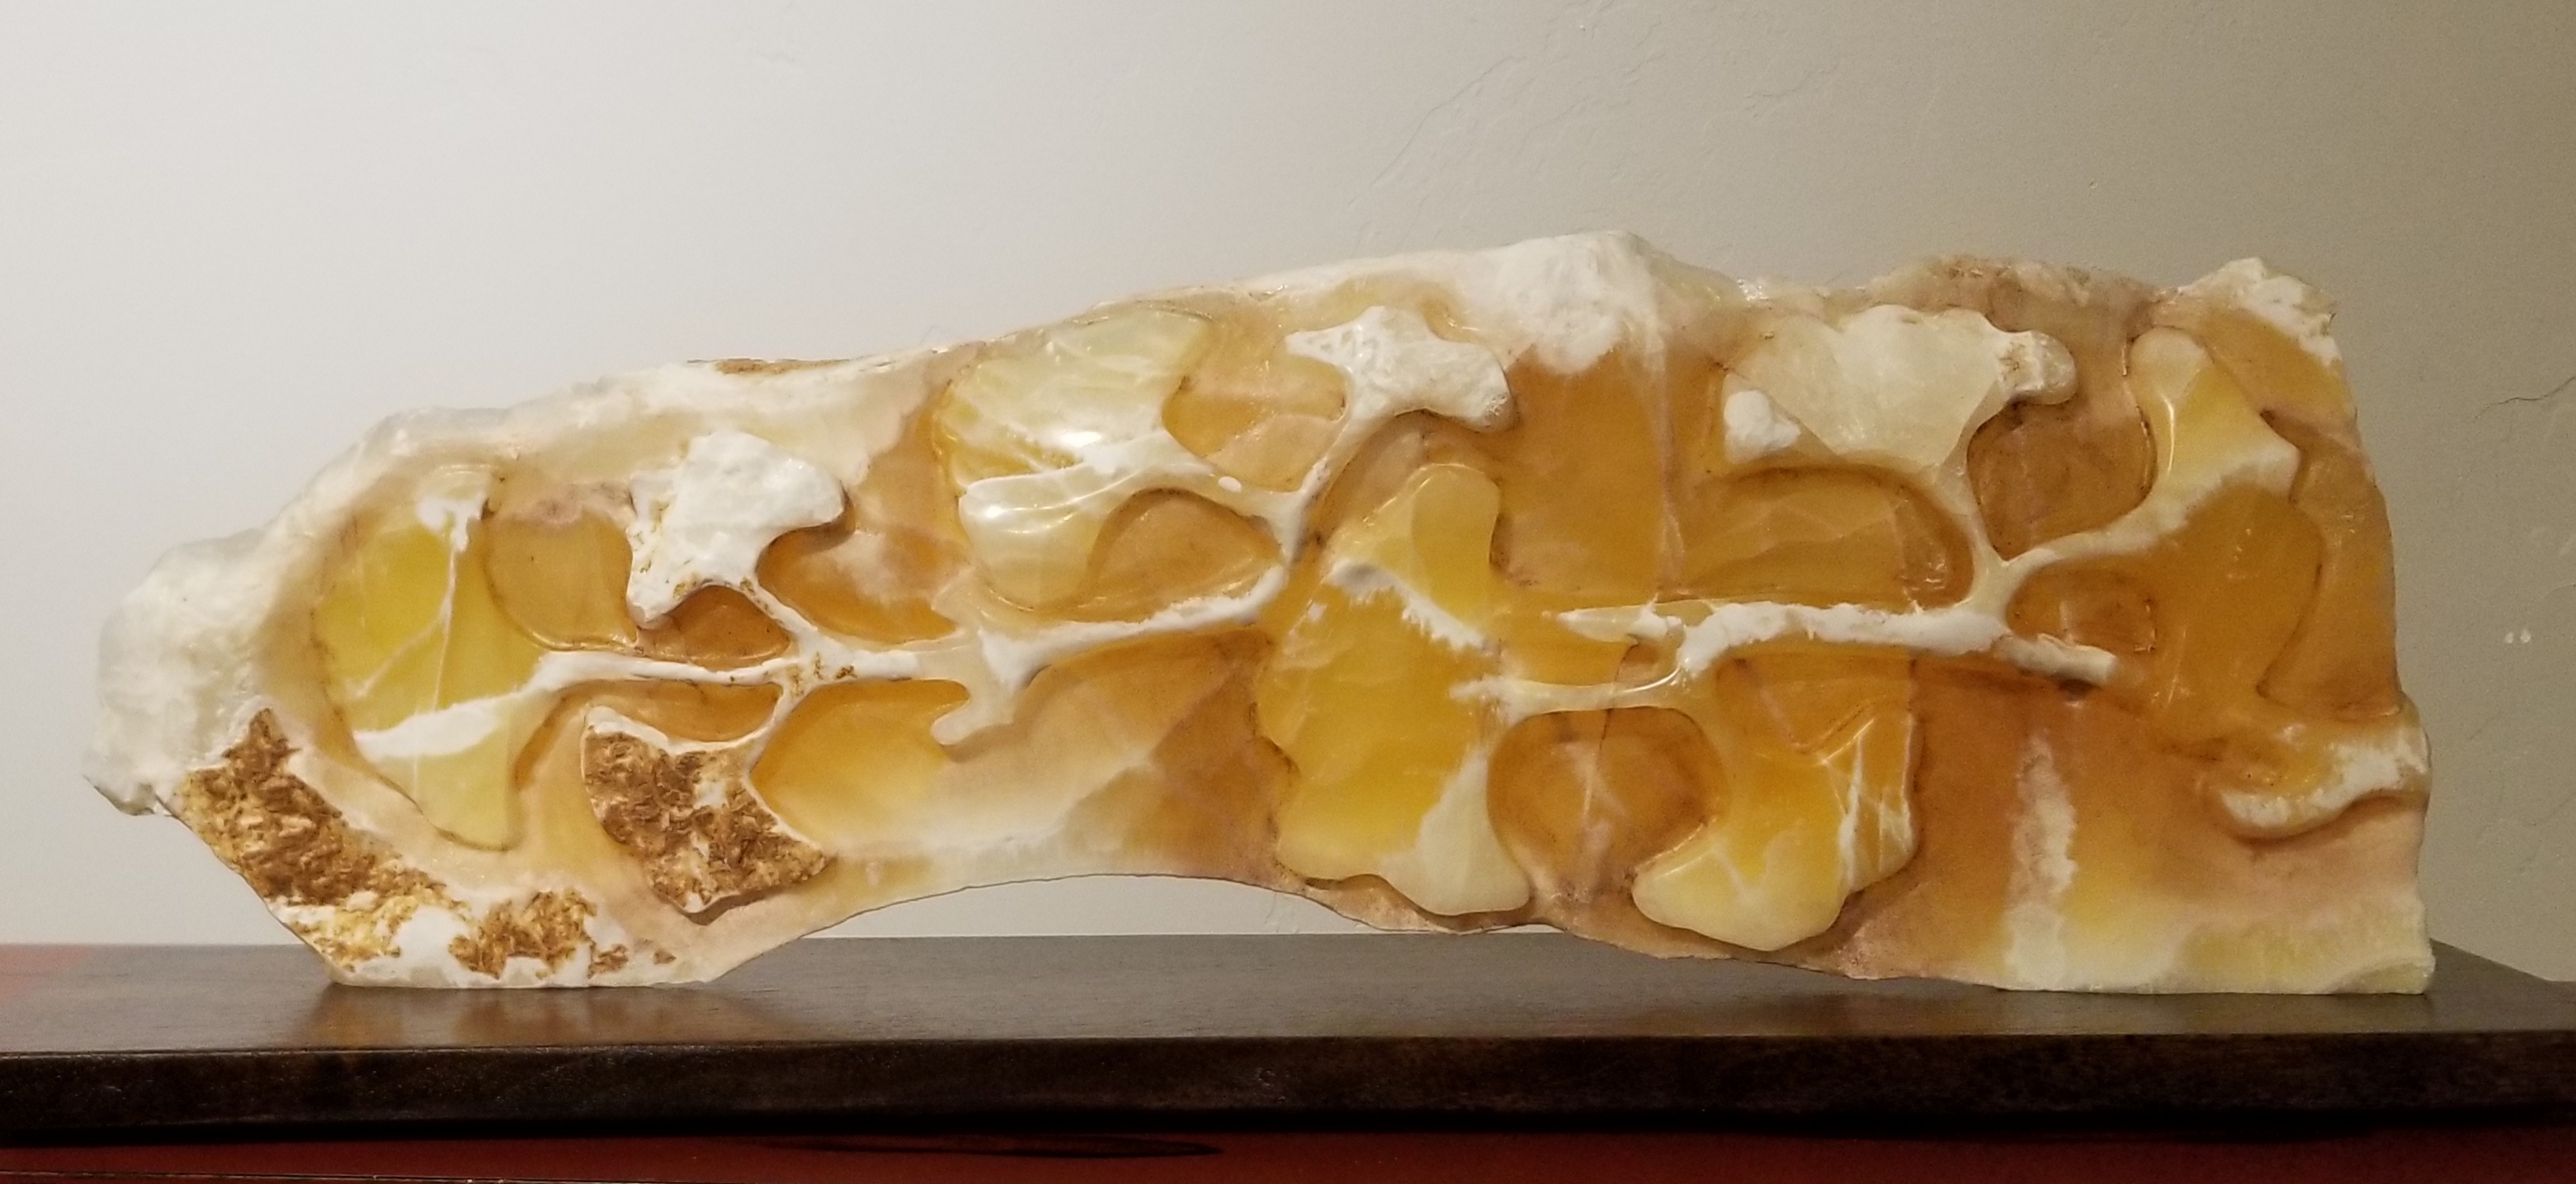
Before & After
“Gingko Bough” by Jonna Ramey. An example of paint on honeycomb calcite.
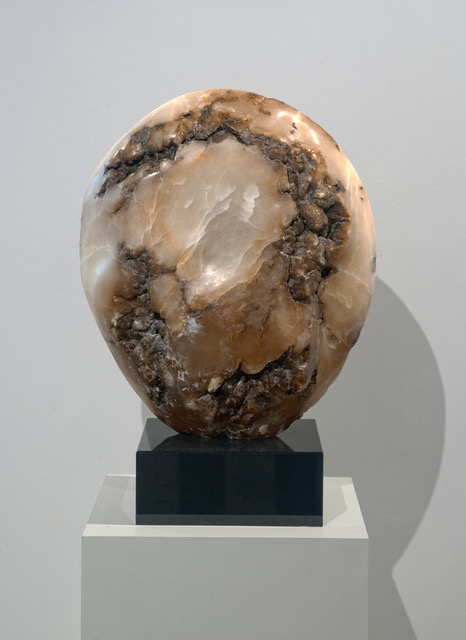 “When the World Dissolves” by MJ Anderson. An example of using paint on an alabaster sculpture.
Jonna Ramey is a sculptor based in Salt Lake City, Utah.
MJ Anderson sculpts in Nehalem, Oregon and Carrara, Italy.
MJ recommended working with oil-based enamel paints like Testor brand metallic paints on stone. She has also used oil-based varnish sprays. The effects can be subtle, beautiful, and rich. She uses both bottled and spray paints but prefers sprays. I found I liked bottled paint on this one piece but can see the advantage of sprays for unique colors and effects. You’ll need lots of rags (cut up t-shirts or sheets work well), clean paint thinner, Q-tips, nitrile gloves, and mixing sticks. You need a clean space to work in (no dust). Air temperature of 50-75 degrees is good. Too hot and the paint will dry on your rag before you can get it onto the stone. Good ventilation is important: you don’t want to kill brain cells or ignite fumes into flames.
Process.
These steps assume that you have sanded, buffed, and finished your piece to your satisfaction before beginning applying paint.
Step one. Cover the piece/area with the stone impregnator sealer that you normally use (511 Impregnator, for example). You do this first so that the petroleum-based impregnator will not interfere with the oil-based paint later. Apply it according to product directions and/or your preference. Once applied, dried and cured, you can proceed to step two.
Step two. The basic technique involves two rags—one with paint on it and one with thinner. You swipe on the paint with one rag and then swipe off with the thinner rag. You keep up this swipe on/swipe off process until you achieve the color density or effect you desire. Having some thinner on your paint rag before you dab it into the paint is good to help keep the paint more transparent. Being relaxed as you work, trusting your instincts and taste, you’ll add the subtle warming, shadowing or luster you need in the piece.
Tips and Test.
When using spray oil-based enamels or varnishes, MJ recommends spraying the paint into the cap of the can. Wipe the paint out with your paint rag and then swipe it onto the sculpture. She likes using paint thinner to thin the paint and make it more transparent. It may take you longer to build up the color or effect you want but the control you have with a more transparent paint is essential.

Colors on this side of the test stone (L to R) are liquid metallic black, gold, silver, gold flake, and copper.

Colors on this side of the test stone (L to R) are liquid brown, metallic sprays of graphite, silver, gold, and brown.
I found that first creating a test stone with a variety of colors was very helpful. I took a shard of faded honeycomb calcite, carved some quick grooves into it with my angle grinder, and sanded the surface to about 400 grit. I then used 511 impregnator sealer on the stone. I taped off little test areas on the front, back and sides of the stone. Then I applied a variety of colors and paint types (liquid and spray). I painted one square the ‘solid’ color and the square next to it the ‘swipe on/swipe off’ version with 3-5 swipes. I made notes so that I can later remember what section included what color or treatment. Taking off the tape once dry, I could directly compare the untreated stone with the various colors and swipe levels. I immediately realized that some of the colors could enhance other existing sculptures in unique ways, beyond the specific piece I am working on now. I keep the test stone and notes with the box of paints and thinner for future reference. Sculptors, have fun experimenting.


Before & After
“Gingko Bough” by Jonna Ramey. An example of paint on honeycomb calcite.
 “When the World Dissolves” by MJ Anderson. An example of using paint on an alabaster sculpture.
Jonna Ramey is a sculptor based in Salt Lake City, Utah.
MJ Anderson sculpts in Nehalem, Oregon and Carrara, Italy.

