
 Fast forward 30 years after decades of doing computer work and a decade of public service. I picked up stone carving, and whether it be direct carving, working from a maquette, or foraging in the rivers, mountains, or stone yards for stones that speak to me with their shape, color and hardness, each approach has a process that leads to a successful piece.
In the last decade, as I have learned these processes, there are lessons worth summarizing: some tools are better than others when getting a job done quickly, no amount of technical skill or tooling, will make up for a poor composition, and the last half inch to quarter inch of stone (some say the last 10-20% of the work) is where an artist’s style/signature can be found.
I’m always interested in finding tools that make the process go quickly and can help with composition. I am very interested in finding technology to get the first 70-80% of the carving done more quickly, possibly even opening up new design and composition possibilities.
January of 2015 I visited Patrick Doratti and worked with him and his robot arm to test cutting olivine and peridotite. In the summer of 2016 at Suttle Lake, Peter Andrusko presented his work, some of which used a CNC. For several reasons, I was inspired in the fall of 2016 to explore his approach, and I put together a combination of CAD/CAM software and a CNC to do design, rough out, and carving.
First, CNC is short for Computer Numerical Control. This means a computer converts the design produced by Computer Aided Design (CAD) / Computer Aided Manufacturing (CAM) software, into numbers (G-CODE). The numbers can be considered to be the coordinates of a graph and they control the movement of the cutter. Think of it as a giant etch-a-sketch with a router controlled by an inexpensive laptop computer. (If you have no idea what I’m talking about check out the first 10-20 seconds of this video: https://www.youtube.com/watch?v=FY6fEhsFur4).
Over the last 5 years, the software to capture and/or compose a 3D designs has changed from piecemeal, difficult to learn, and running on expensive computer hardware, to one where there are low cost integrated pieces of software from many sources that are easier to use, and they run on current model laptops or in the cloud.
The coming together of the “maker movement” has fueled the creation of low costs devices (such as 3D printers, laser cutters, and small home & shop hobby kits for building CNC machines to cut plastics, wood, metal) and 3D printing services that need easy to learn and use software. Learning is made easy by the videos posted on-line by the device manufacturers and their users.
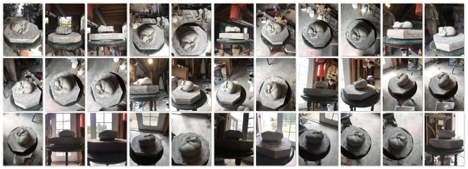
So how does one get that maquette of a kitten, or beautifully shaped river rock from nature’s garage sale, into the computer software to be able to use the CNC to cut it? Today, it starts with taking photos with a camera, an iPhone is adequate, and giving them to a piece of software called ReCap by Autodesk ($300/yr subscription 2017) to assemble into a 3D model. It’s not scanning but rather photogrammetry, where many many photos from all angles are used by the software to figure out what the object is shaped like. This great 6 minute video explains how to take photos and how the technology works: https://www.youtube.com/watch?v=D7Torjkfec4
Once you have a 3D model, whether you create it virtually with a 3D drawing program, like z-Brush, or many others, or from a scan, or photogrammetric reconstruction (say that five times fast), the 3D model can be prepared, manipulated, cleaned up (if needed), then sent to the CNC for cutting.
The software I use to go from my 3D Model to numbers that drives the CNC is Fusion 360 by Autodesk (first year free with my CNC and $360/yr after). It provides 3D design tools to create, assemble, analyze, cut, slice, and dice virtual 3D models and meshes. It also manages the iterations of a design as a project with versions, so I can go back to or branch out and try variations. It provides a CAM workspace so I can define the setup of the stone and select the techniques, tools, and tooling parameters to cut the model from the stone. I use it to perform simulations of the proposed cutting paths into the stone, so as to find problems and estimate cutting time. When I am satisfied it will do what I want I use it to turn the proposed cutting paths into the G-CODE that drives the CNC.
(Here’s a 1 minute promotional video about Fusion360 that might help explain it: https://www.youtube.com/watch?v=beebJ6fgVPo)
The CNC I use is from a kit made by CNCRouterParts which took me about 40 hours to build, and an additional 20 hours of modifications and additions to be able to cut stone. The main modifications were adding water to keep the diamonds cool, a way to collect the water to minimize splashing and the machine rusting, and, finally, a stone spoilboard which creates a level surface and a way to hold the stone in place. See "Acquisition" below for more details about prices and operation.
TheCNCRouterParts electronics are currently driven by software called Mach3 running on a used laptop I bought on craigslist for $100. Running the Mach3 software along with learning the basics of a CNC required the most effort in getting comfortable with the CNC carving process. Running a CNC requires attention, focus, and discipline. Distraction during setup, improperly securing the stone to the work table, or forgetting a step can ruin a tool or the piece you are working on. The CNC exerts significant force and the stone needs held in place while the CNC is cutting it. Careful planning of how to hold a stone during its cutting was a new skill and thought process for me. Therefore the shape of the stone and the sculpture being cut from it will determine how the stone is held in place. For more detailed info, see Setup and Work Holding section below.
The cutting head (router spindle) on the CNC uses spinning tools, carbide for soft stone, and diamonds for harder stone, the same ones used in your Dremel, Foredom, jade point carver, or on your angle grinder. I mainly use diamonds for both hard and soft stone. The important part of cutting any material with a CNC is knowing how fast to spin (RPMs) the (diamond) tool and how fast (inches per minute ) to feed (push) the diamond tool into the stone. This is called feeds and speeds, and for every stone, feeds and speeds need to be tested and empirically determined. Everyone using a CNC spends a great deal of time accumulating the hard-won knowledge of feeds and speeds. One of the reasons I am writing this is that by sharing what I have learned from tool speeds and feeds, others can do this and benefit.
I have cut limestone, marble (https://youtu.be/hB93F321FWo), soapstone, granite, basalt, pyrophyllite, olivine, and perioditite, and have feeds and speeds for some of the standard tool shapes.
NWSSA is a great community, I am very grateful for the many artists who have worked with me to test the CNC on cutting their stone. Below are four examples of work we have done including Michael Binkley's piece cut at the Suttle Lake Symposium:
Ken Barnes
Corpuscle #5 a 14” round snowflake obsidian is part of Kens Corpuscle series. It was designed virtually on computer then cut with 8mm vacuum brazed diamonds at 10 in/min) see : https://www.youtube.com/watch?v=Evqmj61Eo6U)
Bruce Wickler
Jade Turtles from a paper sketch by 16yr old student to 3D model then cut with 4mm vacuum brazed - .5in/min, see time lapse of second rough pass: https://youtu.be/P77Ayq5zfNk
Deborah Wilson
Jade Labyrinth (6mm vacuum brazed 35-40grit ball end diamond bit, 1.5 in/min)
Michael Binkley
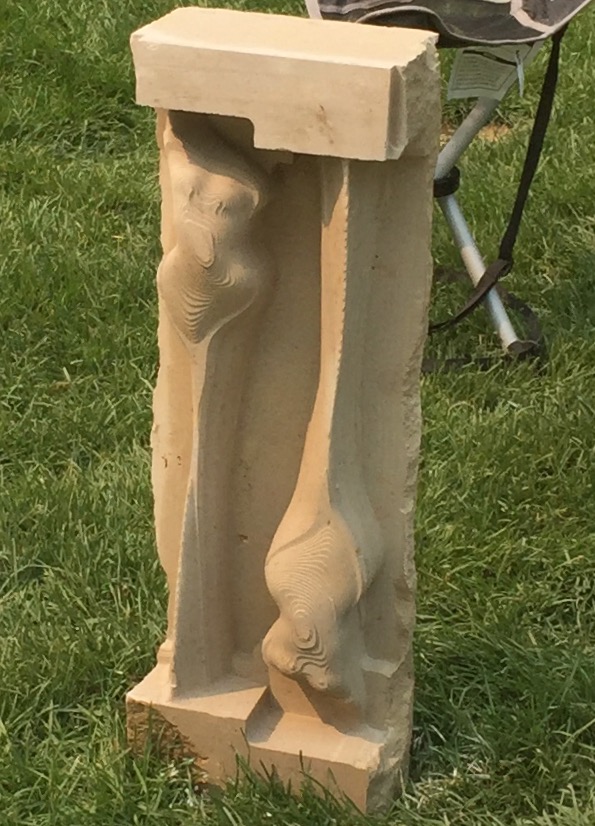
Michael gave a presentation at our 2017 Suttle Lake symposium regarding his experience doing virtual sculpting with zBrush (see his article in the journal or http:.???...). At the same symposium CNCRouterParts, lent a 4'x2'x8" CNC modified to cut stone, so that I could do a presentation and demo. In preparation for our presentations at the symposium Michael and I thought it would be a good demo to cut in Texas limestone an abstract female figure Michael had created on the computer. The limestone was 24x8x5 inches and I set it up to cut two of his toros from the stone (see photo). The lesson learned was that at a symposium, do smaller demo pieces as a demo, I ran out of time and others did not get a chance to cut a piece. When I returned home to my studio, I finished the work and Michael dropped by to pick it up.
Abstract Female Figure (created virtually in z-Brush, then scaled to fit 2 copies into a 5x8x23" Texas limestone block. 10mm Vacuum Brazed bull Nose bit)
So how does one get that maquette of a kitten, or beautifully shaped river rock from nature’s garage sale, into the computer software to be able to use the CNC to cut it? Today, it starts with taking photos with a camera, an iPhone is adequate, and giving them to a piece of software called ReCap by Autodesk ($300/yr subscription 2017) to assemble into a 3D model. It’s not scanning but rather photogrammetry, where many many photos from all angles are used by the software to figure out what the object is shaped like. This great 6 minute video explains how to take photos and how the technology works: https://www.youtube.com/watch?v=D7Torjkfec4
 |
|||
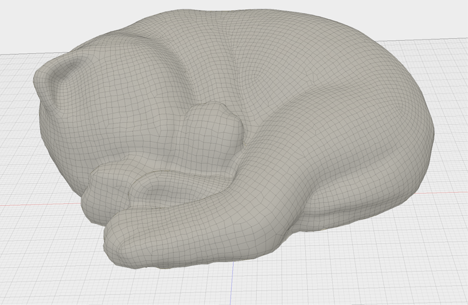
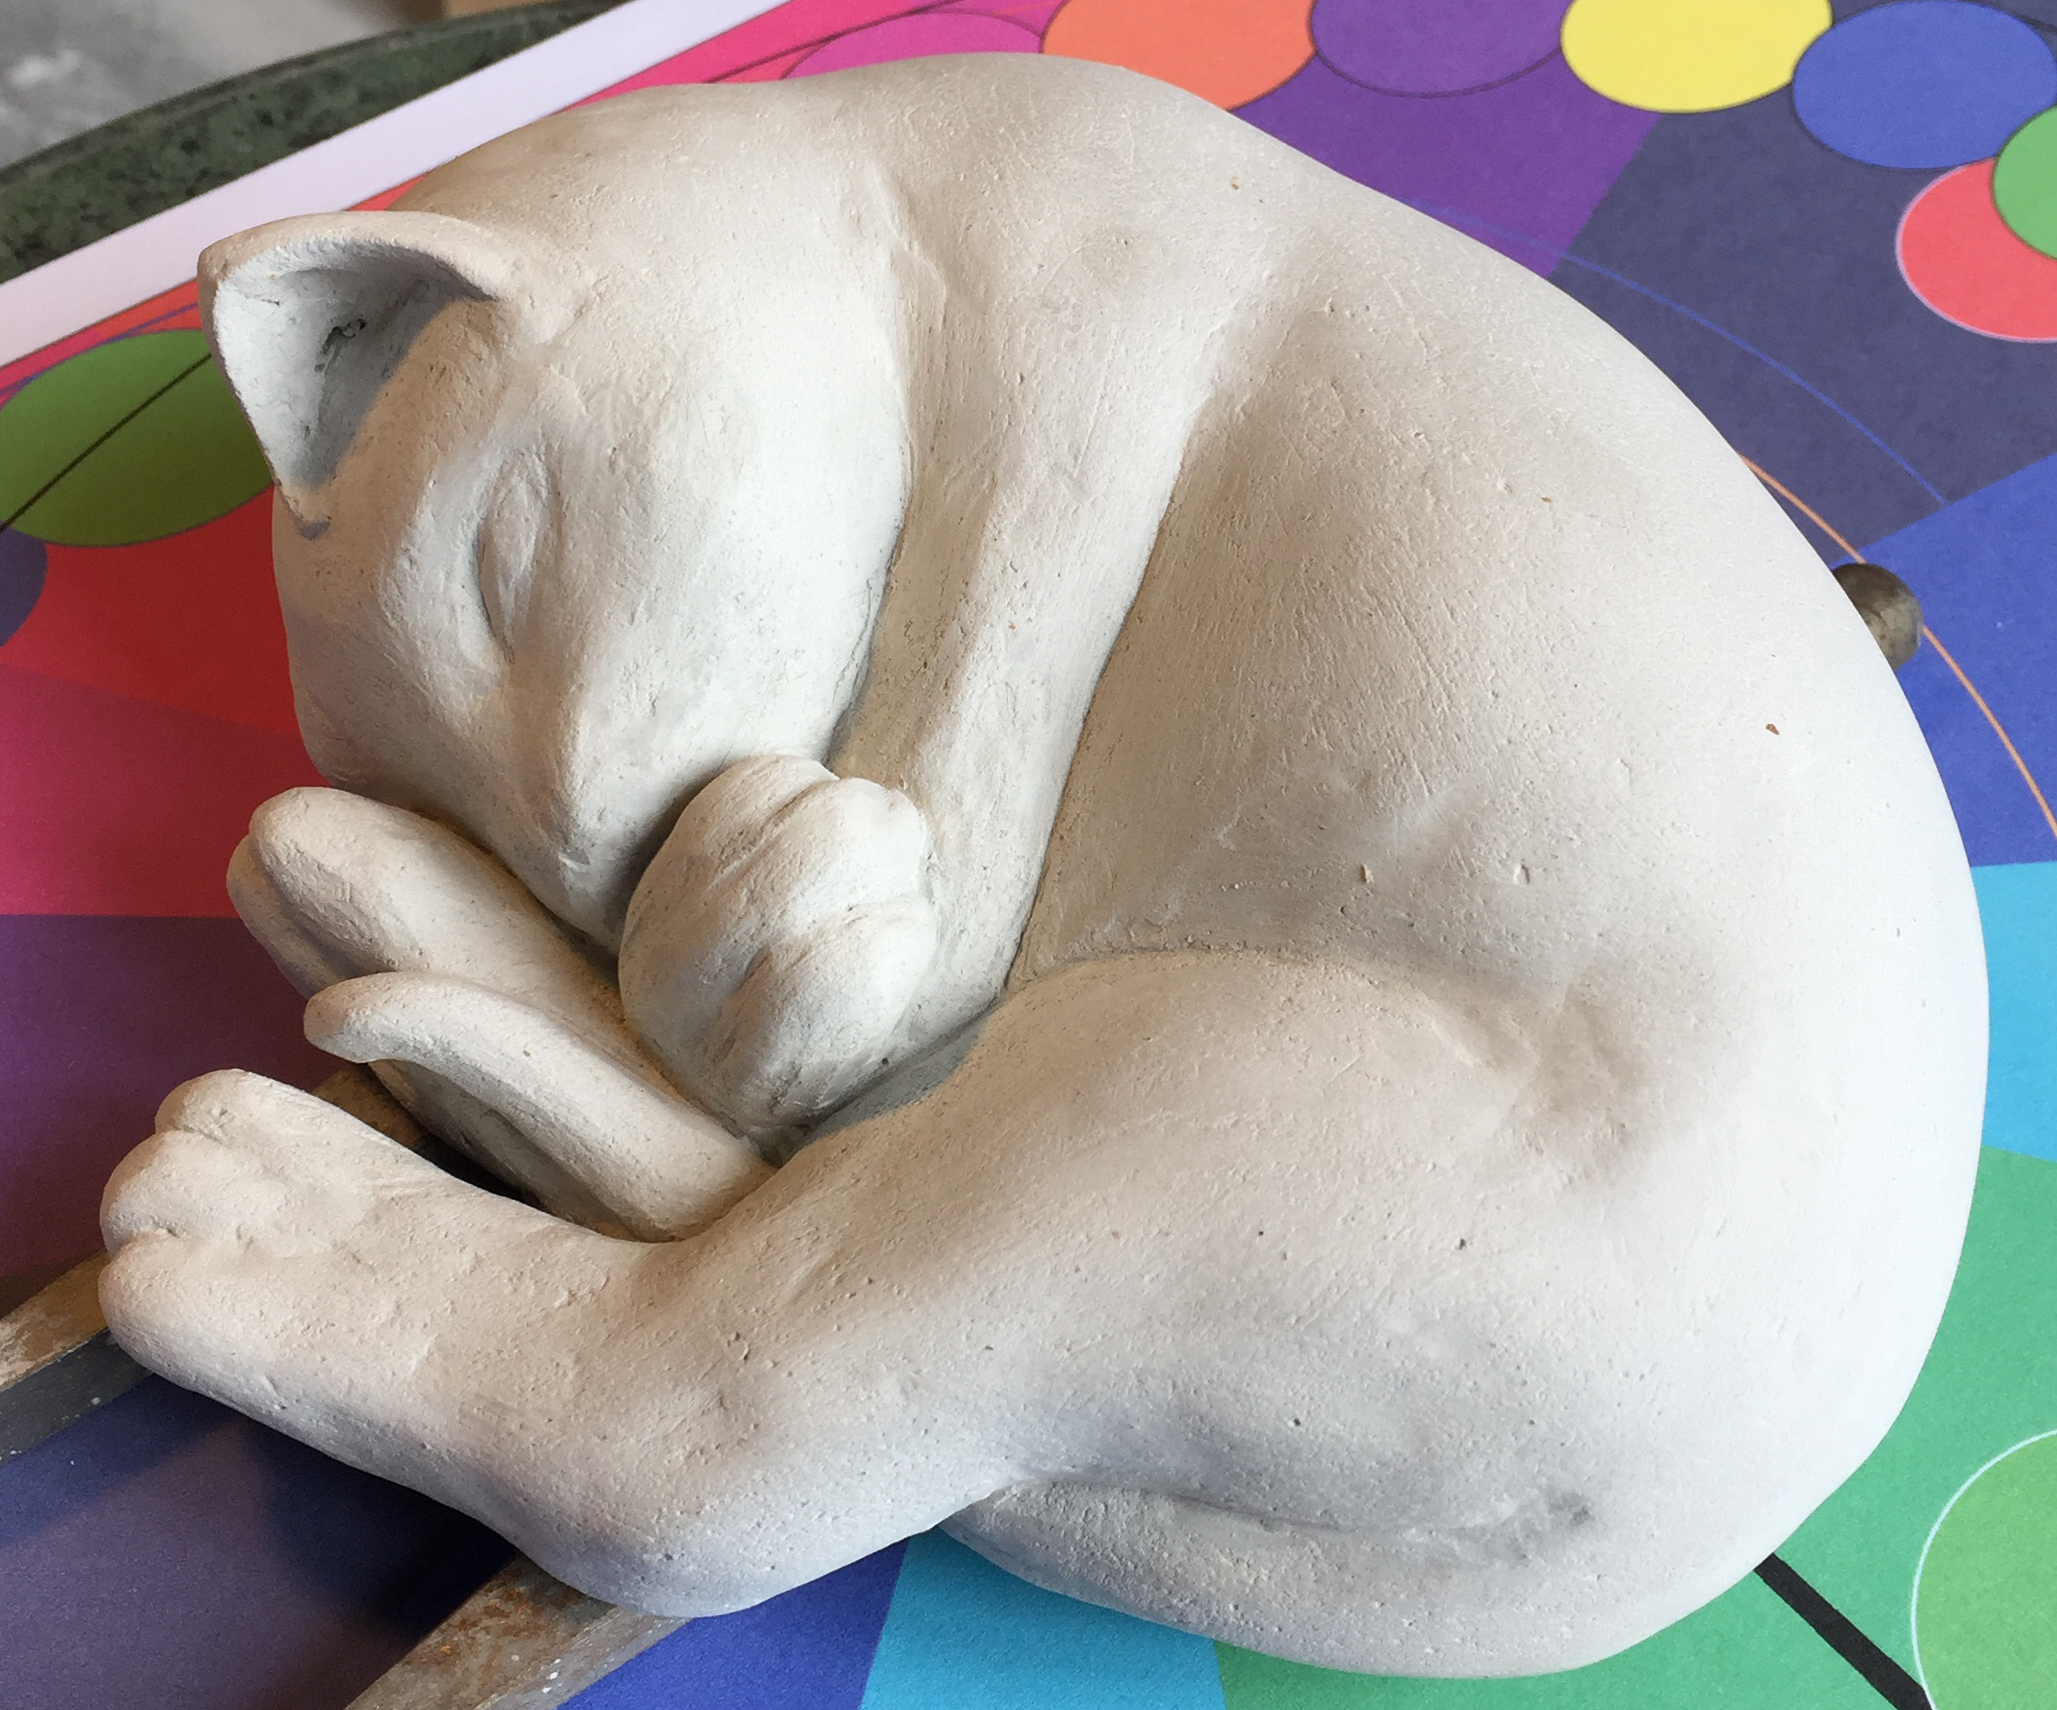 Clay Maquette Clay Maquette |
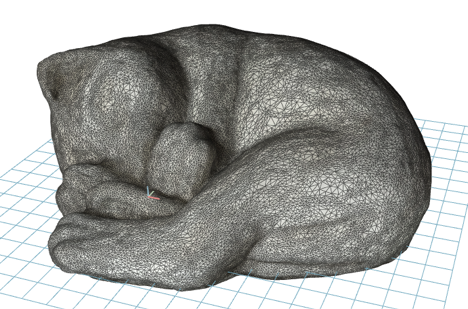 3D Mesh from ReCap Photogrammetry 3D Mesh from ReCap Photogrammetry model rotating: https://youtu.be/RI86nU7EHw8 |
 ReCap Export as "quad" mesh in Fusion360 ReCap Export as "quad" mesh in Fusion360 |
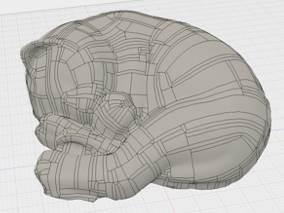 Fusion360 conversion to vector BREP Fusion360 conversion to vector BREP |
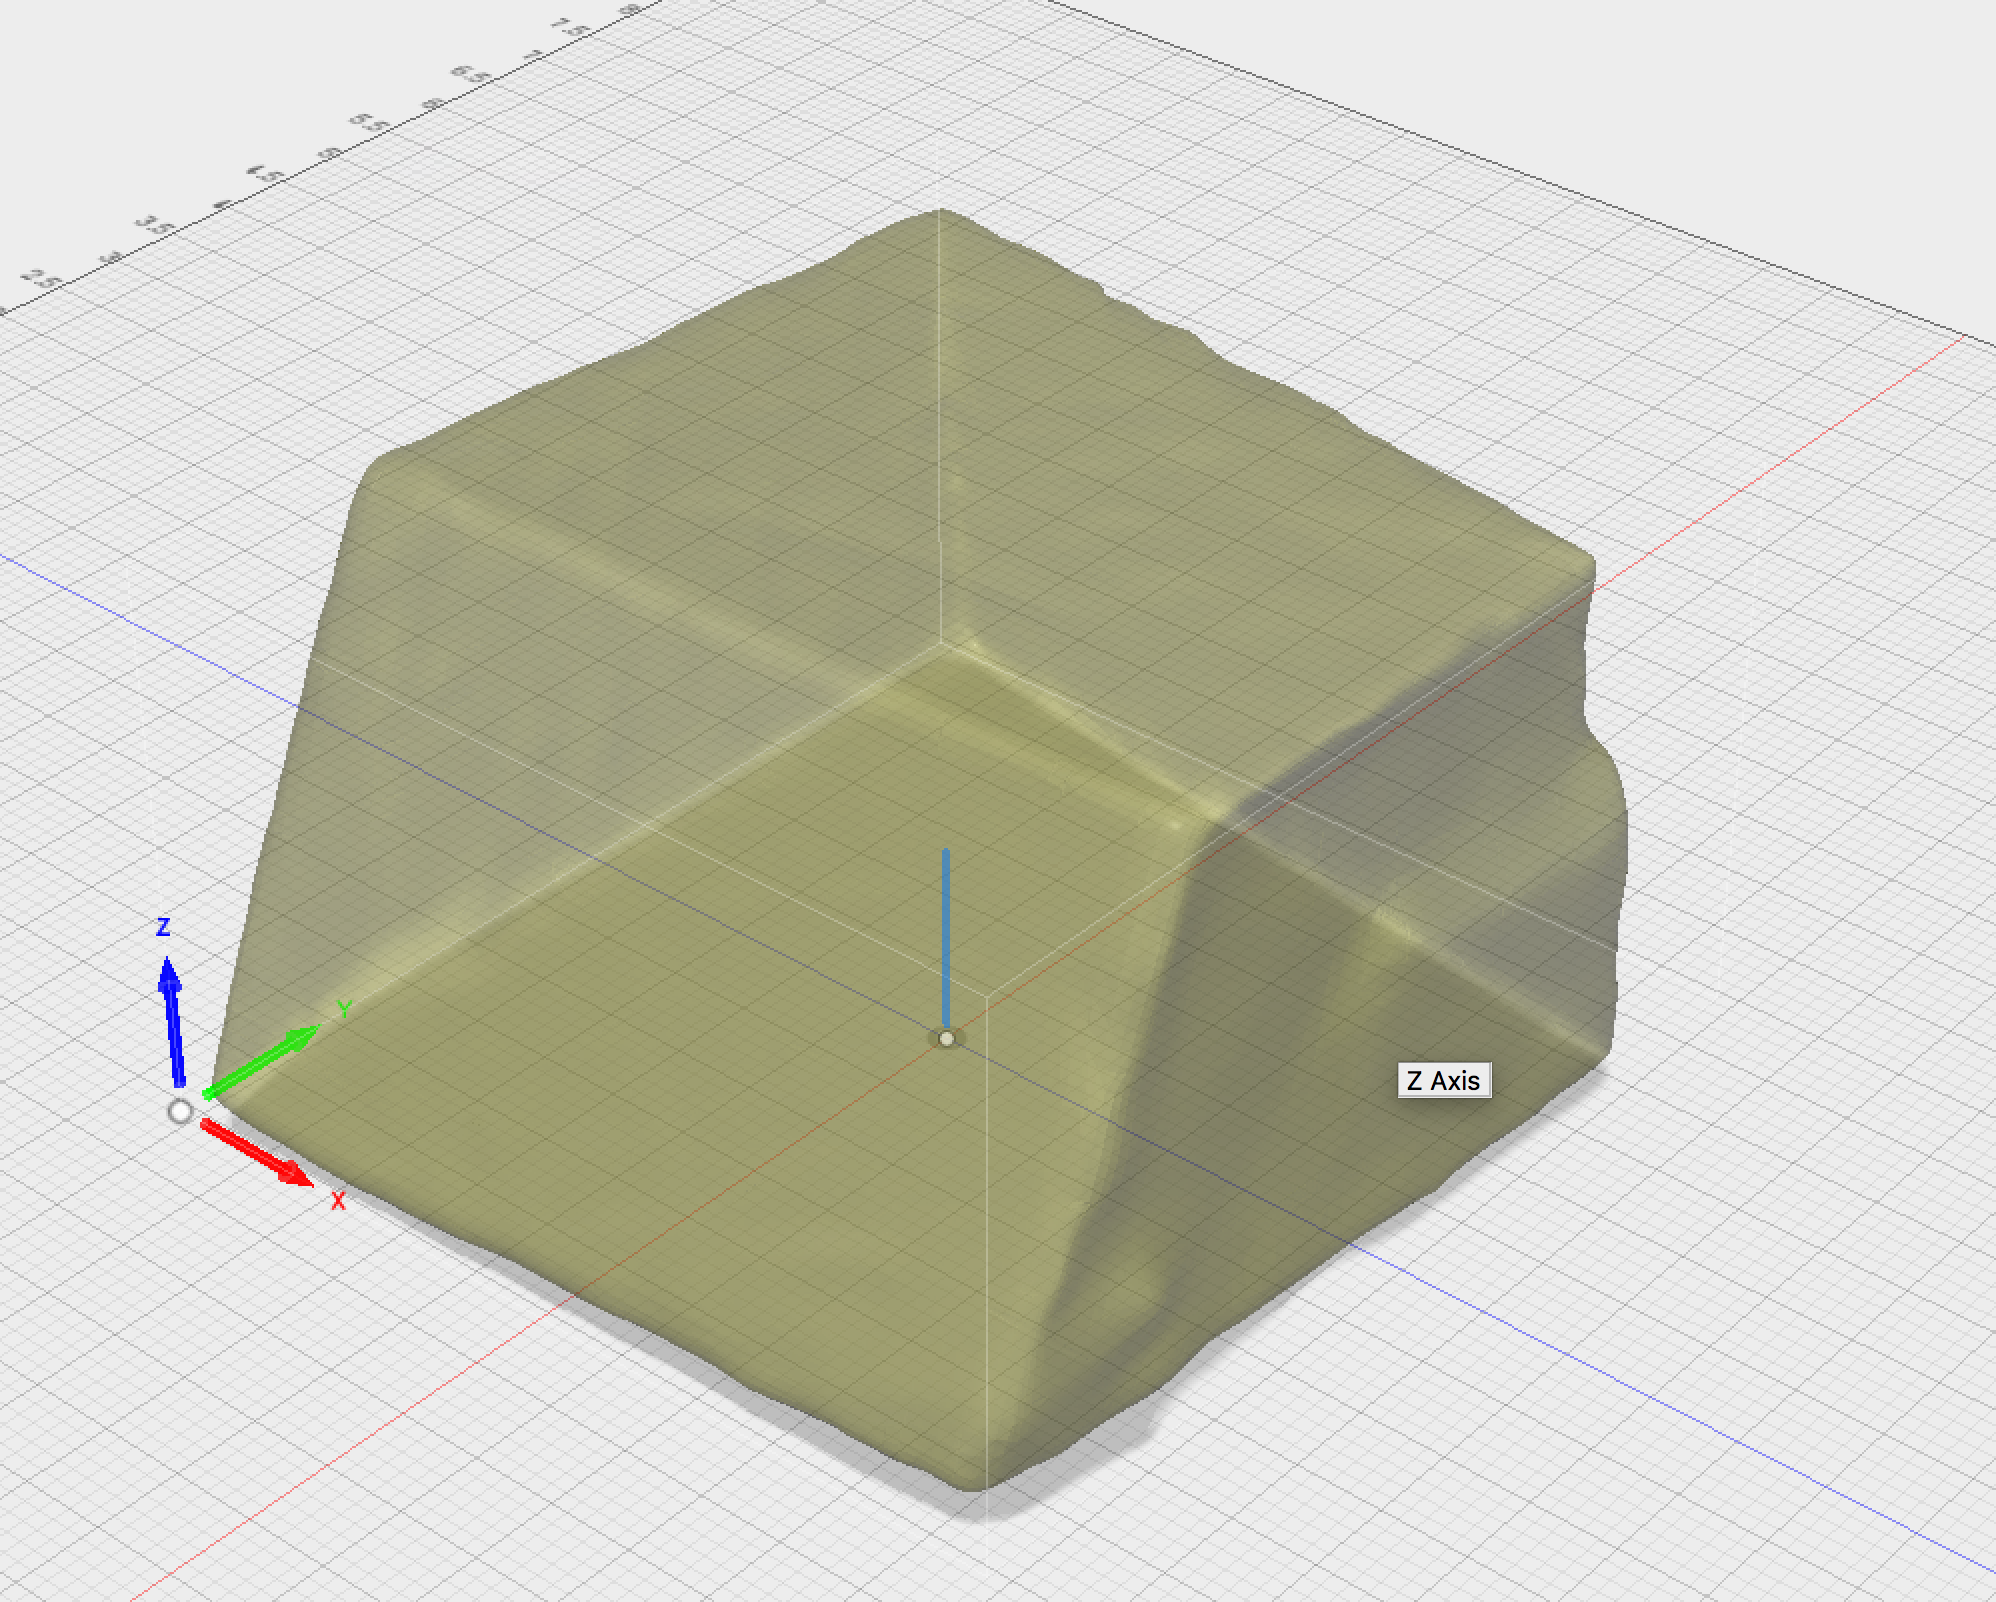 Same process to create Model of Marble Block Same process to create Model of Marble Block |
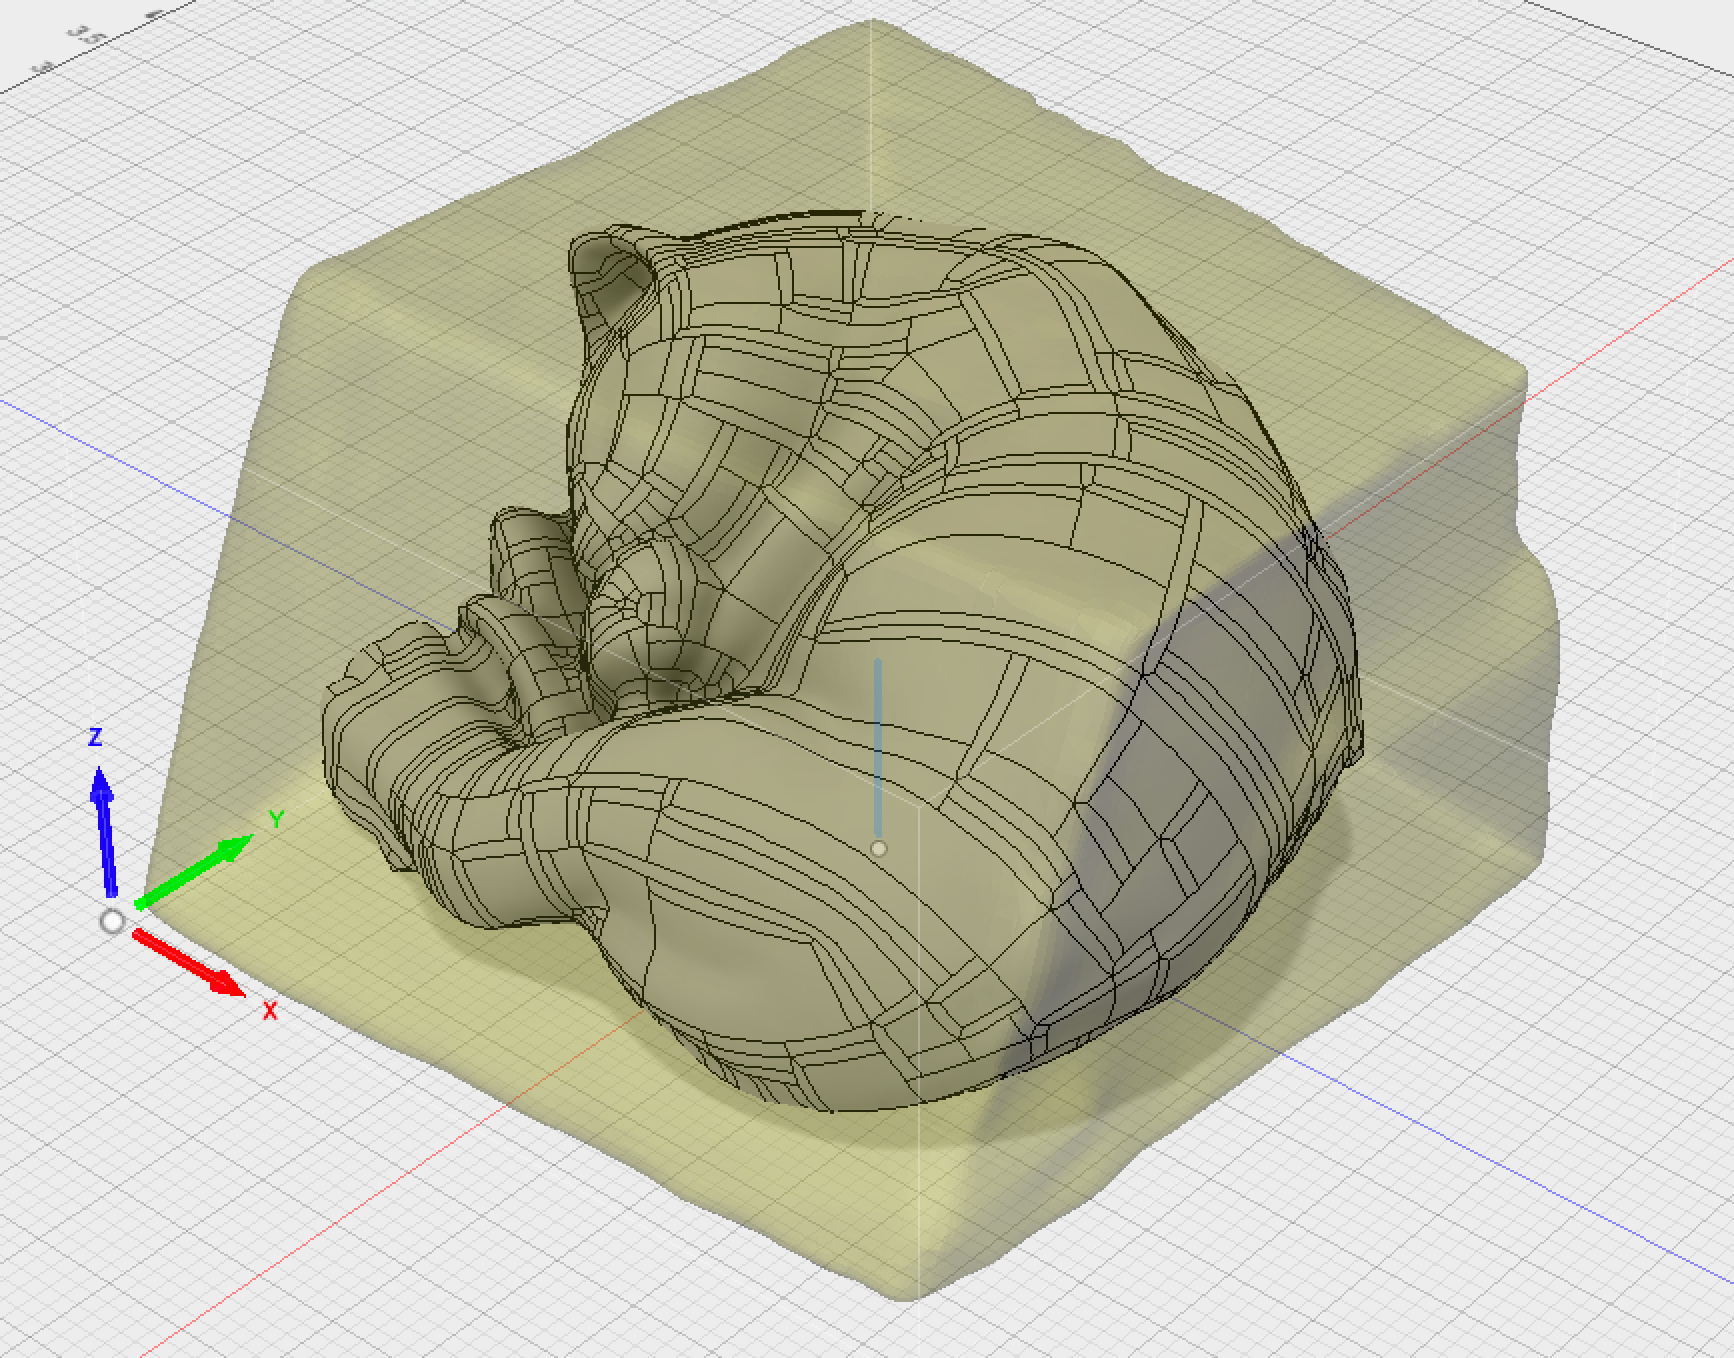 Kitty Model placed I marble block Kitty Model placed I marble block |
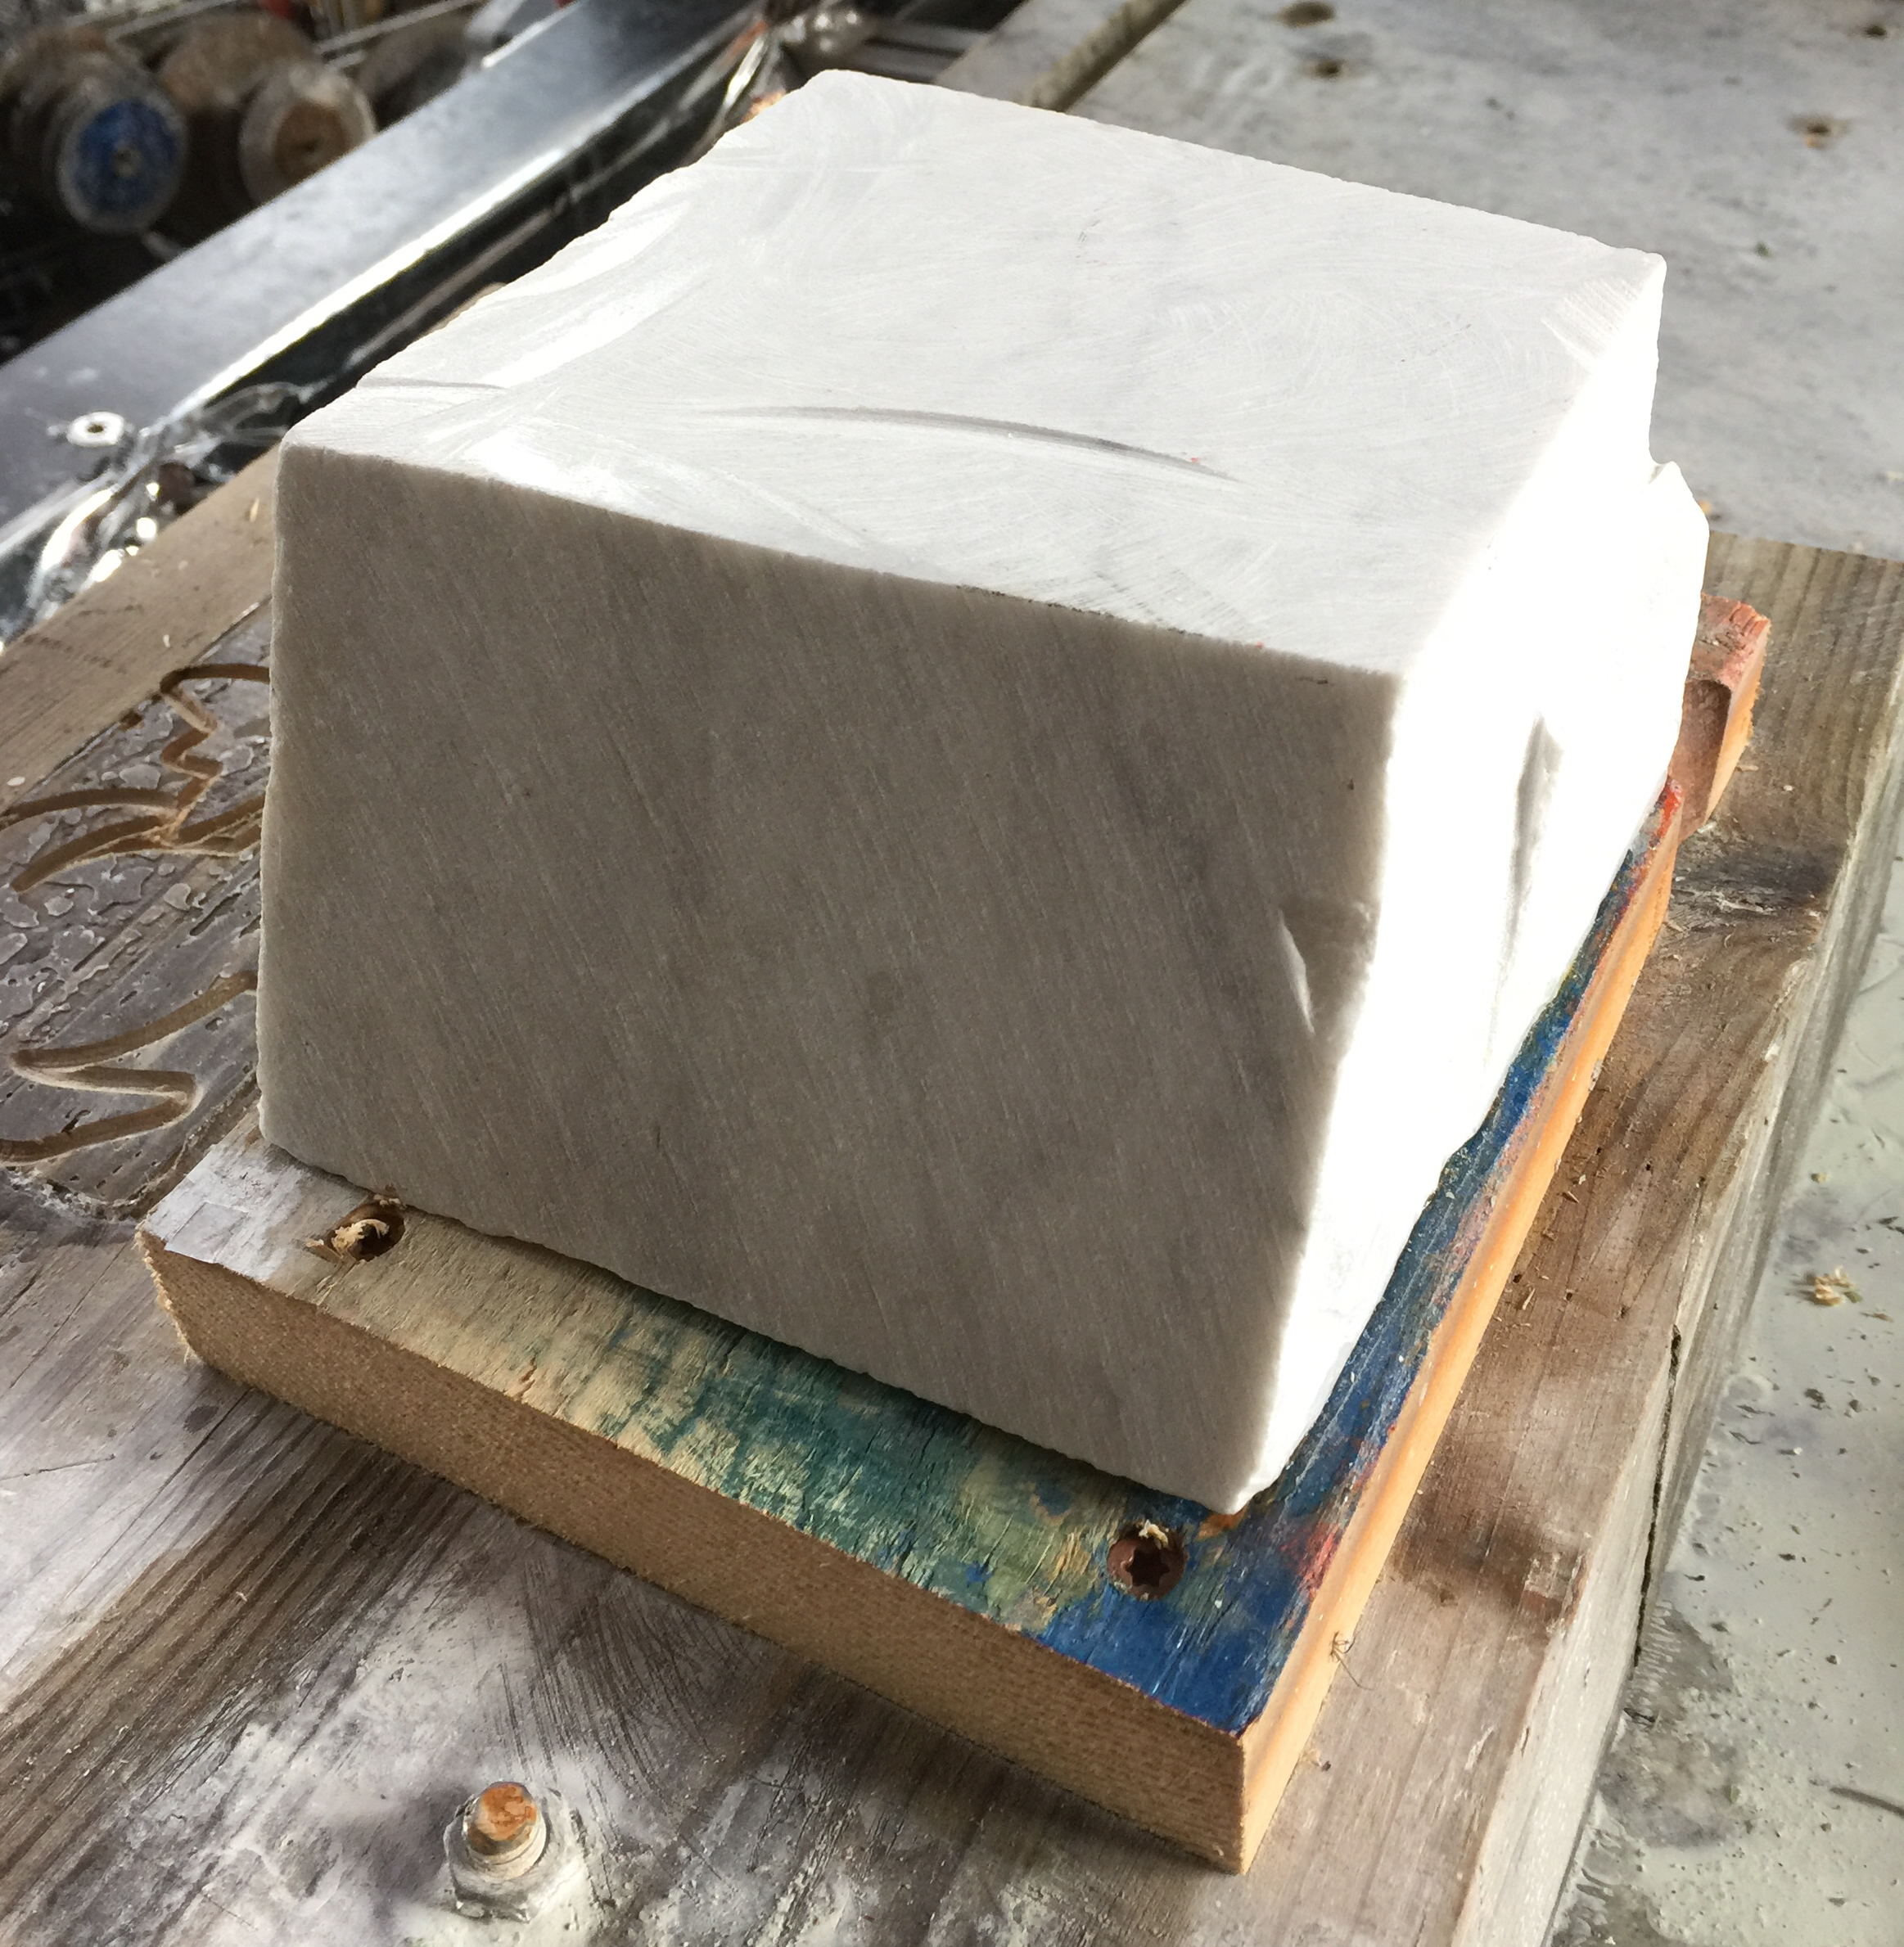 Marble superglued to wood & bolted down to CNC Marble superglued to wood & bolted down to CNC |
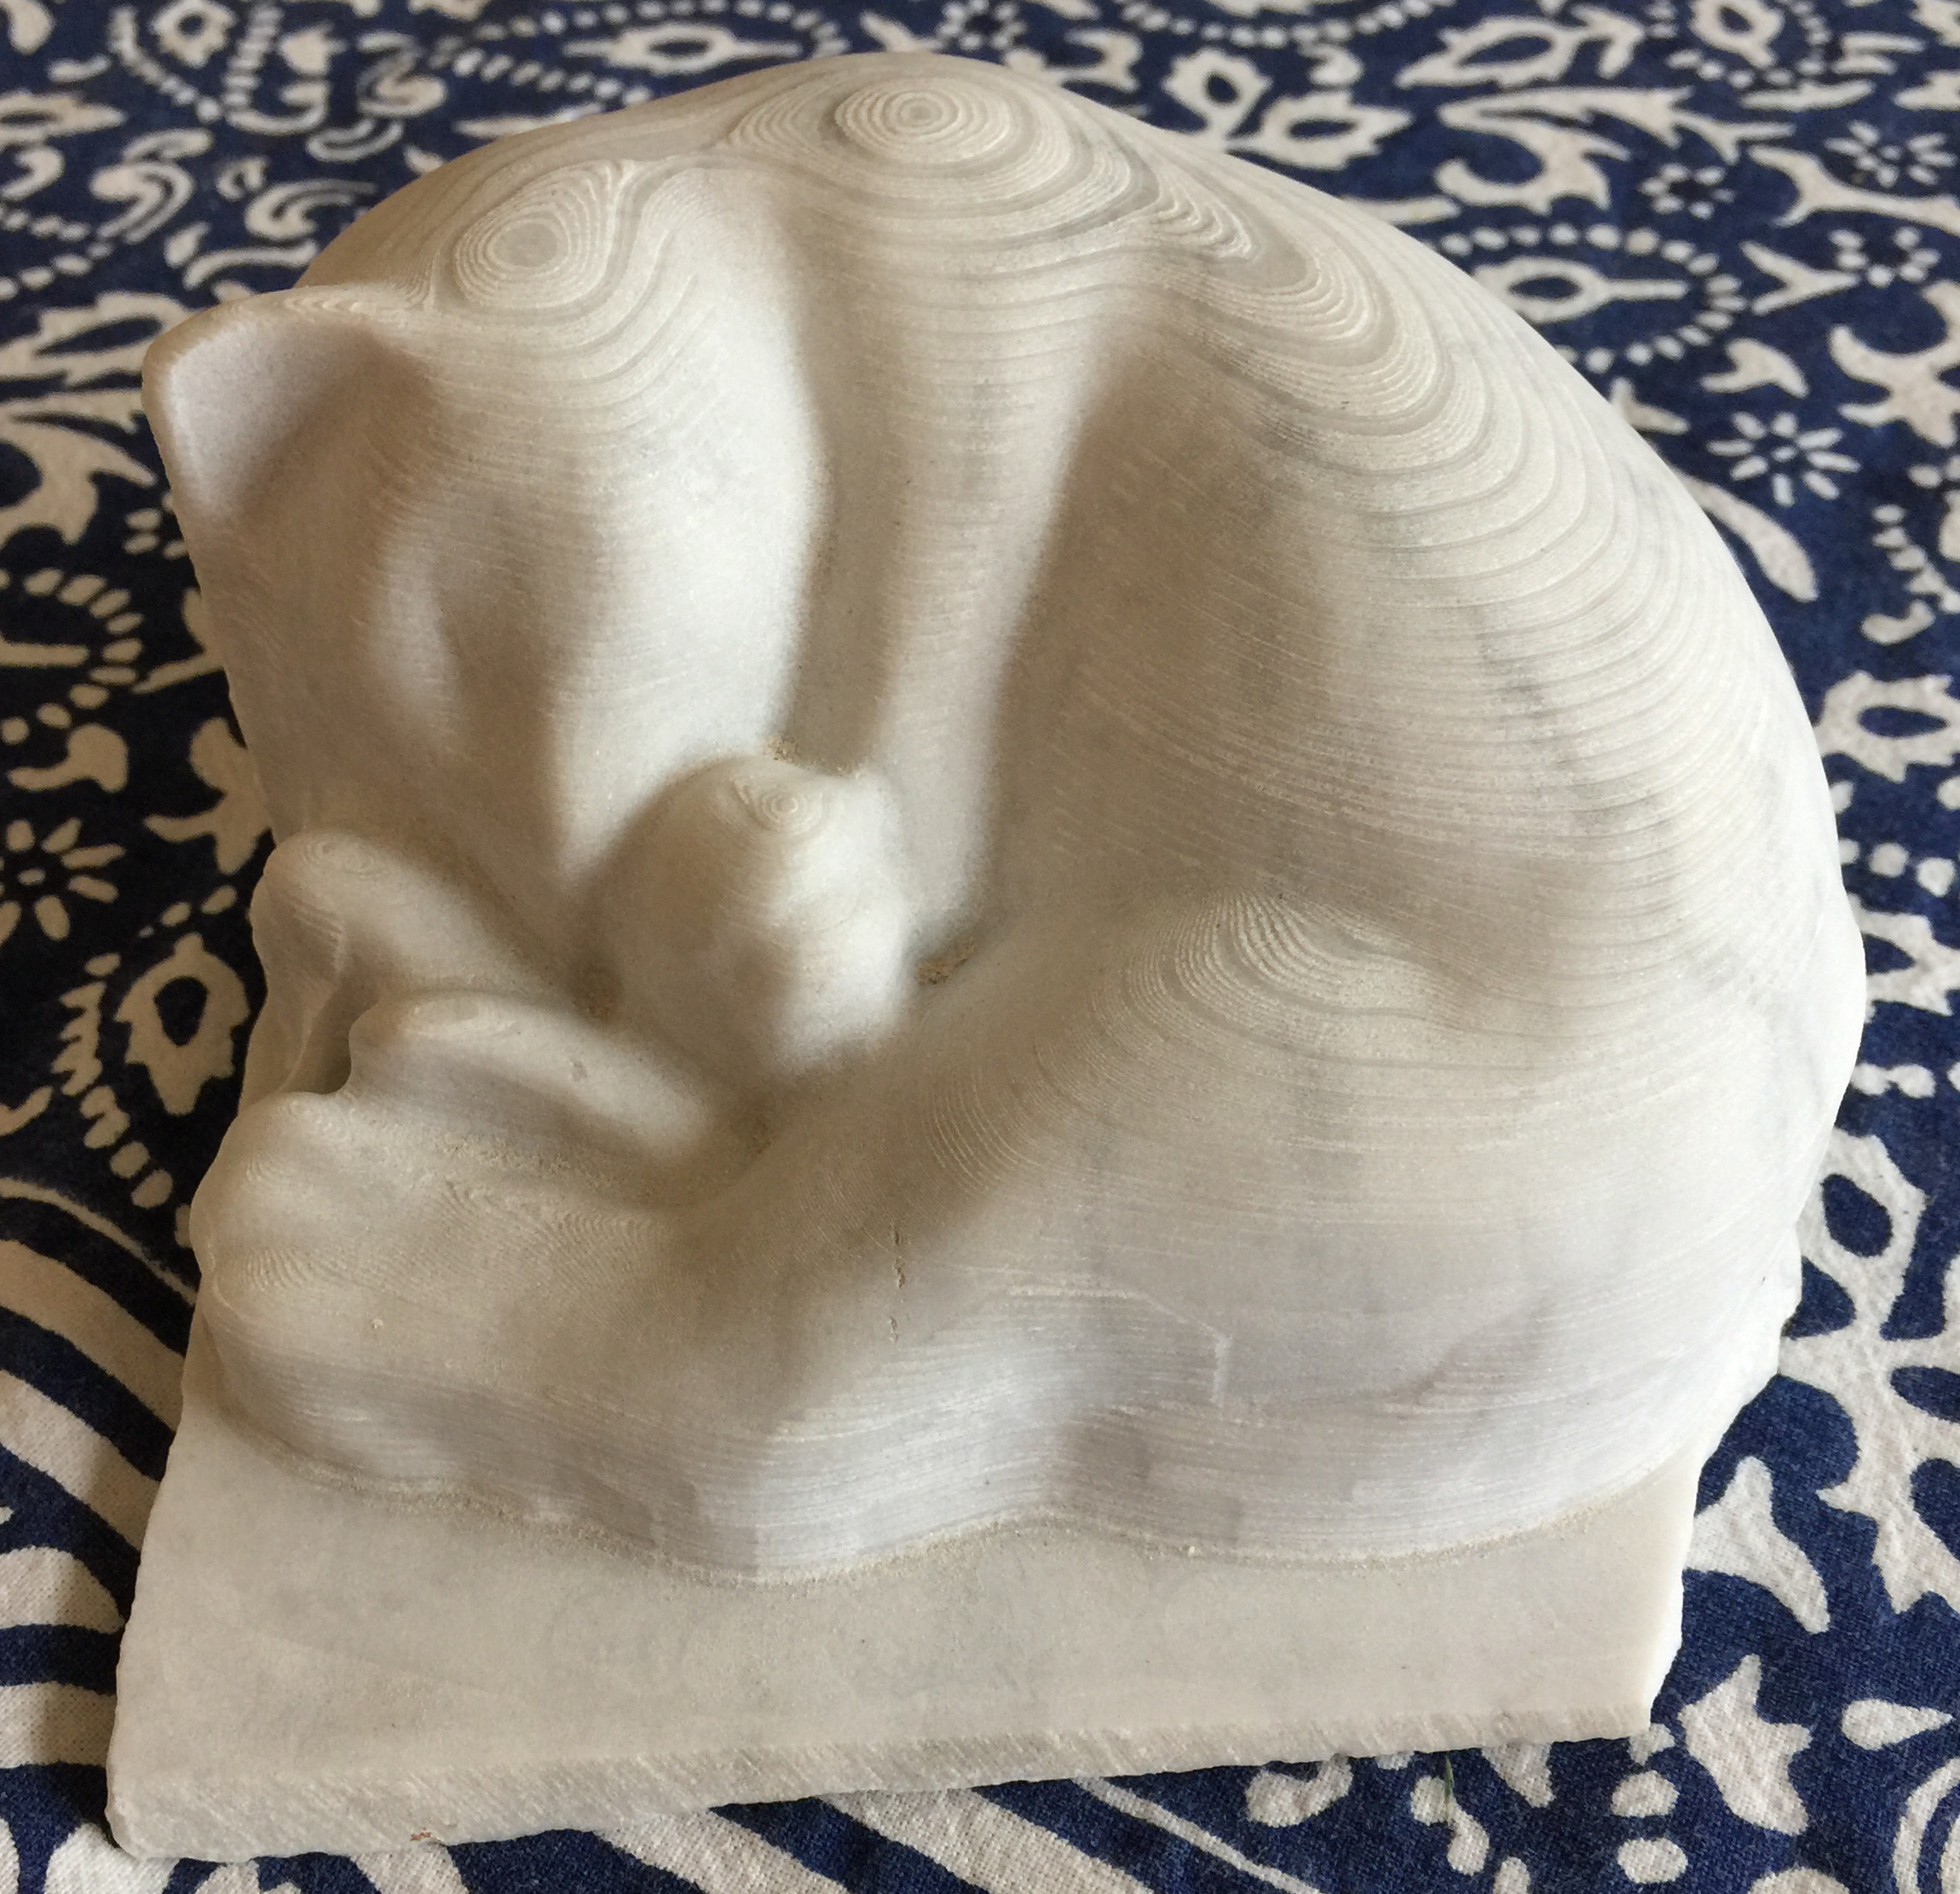
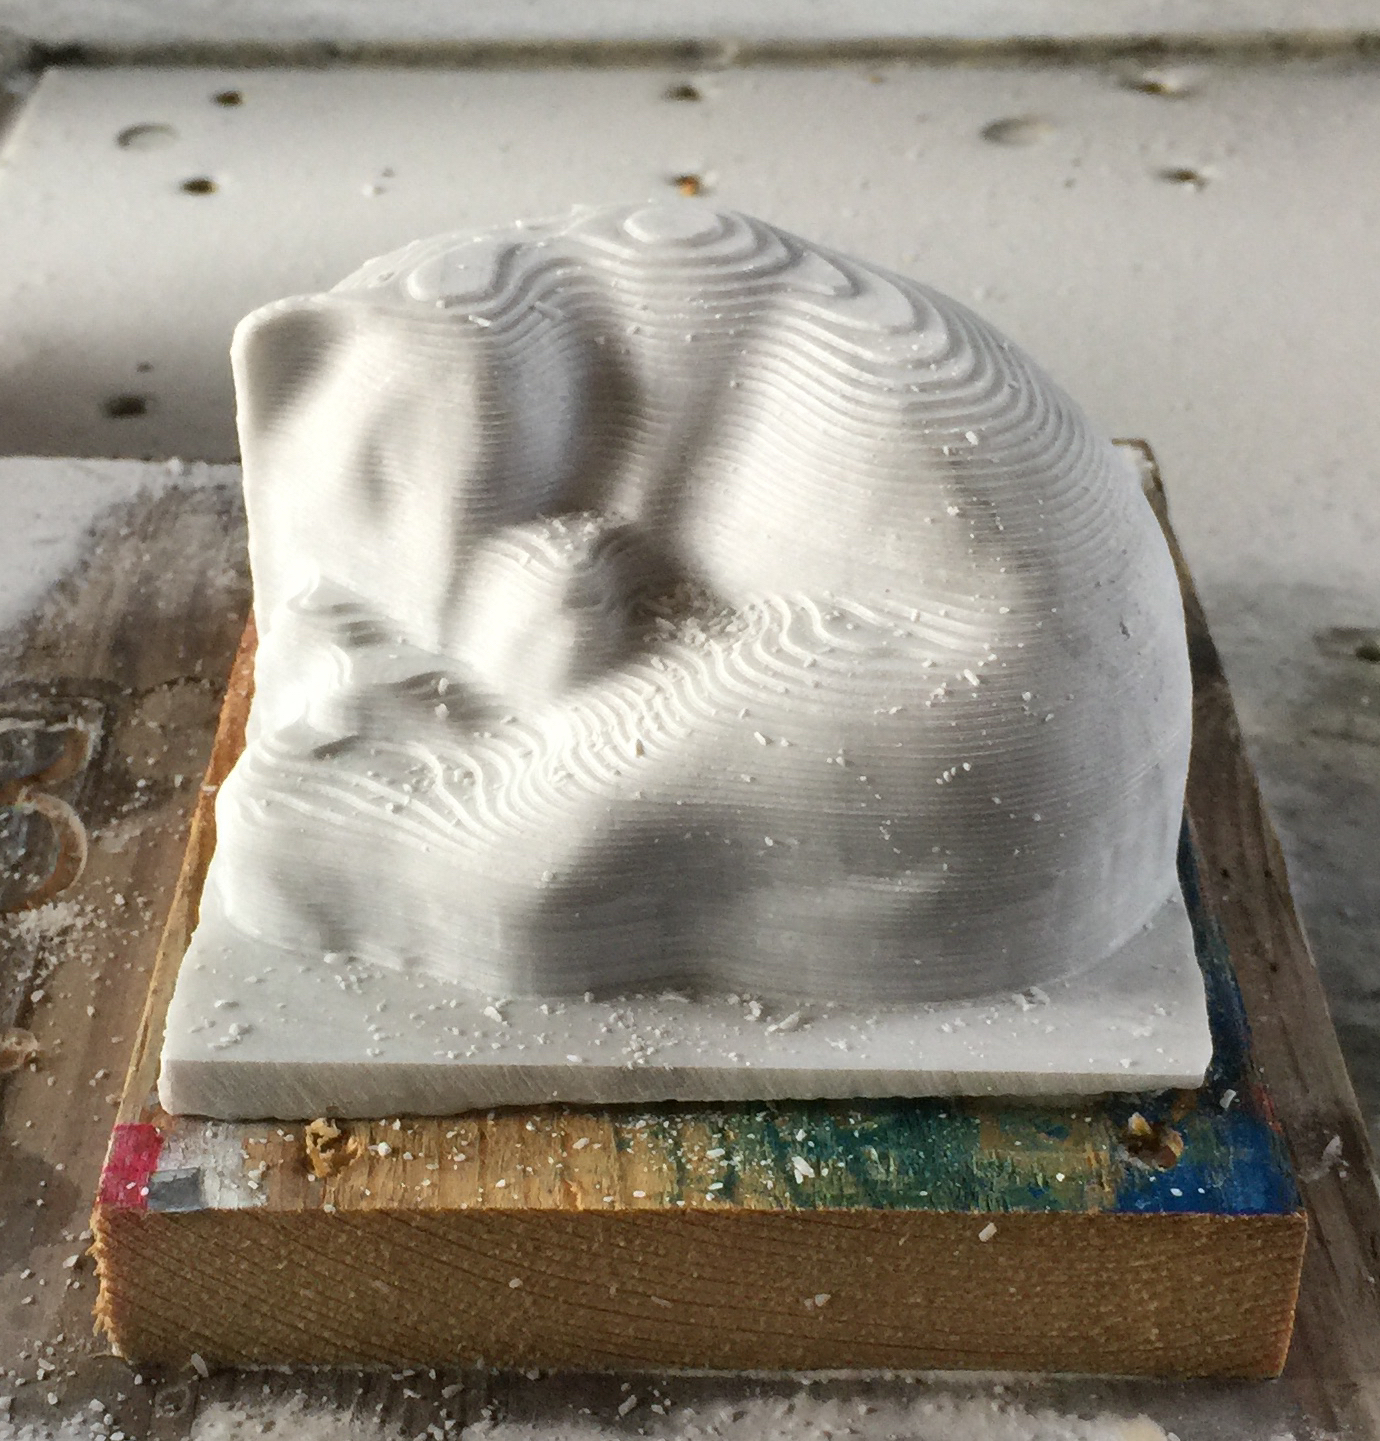 After rough cut of Kitten from marble block After rough cut of Kitten from marble blocktime-lapse of cut: https://youtu.be/hB93F321FWo |
Once you have a 3D model, whether you create it virtually with a 3D drawing program, like z-Brush, or many others, or from a scan, or photogrammetric reconstruction (say that five times fast), the 3D model can be prepared, manipulated, cleaned up (if needed), then sent to the CNC for cutting.
The software I use to go from my 3D Model to numbers that drives the CNC is Fusion 360 by Autodesk (first year free with my CNC and $360/yr after). It provides 3D design tools to create, assemble, analyze, cut, slice, and dice virtual 3D models and meshes. It also manages the iterations of a design as a project with versions, so I can go back to or branch out and try variations. It provides a CAM workspace so I can define the setup of the stone and select the techniques, tools, and tooling parameters to cut the model from the stone. I use it to perform simulations of the proposed cutting paths into the stone, so as to find problems and estimate cutting time. When I am satisfied it will do what I want I use it to turn the proposed cutting paths into the G-CODE that drives the CNC.
(Here’s a 1 minute promotional video about Fusion360 that might help explain it: https://www.youtube.com/watch?v=beebJ6fgVPo)
The CNC I use is from a kit made by CNCRouterParts which took me about 40 hours to build, and an additional 20 hours of modifications and additions to be able to cut stone. The main modifications were adding water to keep the diamonds cool, a way to collect the water to minimize splashing and the machine rusting, and, finally, a stone spoilboard which creates a level surface and a way to hold the stone in place. See "Acquisition" below for more details about prices and operation.
TheCNCRouterParts electronics are currently driven by software called Mach3 running on a used laptop I bought on craigslist for $100. Running the Mach3 software along with learning the basics of a CNC required the most effort in getting comfortable with the CNC carving process. Running a CNC requires attention, focus, and discipline. Distraction during setup, improperly securing the stone to the work table, or forgetting a step can ruin a tool or the piece you are working on. The CNC exerts significant force and the stone needs held in place while the CNC is cutting it. Careful planning of how to hold a stone during its cutting was a new skill and thought process for me. Therefore the shape of the stone and the sculpture being cut from it will determine how the stone is held in place. For more detailed info, see Setup and Work Holding section below.
The cutting head (router spindle) on the CNC uses spinning tools, carbide for soft stone, and diamonds for harder stone, the same ones used in your Dremel, Foredom, jade point carver, or on your angle grinder. I mainly use diamonds for both hard and soft stone. The important part of cutting any material with a CNC is knowing how fast to spin (RPMs) the (diamond) tool and how fast (inches per minute ) to feed (push) the diamond tool into the stone. This is called feeds and speeds, and for every stone, feeds and speeds need to be tested and empirically determined. Everyone using a CNC spends a great deal of time accumulating the hard-won knowledge of feeds and speeds. One of the reasons I am writing this is that by sharing what I have learned from tool speeds and feeds, others can do this and benefit.
I have cut limestone, marble (https://youtu.be/hB93F321FWo), soapstone, granite, basalt, pyrophyllite, olivine, and perioditite, and have feeds and speeds for some of the standard tool shapes.
NWSSA is a great community, I am very grateful for the many artists who have worked with me to test the CNC on cutting their stone. Below are four examples of work we have done including Michael Binkley's piece cut at the Suttle Lake Symposium:
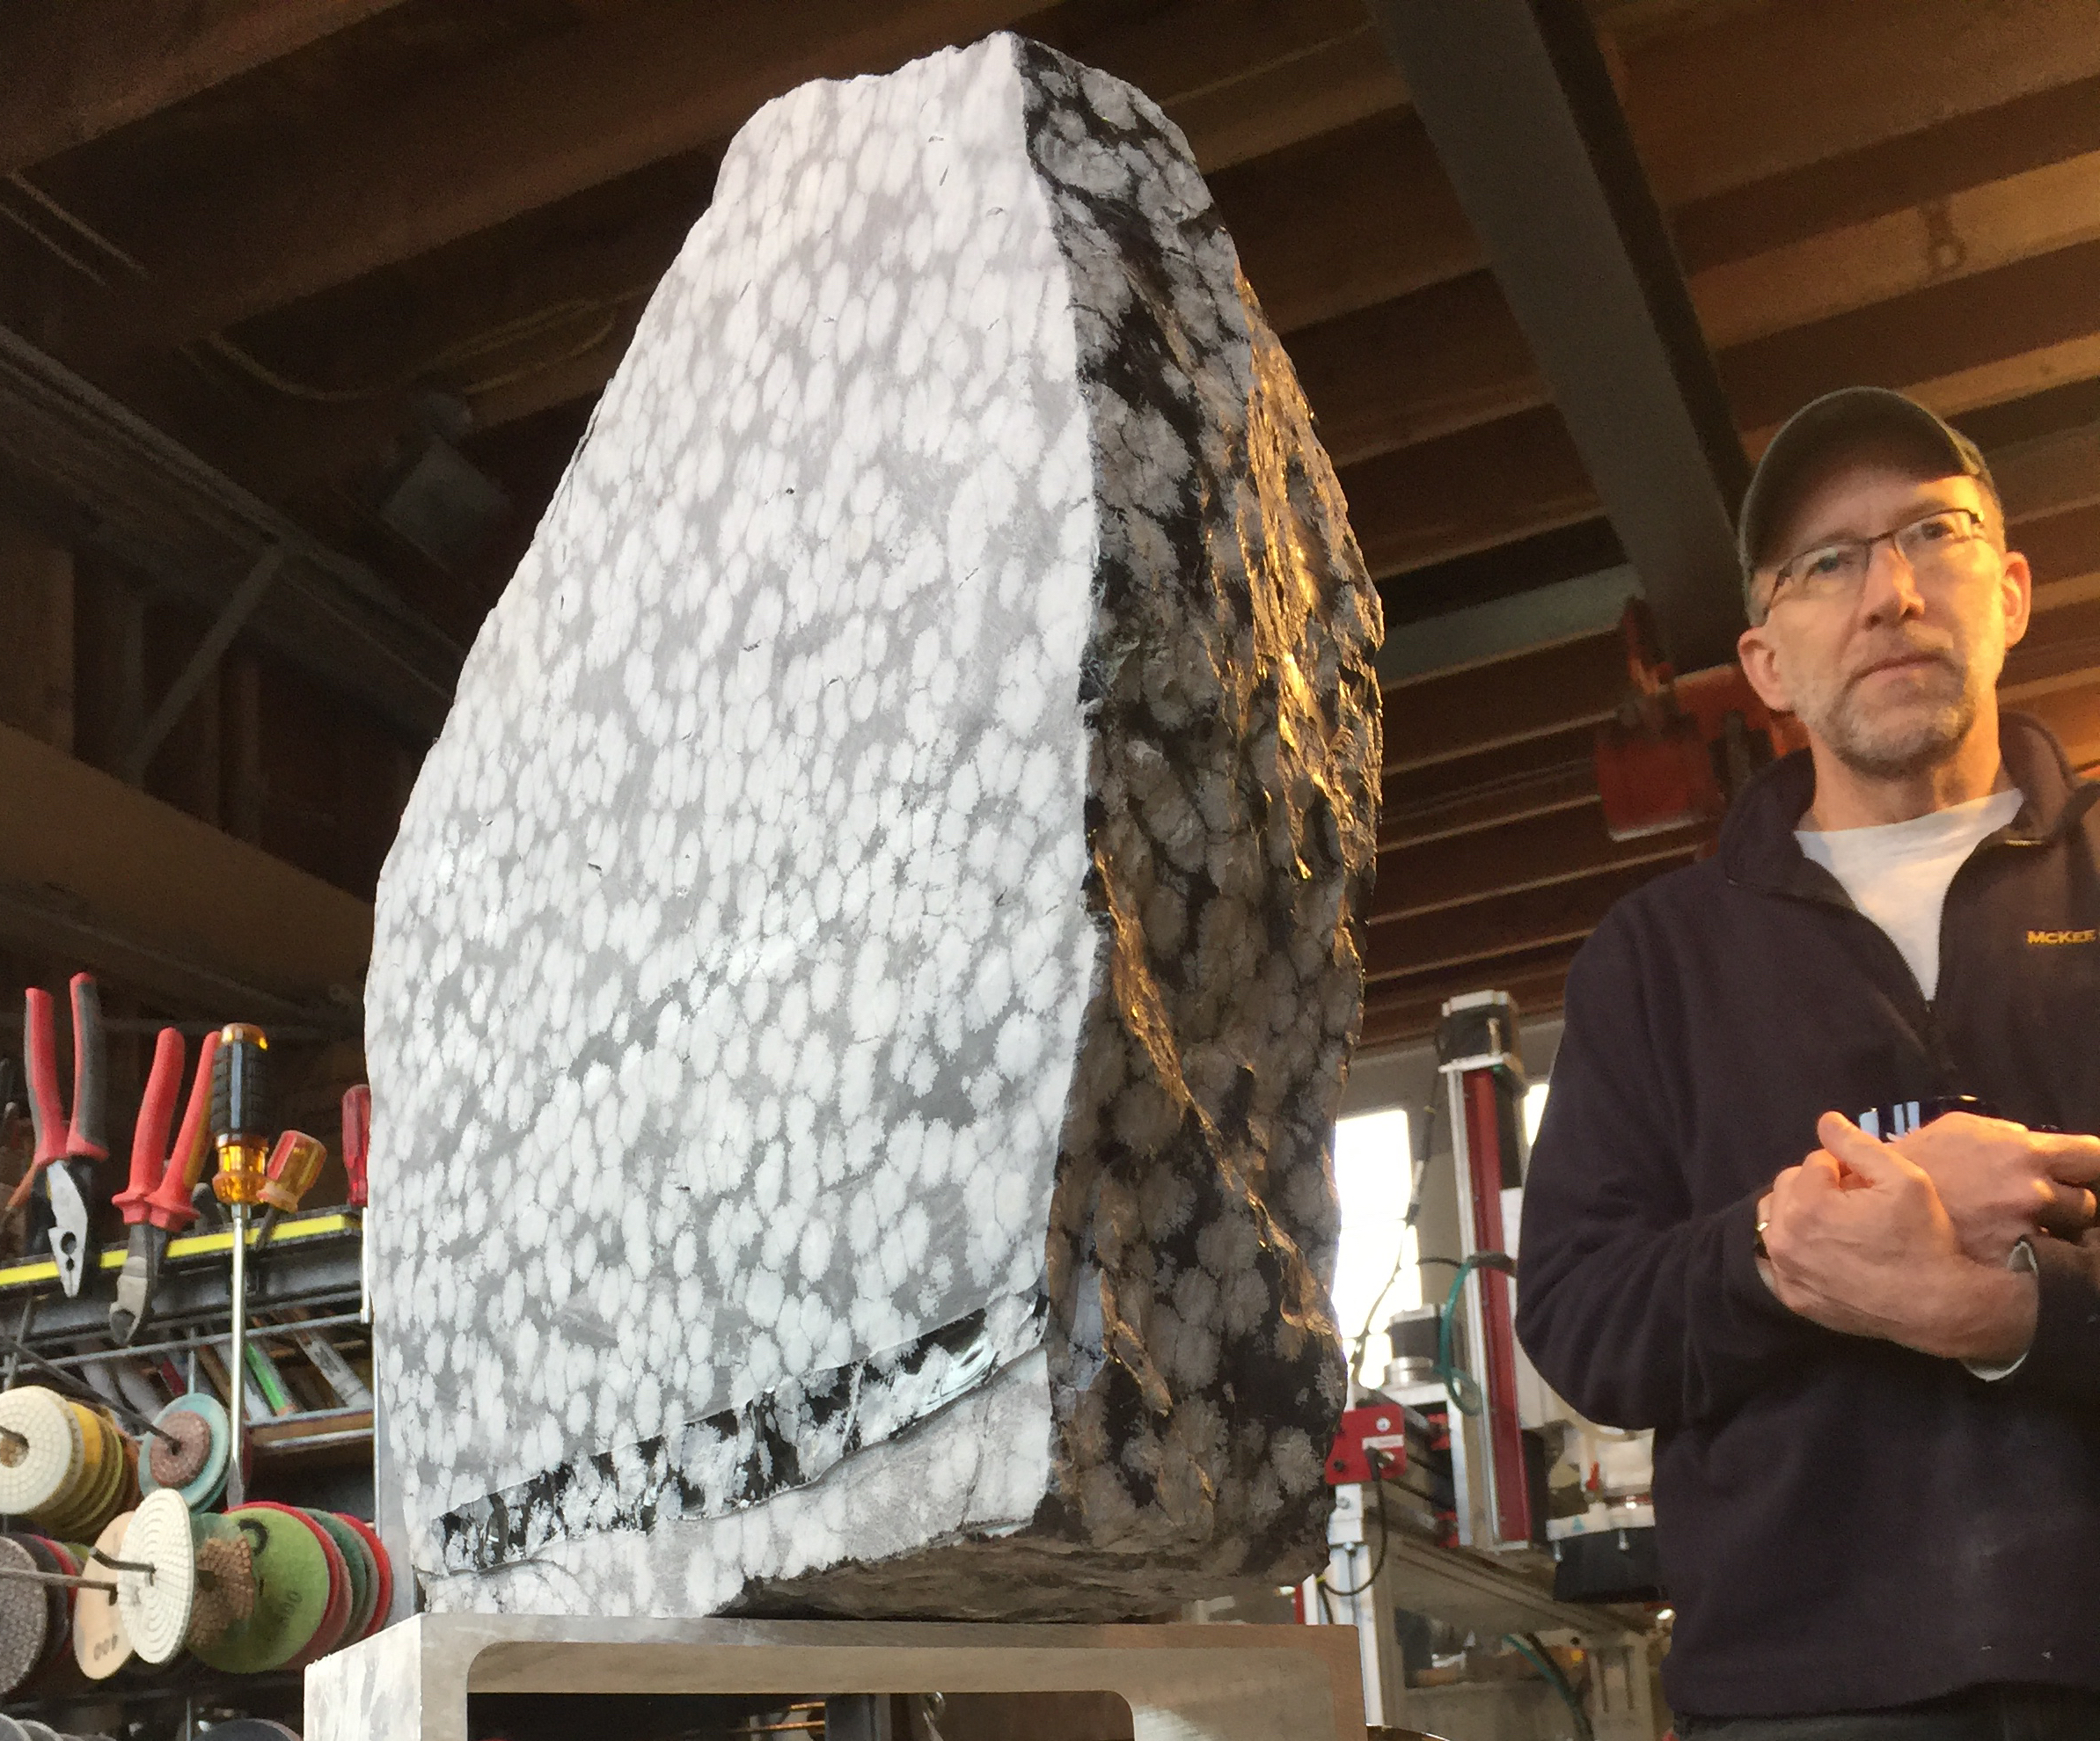
Ken Barnes
Corpuscle #5 a 14” round snowflake obsidian is part of Kens Corpuscle series. It was designed virtually on computer then cut with 8mm vacuum brazed diamonds at 10 in/min) see : https://www.youtube.com/watch?v=Evqmj61Eo6U)
 |
 |
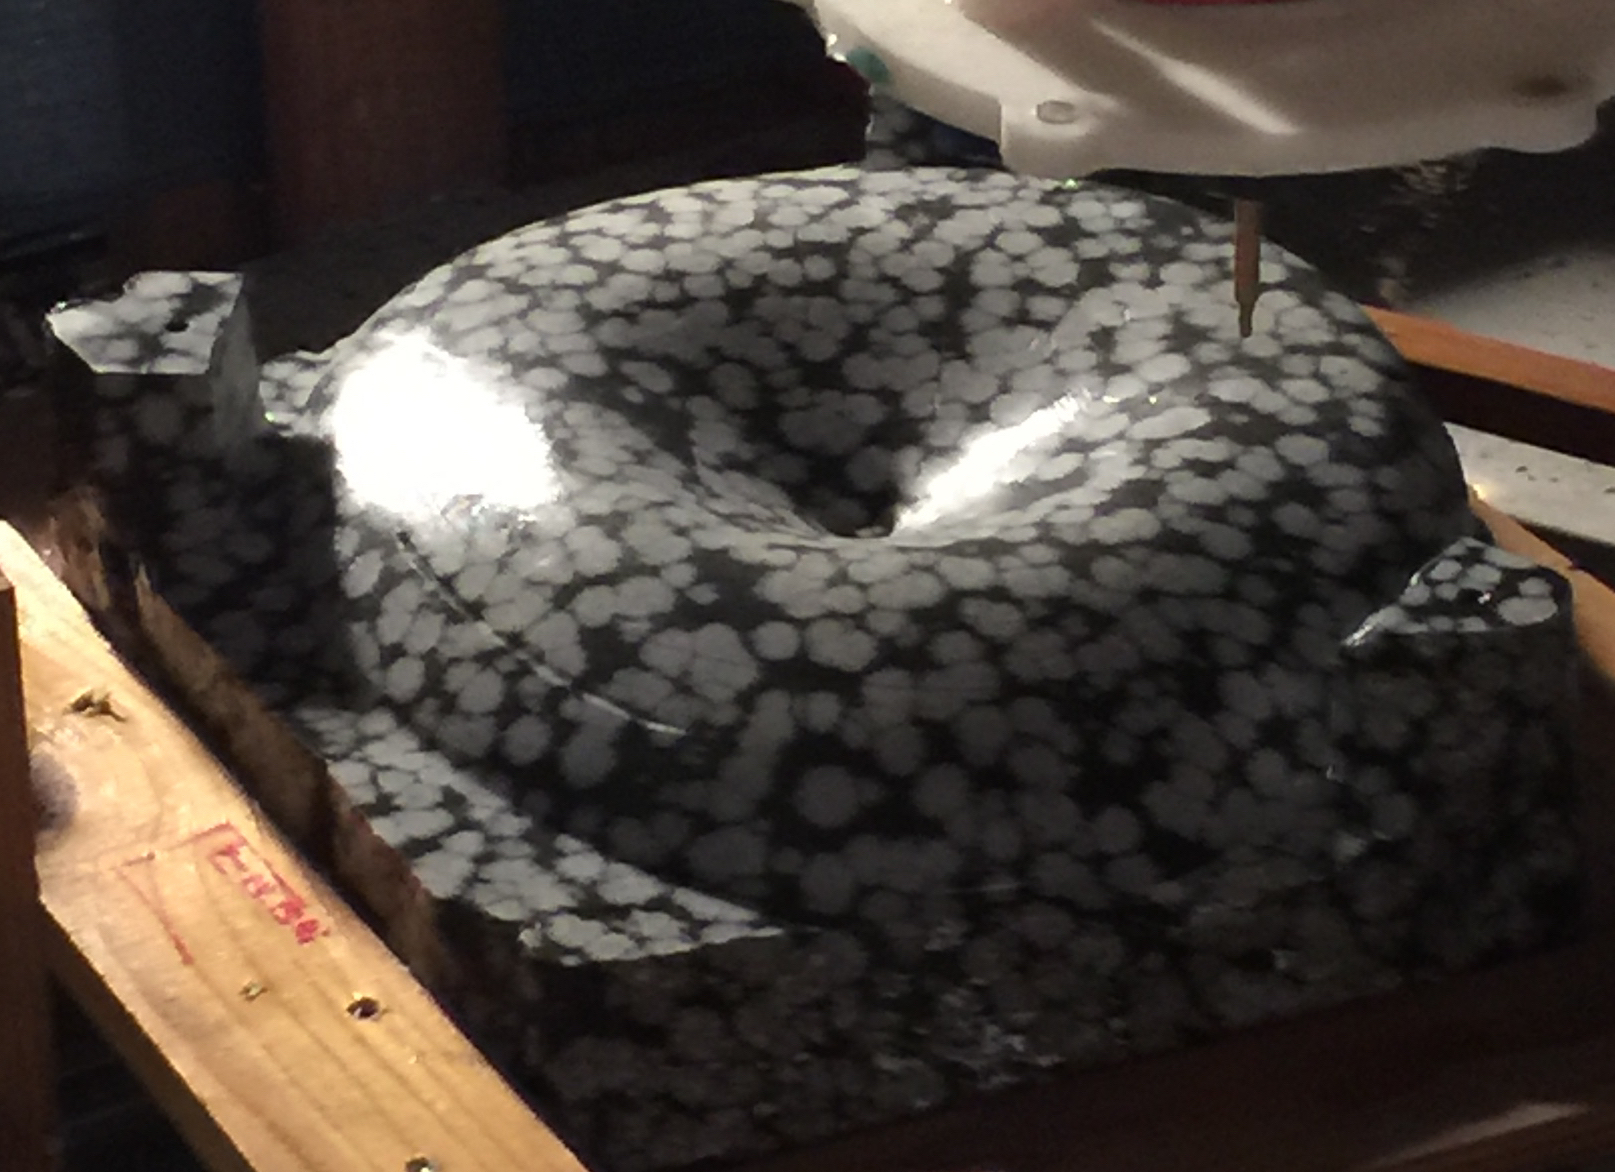 Obsidian held in place with wood blocks. Second pass with 4mm bit. Obsidian held in place with wood blocks. Second pass with 4mm bit. |
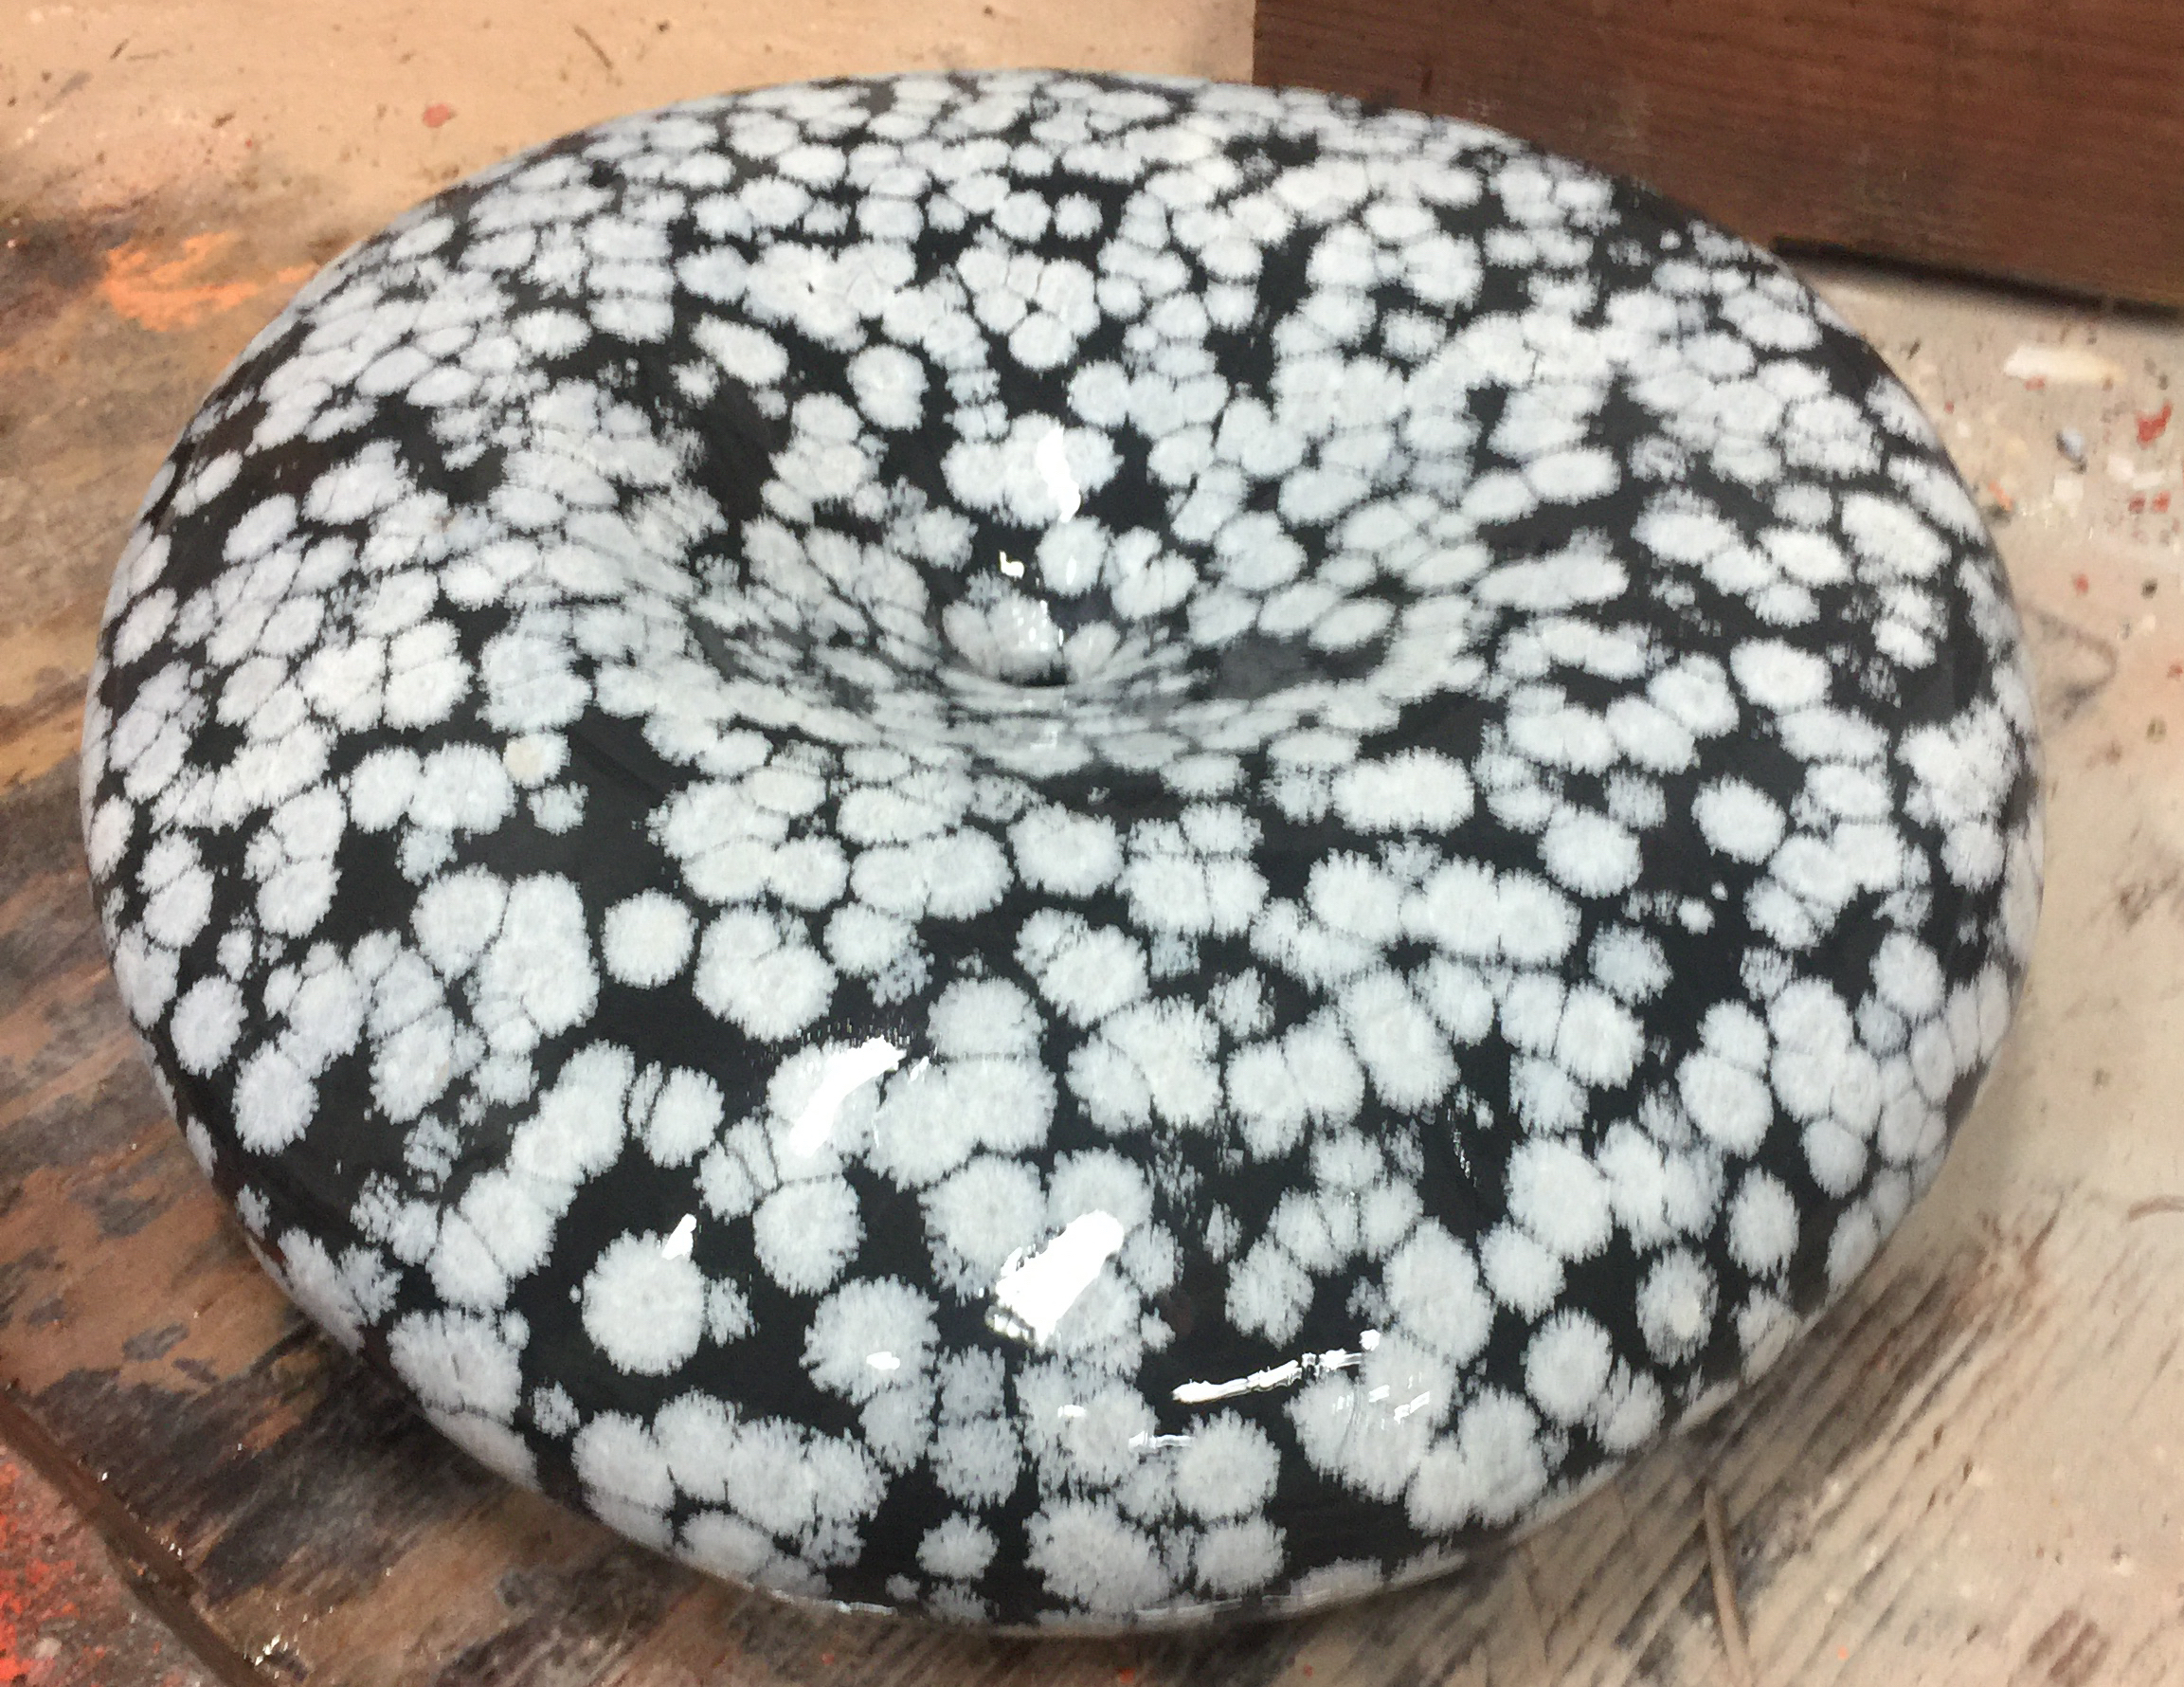 After some finish and polishing work. After some finish and polishing work. |
Bruce Wickler
Jade Turtles from a paper sketch by 16yr old student to 3D model then cut with 4mm vacuum brazed - .5in/min, see time lapse of second rough pass: https://youtu.be/P77Ayq5zfNk
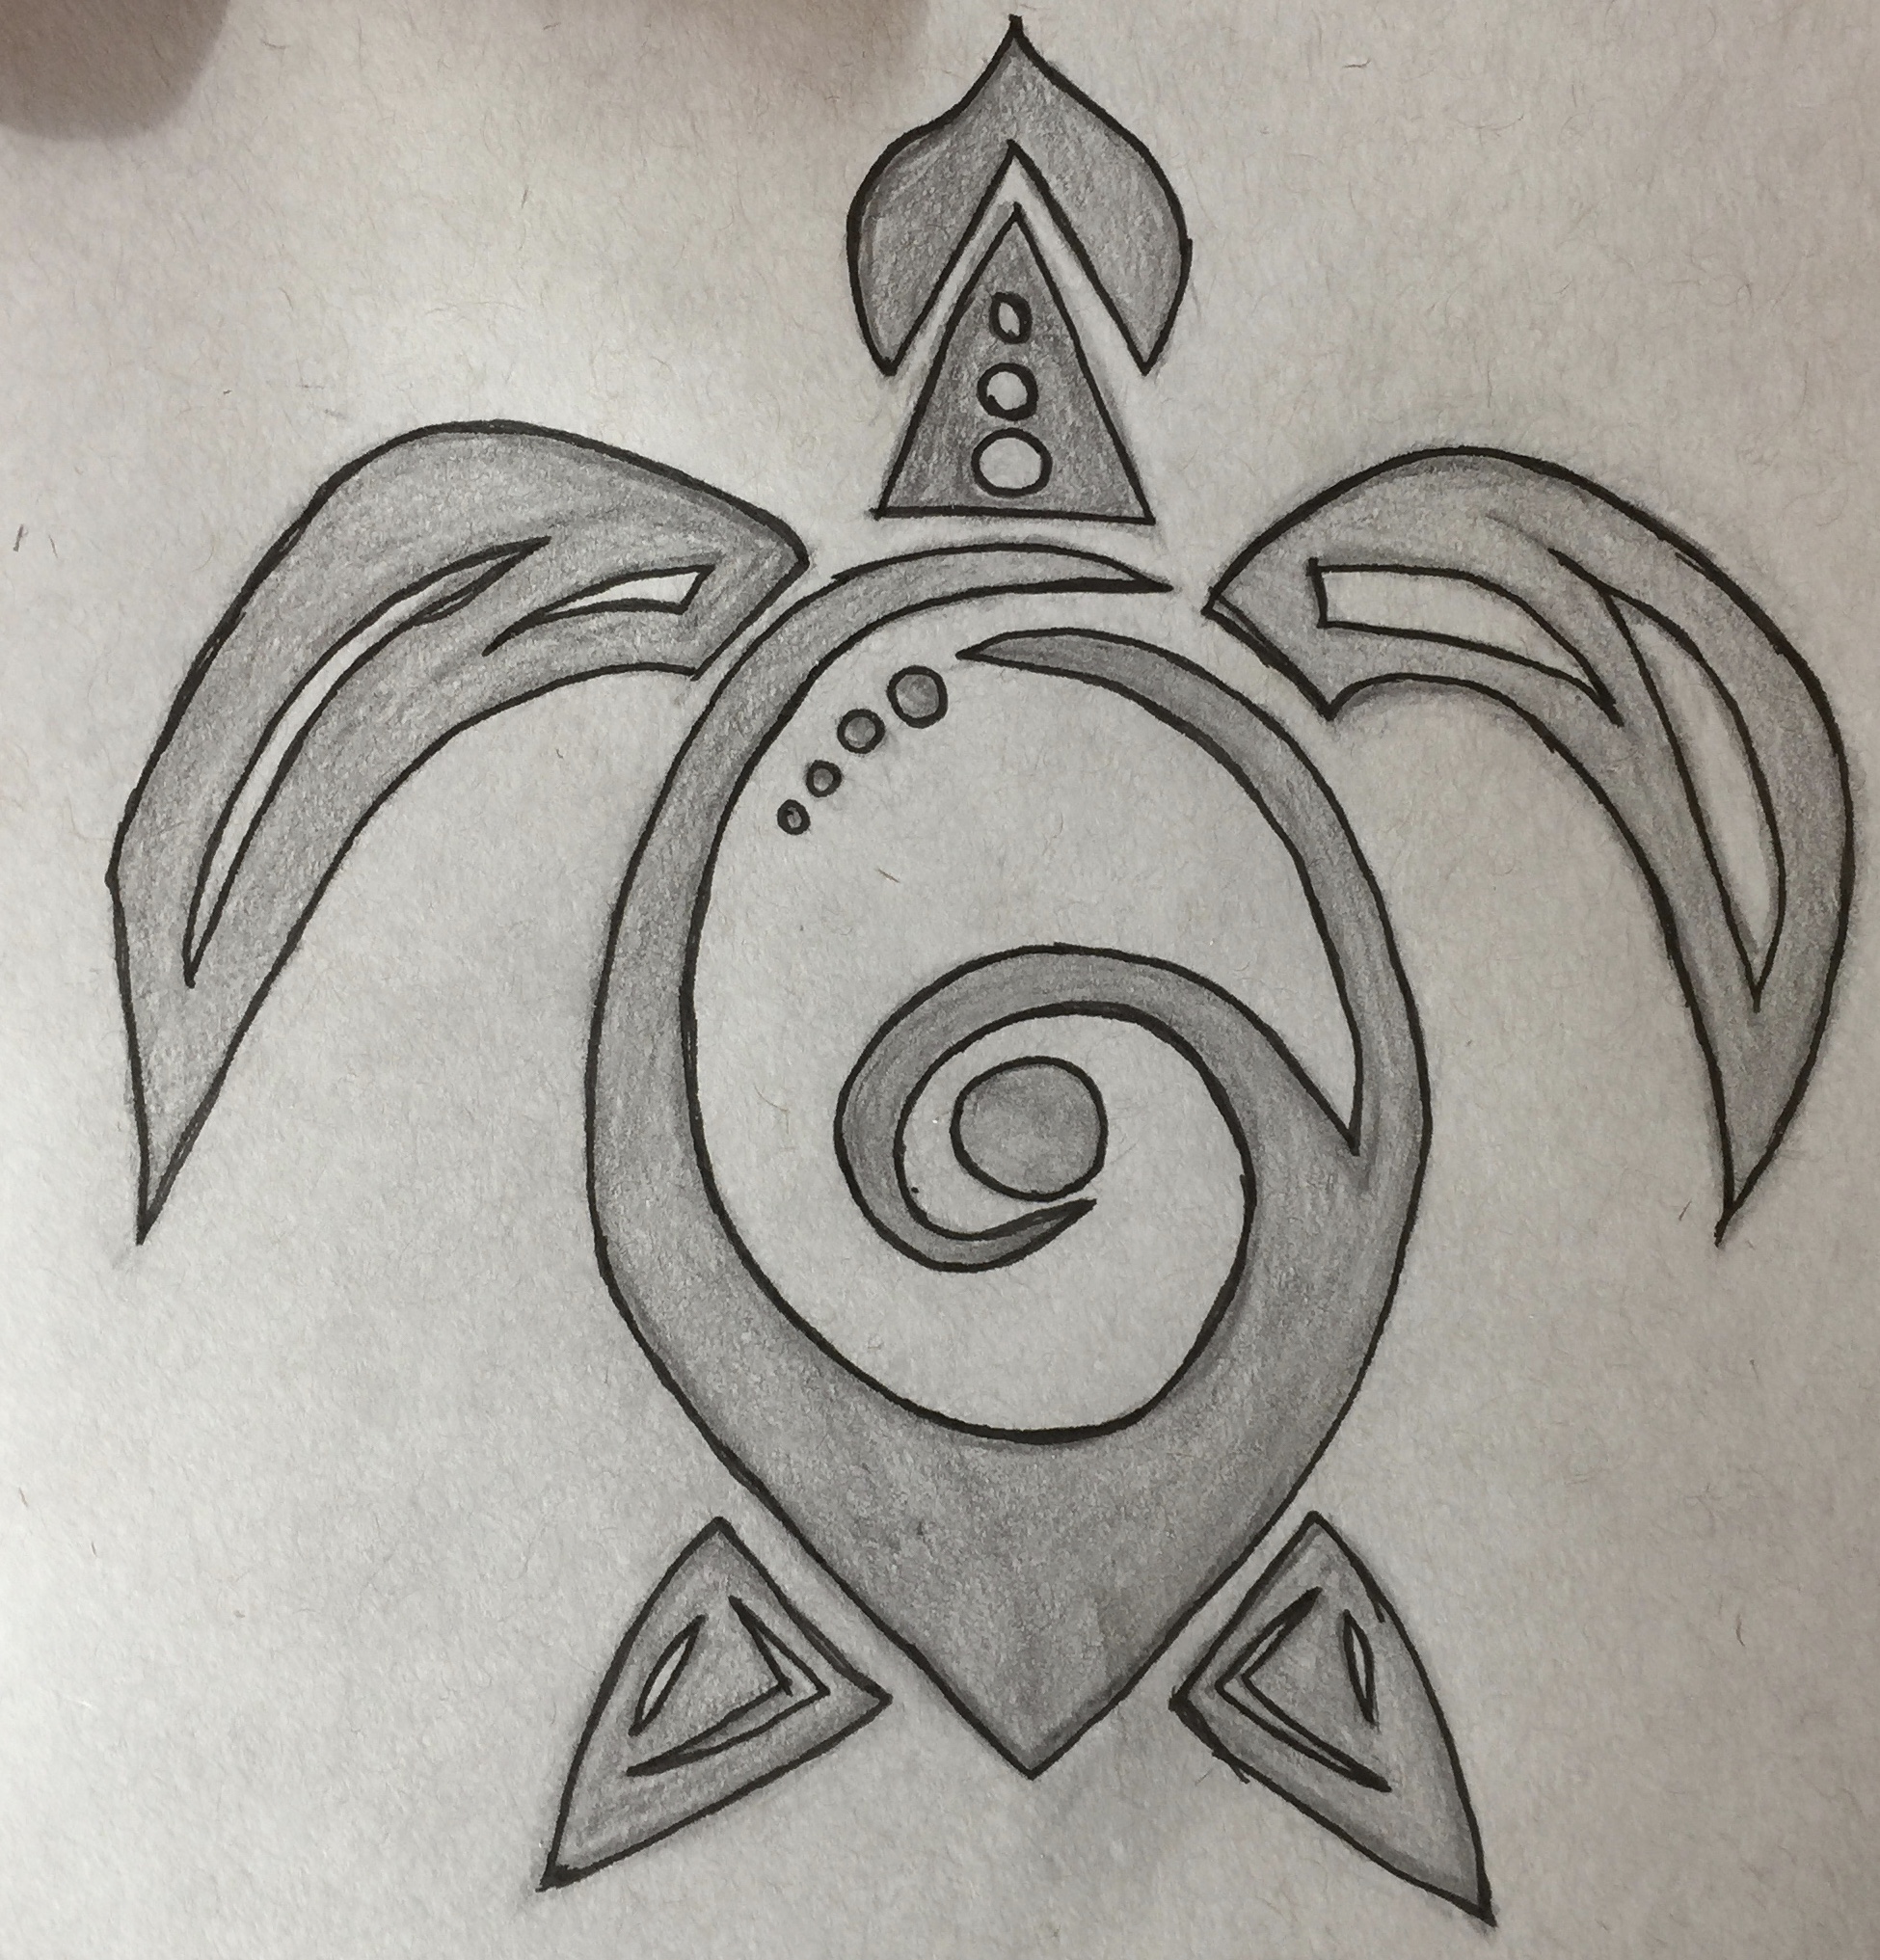 Pencil Sketch Pencil Sketch |
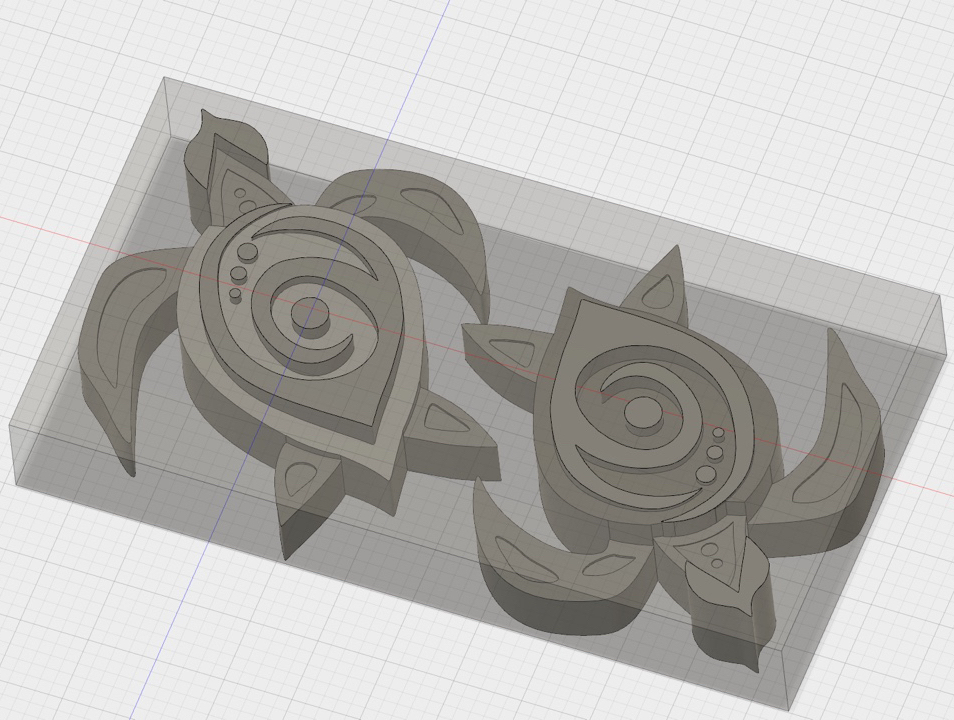 3D construction of sketch and layout of two turtles in block 3D construction of sketch and layout of two turtles in block |
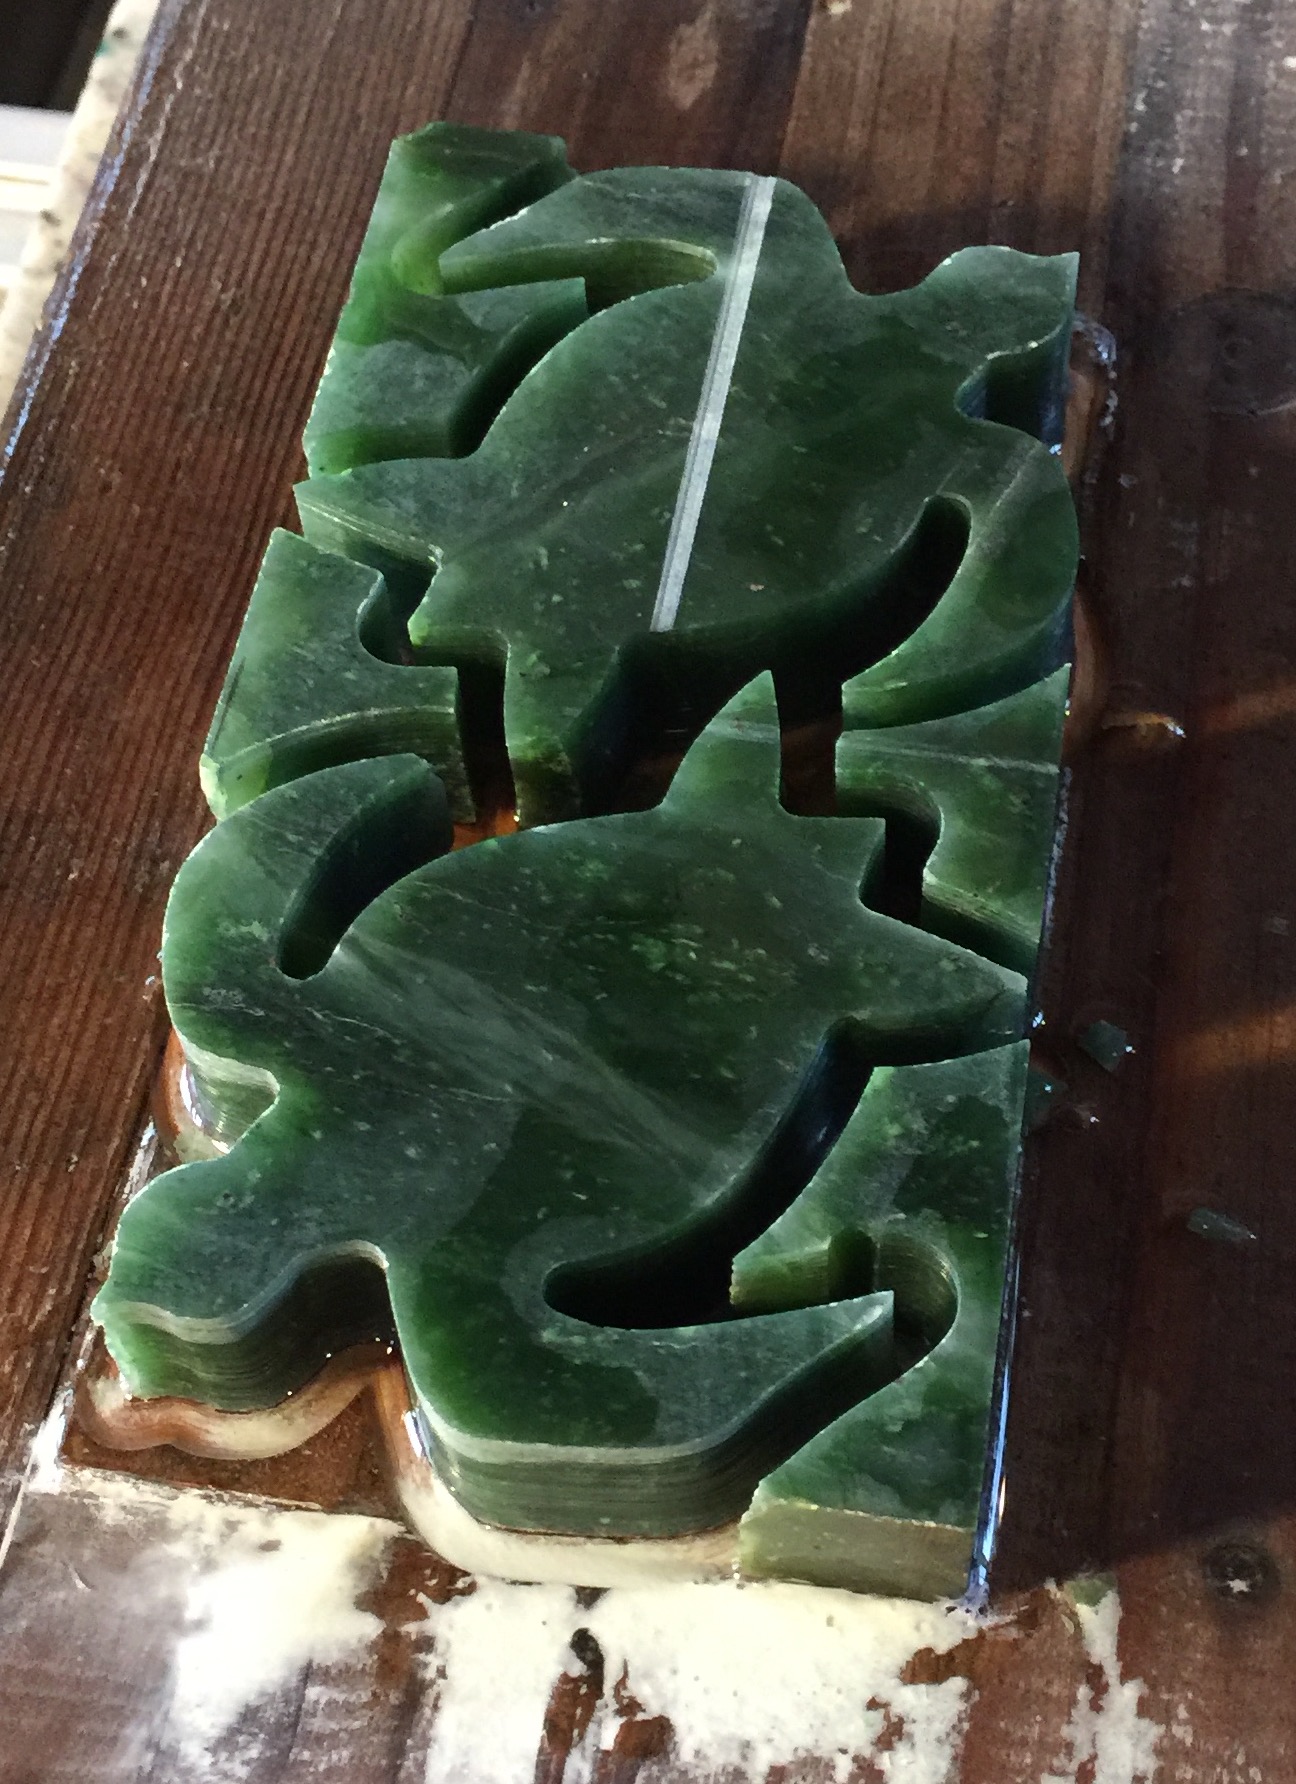 Cut of shapes from Jade superglued to wood. Cut of shapes from Jade superglued to wood. |
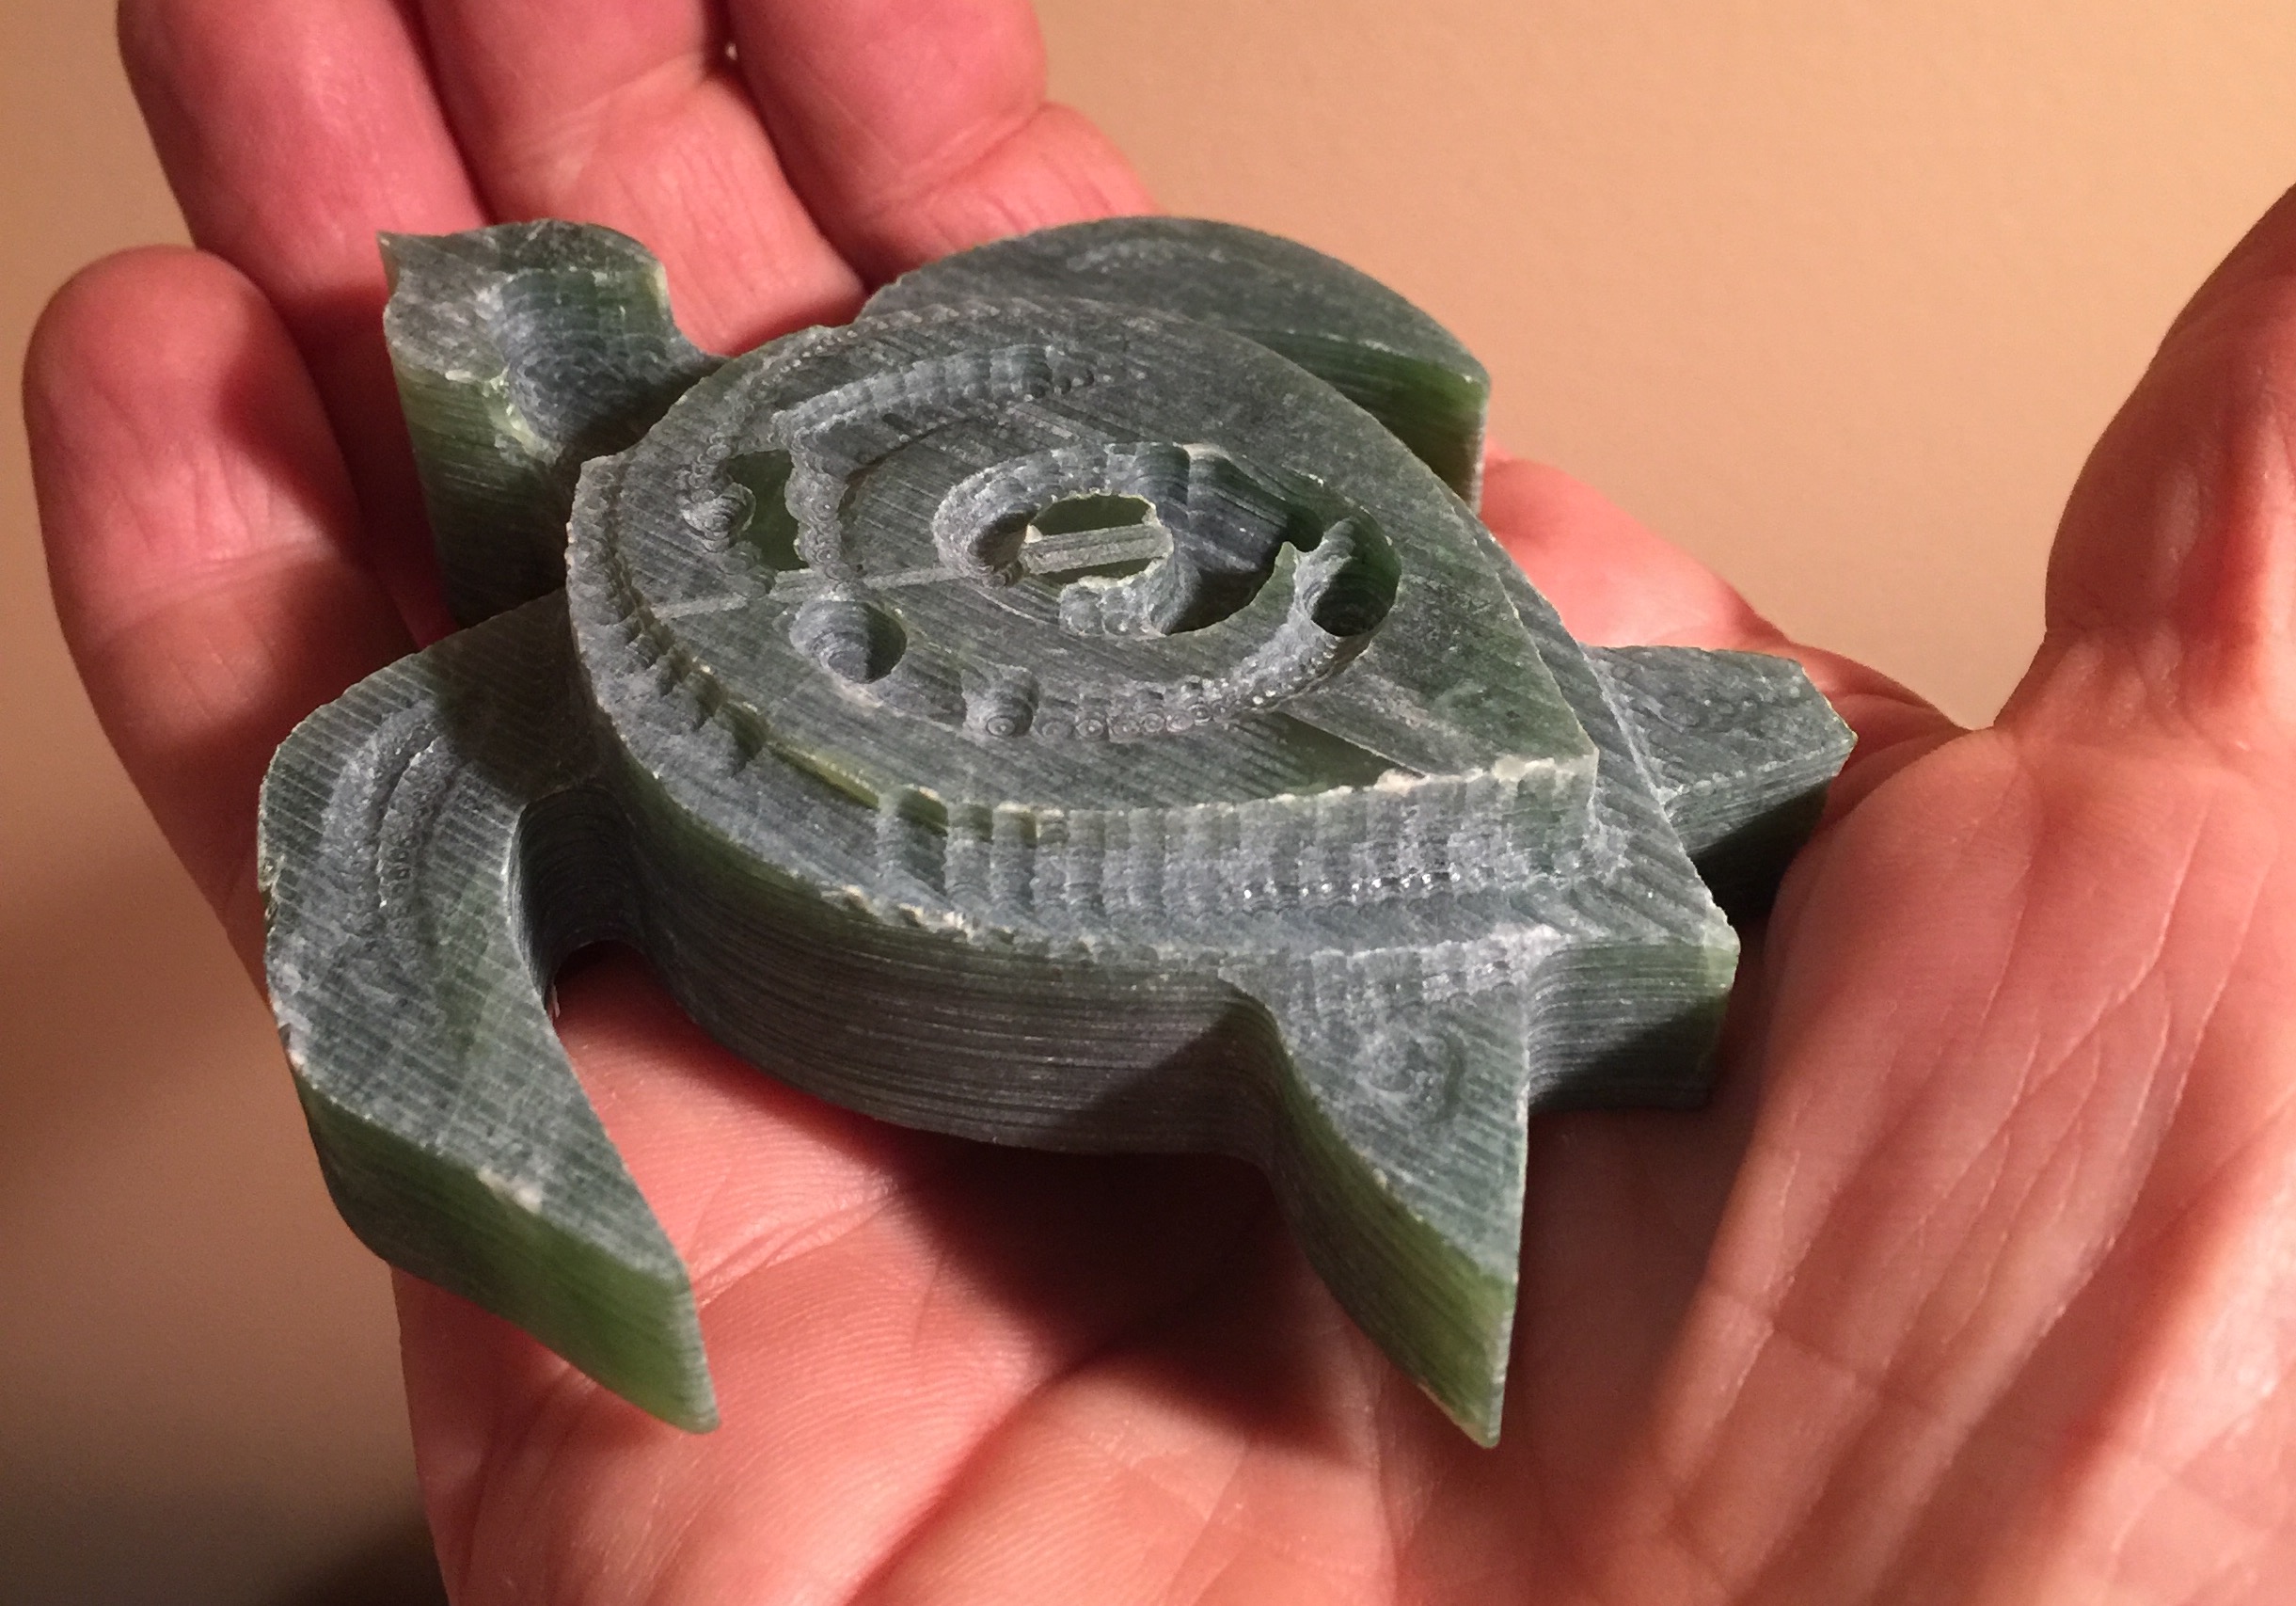 Second pass with 4mm for rough detail Second pass with 4mm for rough detail |
Deborah Wilson
Jade Labyrinth (6mm vacuum brazed 35-40grit ball end diamond bit, 1.5 in/min)
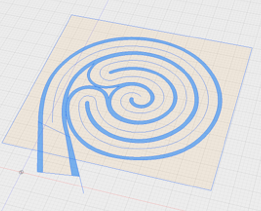 2D Sketch of 3 circuit labyrinth 2D Sketch of 3 circuit labyrinth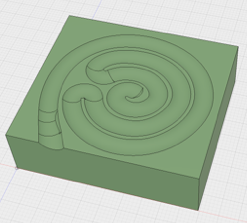 3D Model from sketch 3D Model from sketch |
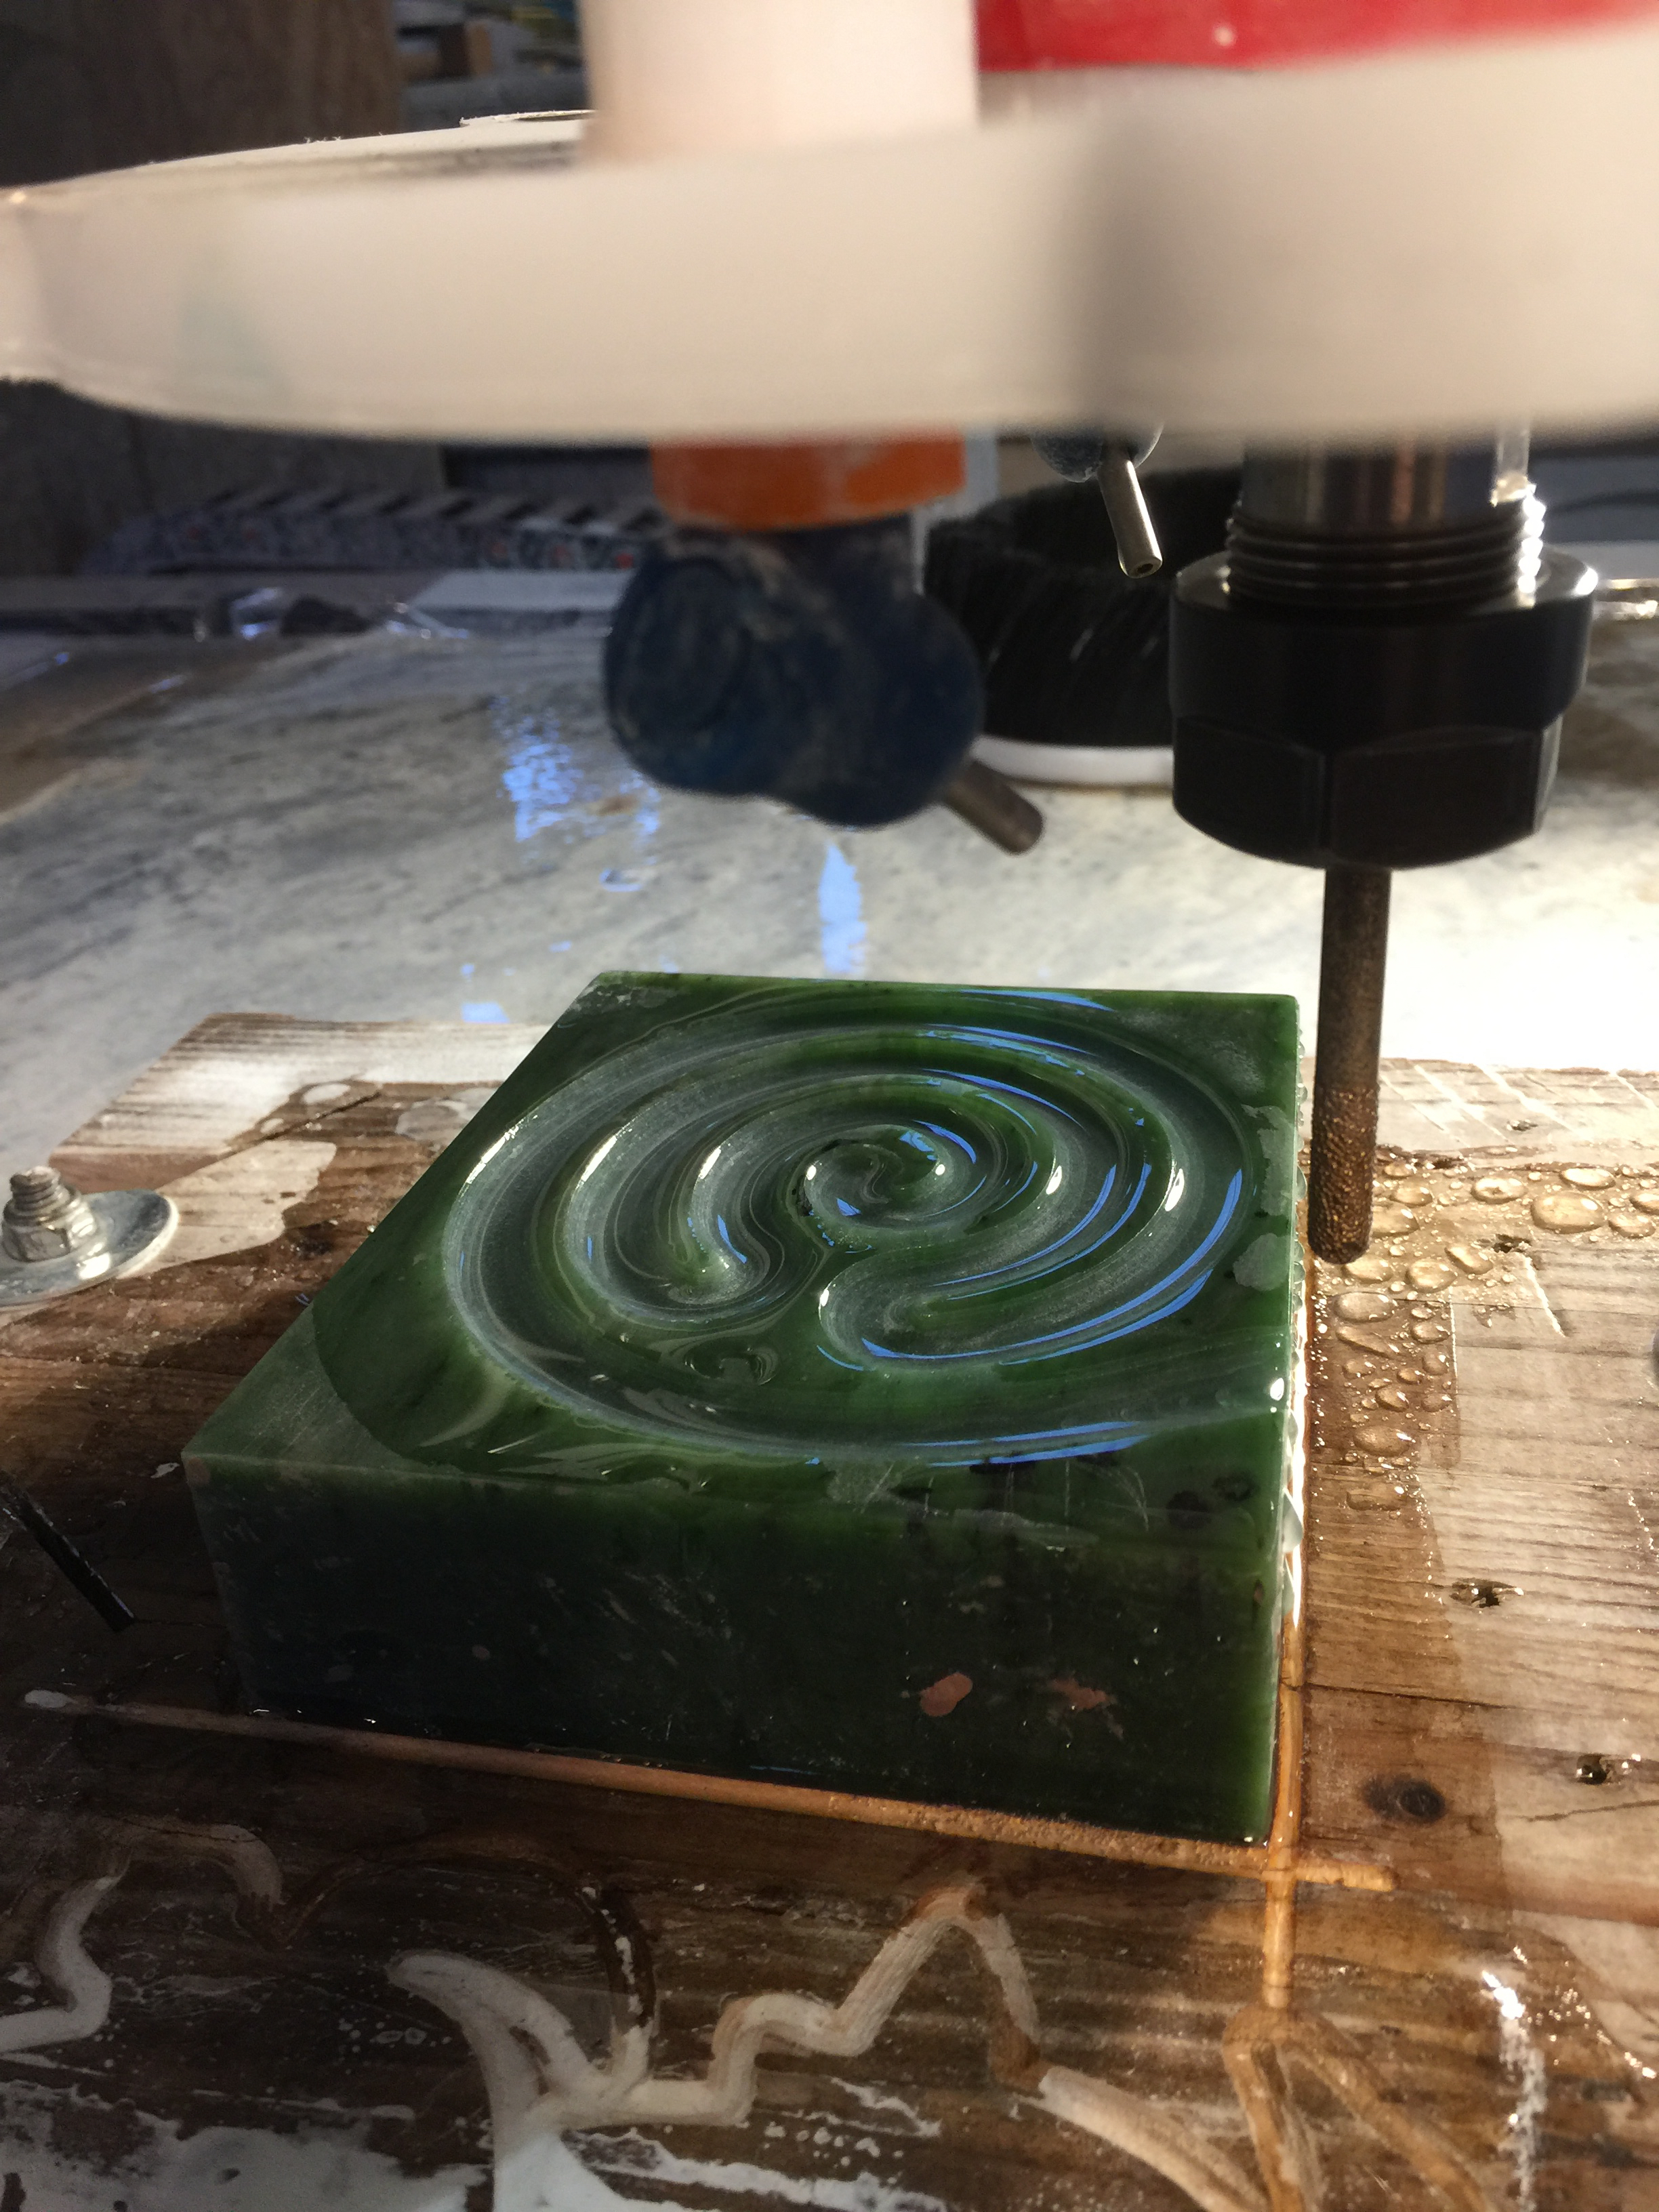 Rough cut of labyrinth using 6mm ball end mill Rough cut of labyrinth using 6mm ball end mill |
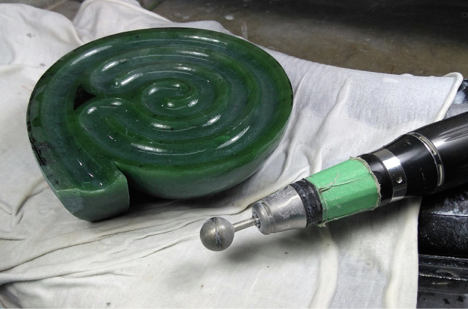 In Process - hand work to complete In Process - hand work to complete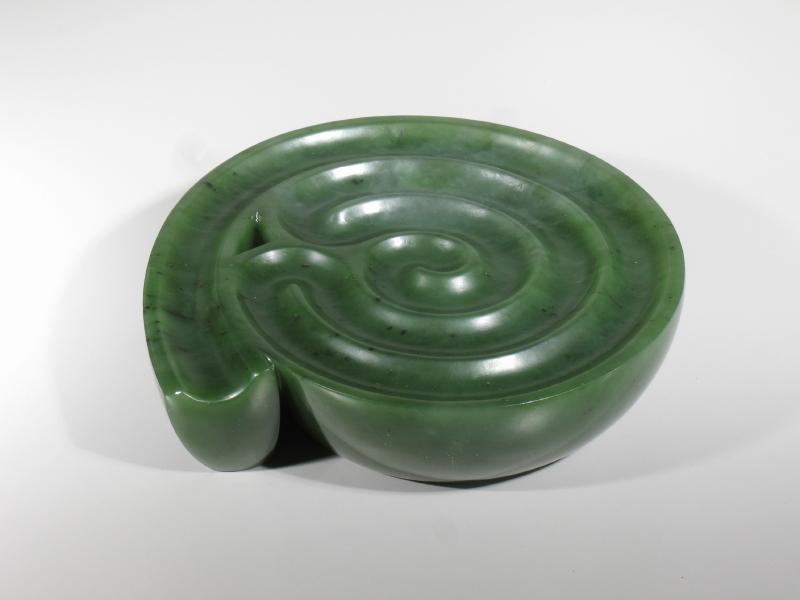 Final Final |
Michael Binkley
Michael gave a presentation at our 2017 Suttle Lake symposium regarding his experience doing virtual sculpting with zBrush (see his article in the journal or http:.???...). At the same symposium CNCRouterParts, lent a 4'x2'x8" CNC modified to cut stone, so that I could do a presentation and demo. In preparation for our presentations at the symposium Michael and I thought it would be a good demo to cut in Texas limestone an abstract female figure Michael had created on the computer. The limestone was 24x8x5 inches and I set it up to cut two of his toros from the stone (see photo). The lesson learned was that at a symposium, do smaller demo pieces as a demo, I ran out of time and others did not get a chance to cut a piece. When I returned home to my studio, I finished the work and Michael dropped by to pick it up.
Abstract Female Figure (created virtually in z-Brush, then scaled to fit 2 copies into a 5x8x23" Texas limestone block. 10mm Vacuum Brazed bull Nose bit)
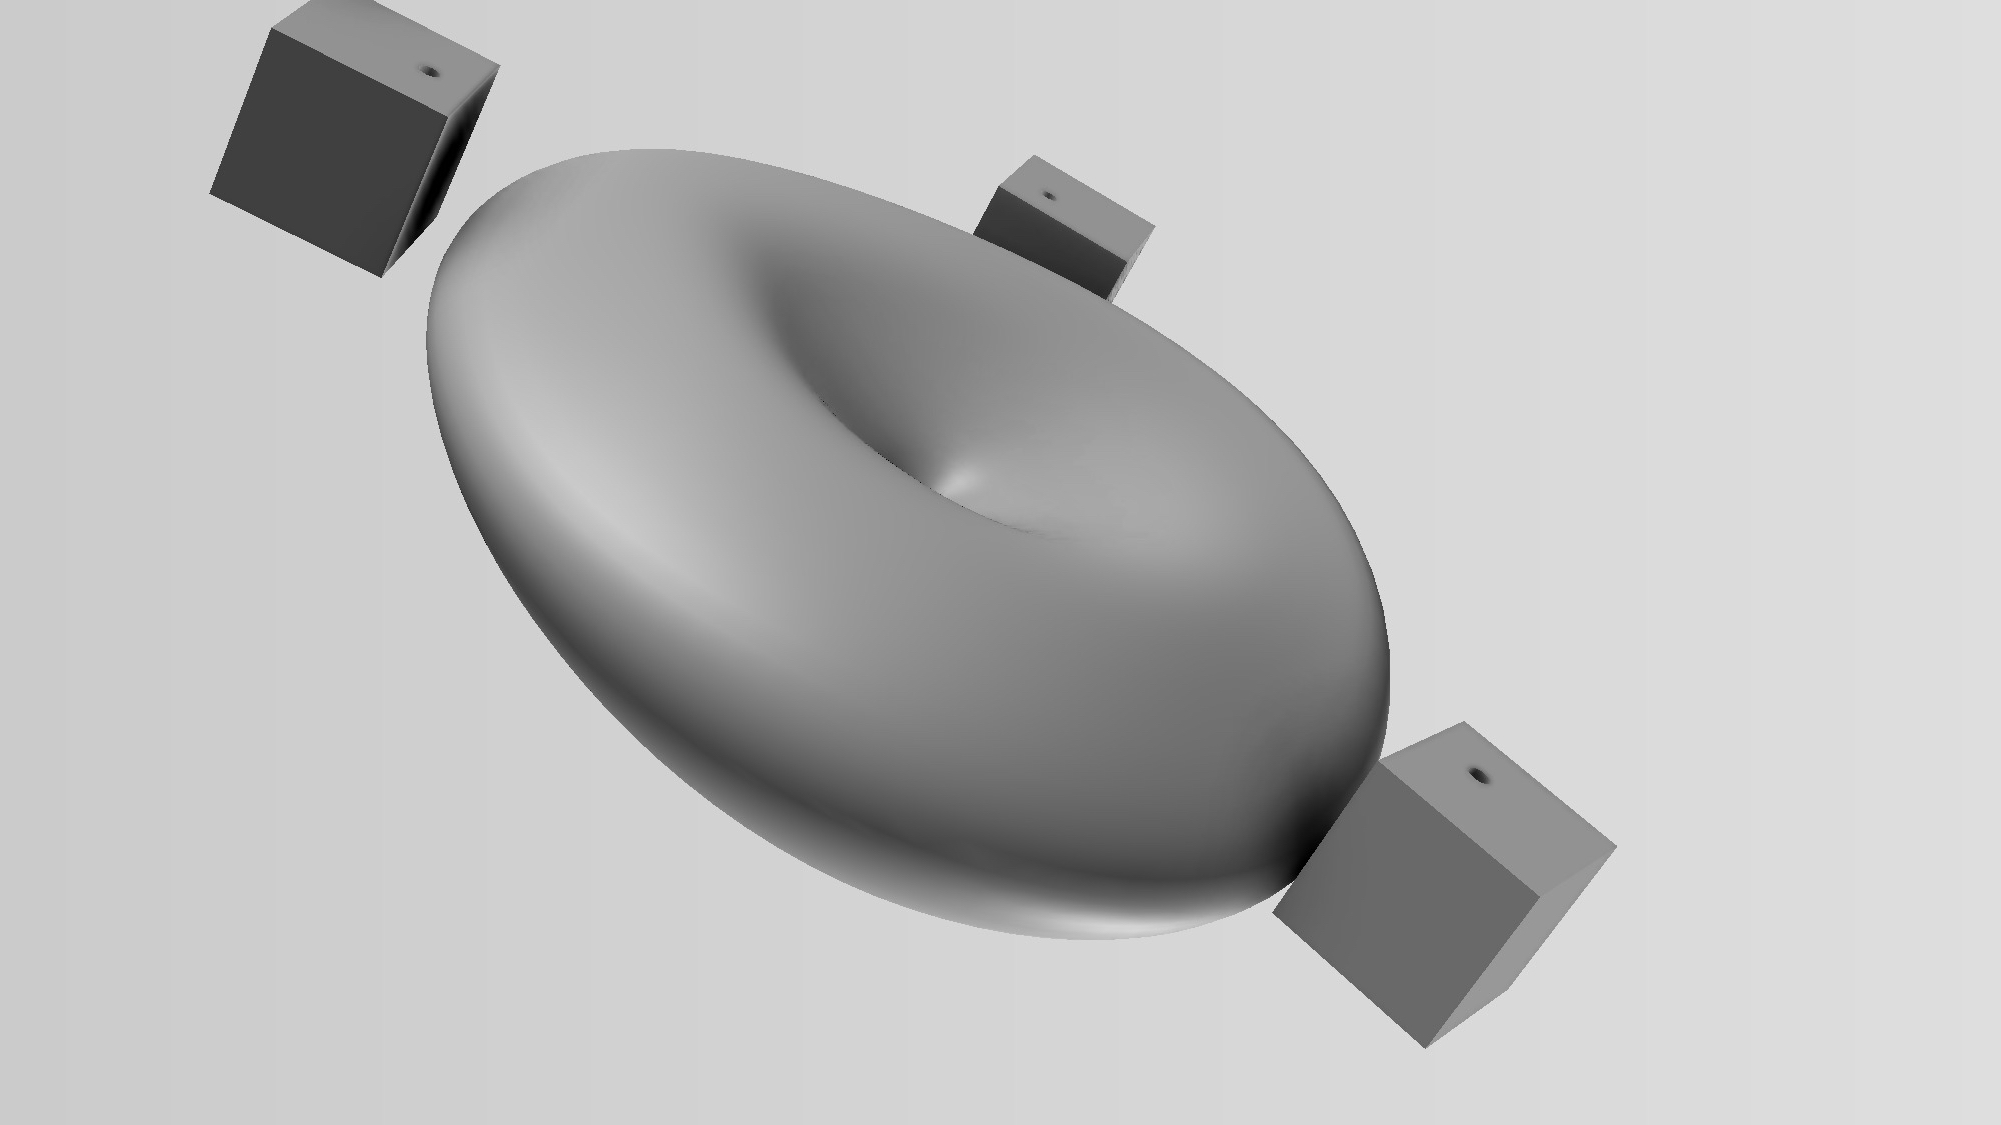
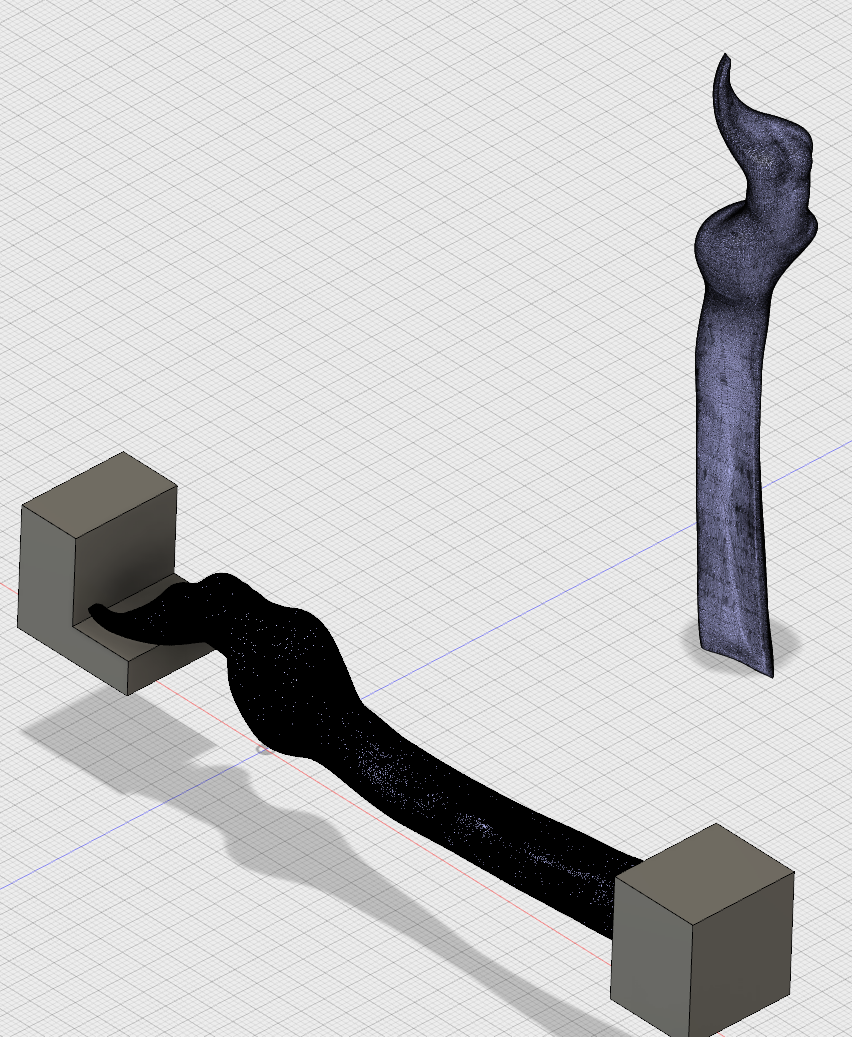 Abstract Female Figure on right. Layout for cutting in lower left, note holding blocks added at either end. Abstract Female Figure on right. Layout for cutting in lower left, note holding blocks added at either end. Due to long narrow neck which is fragile it was embedded in block to be carved later. |
 Setup of stone Setup of stone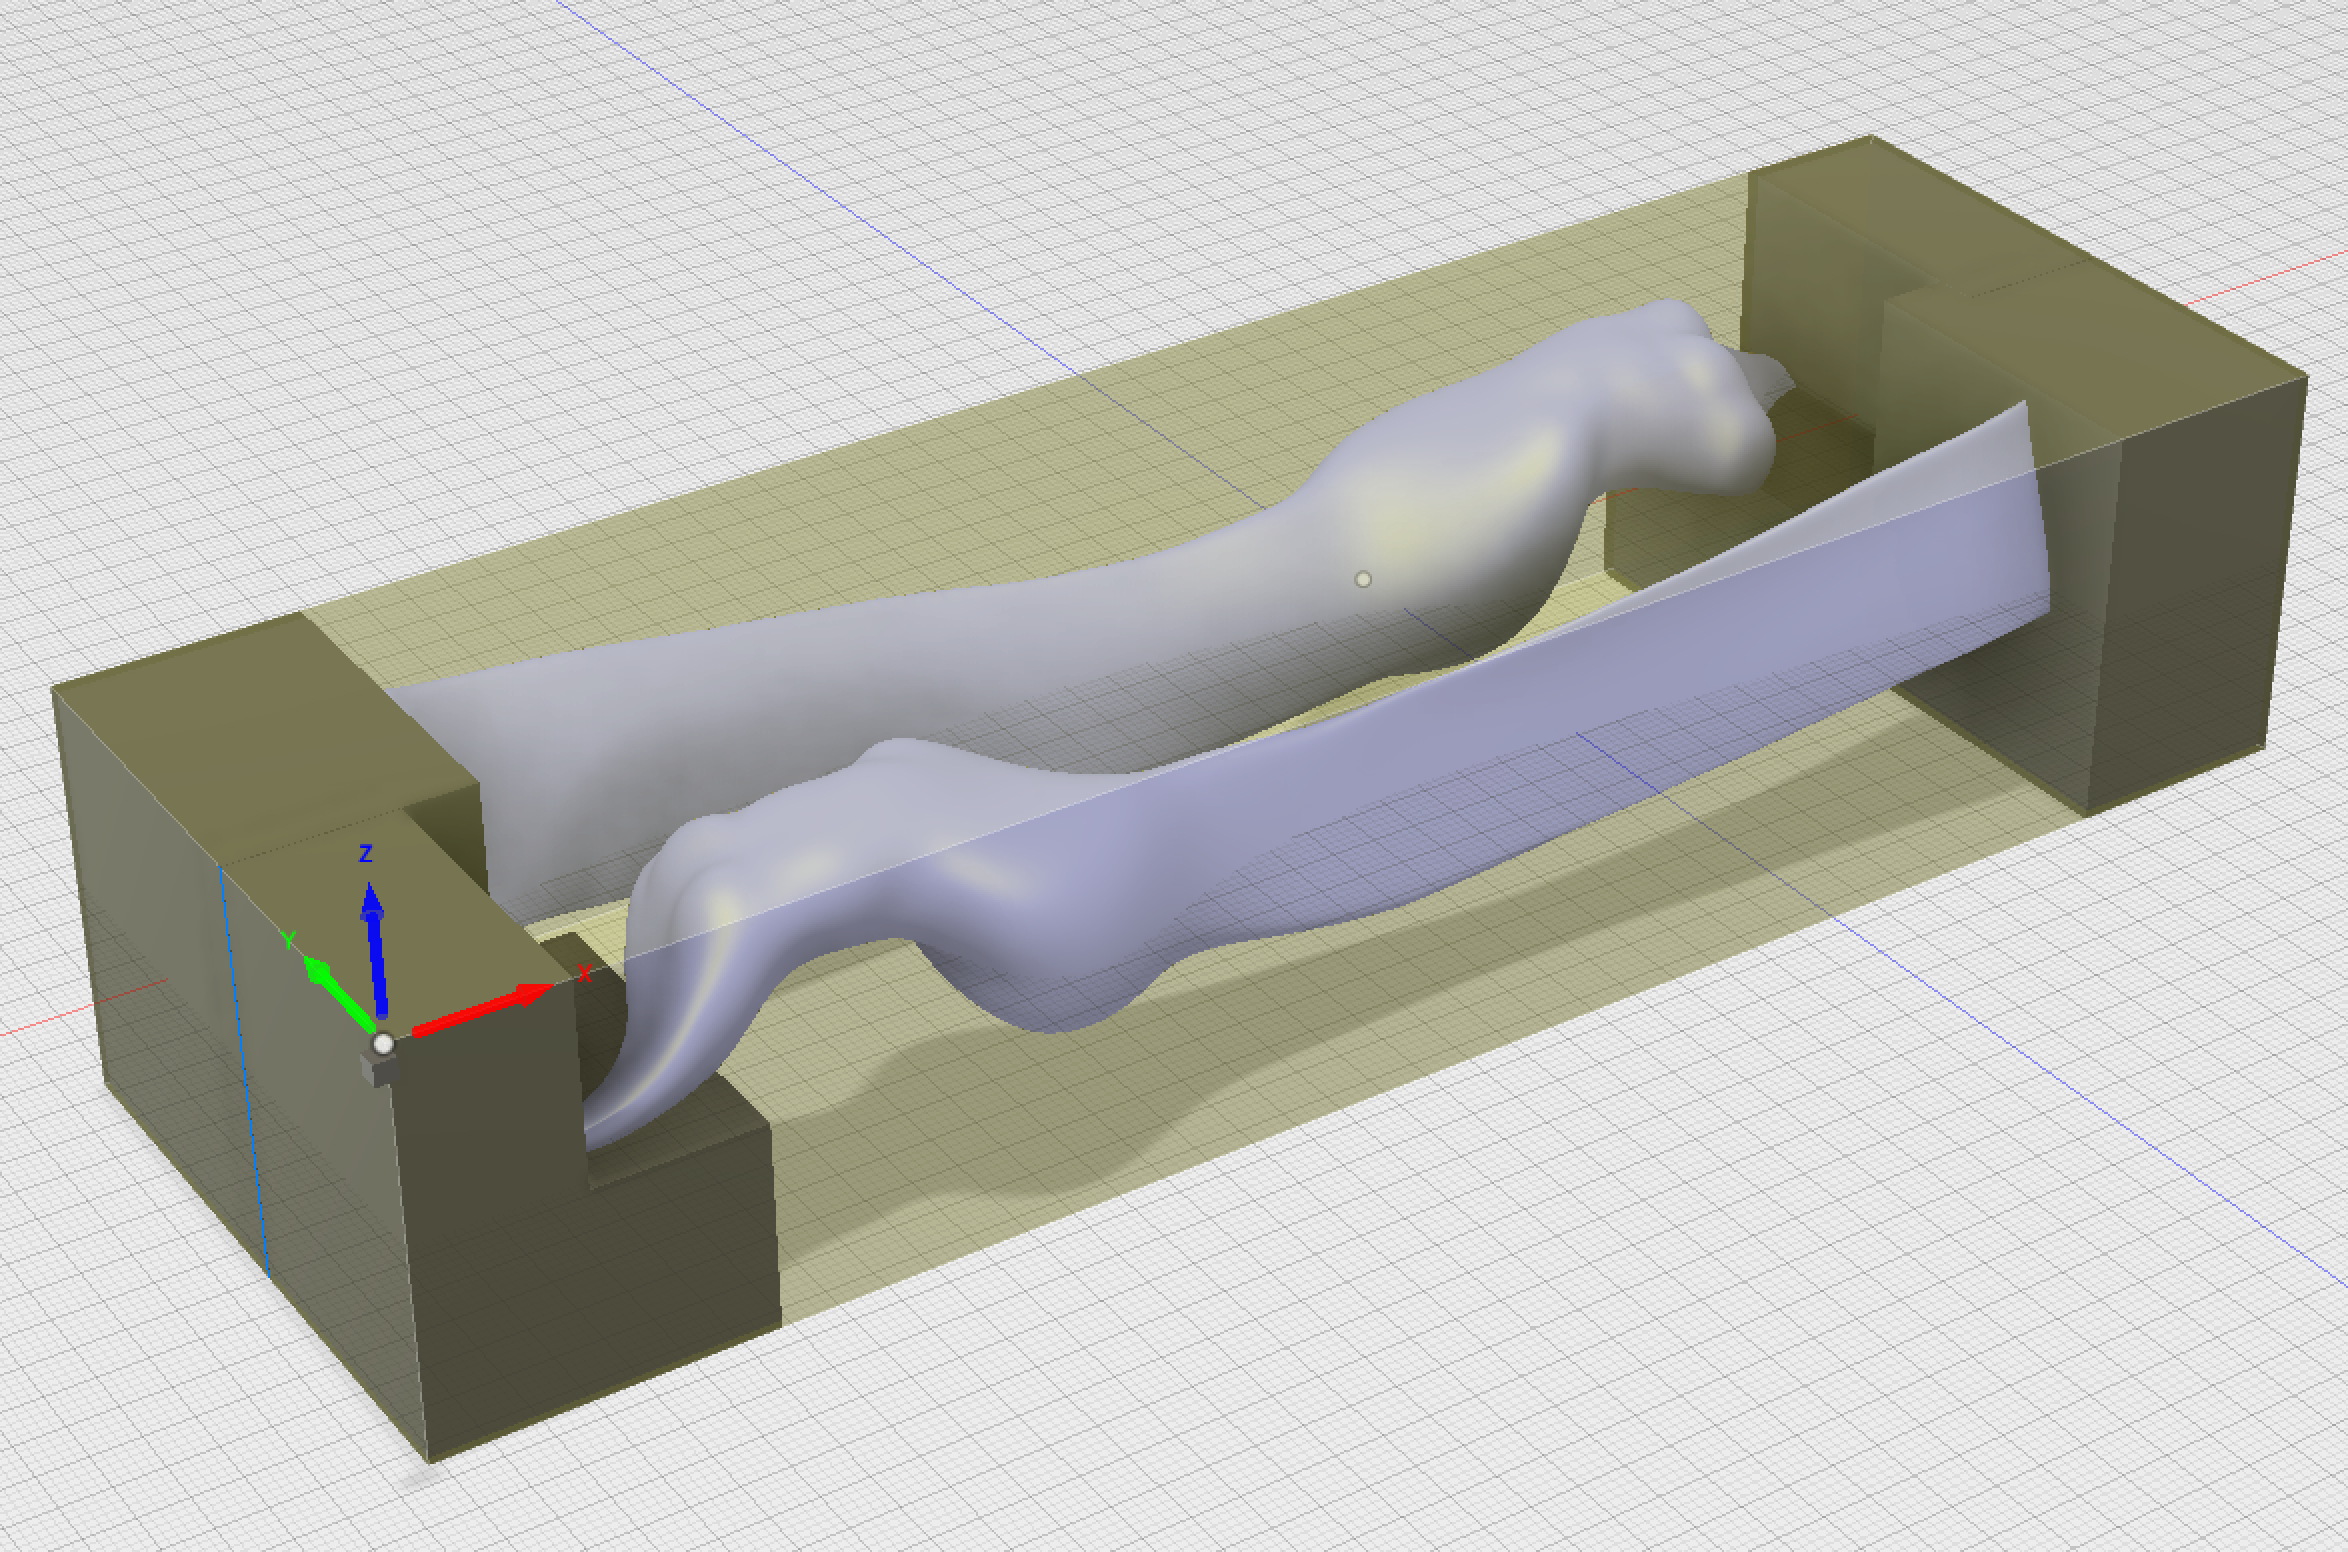 Two copies of Figure placed in a 5"x8"x23" block. Two copies of Figure placed in a 5"x8"x23" block.Side by side head to toe to get them close together in stone. 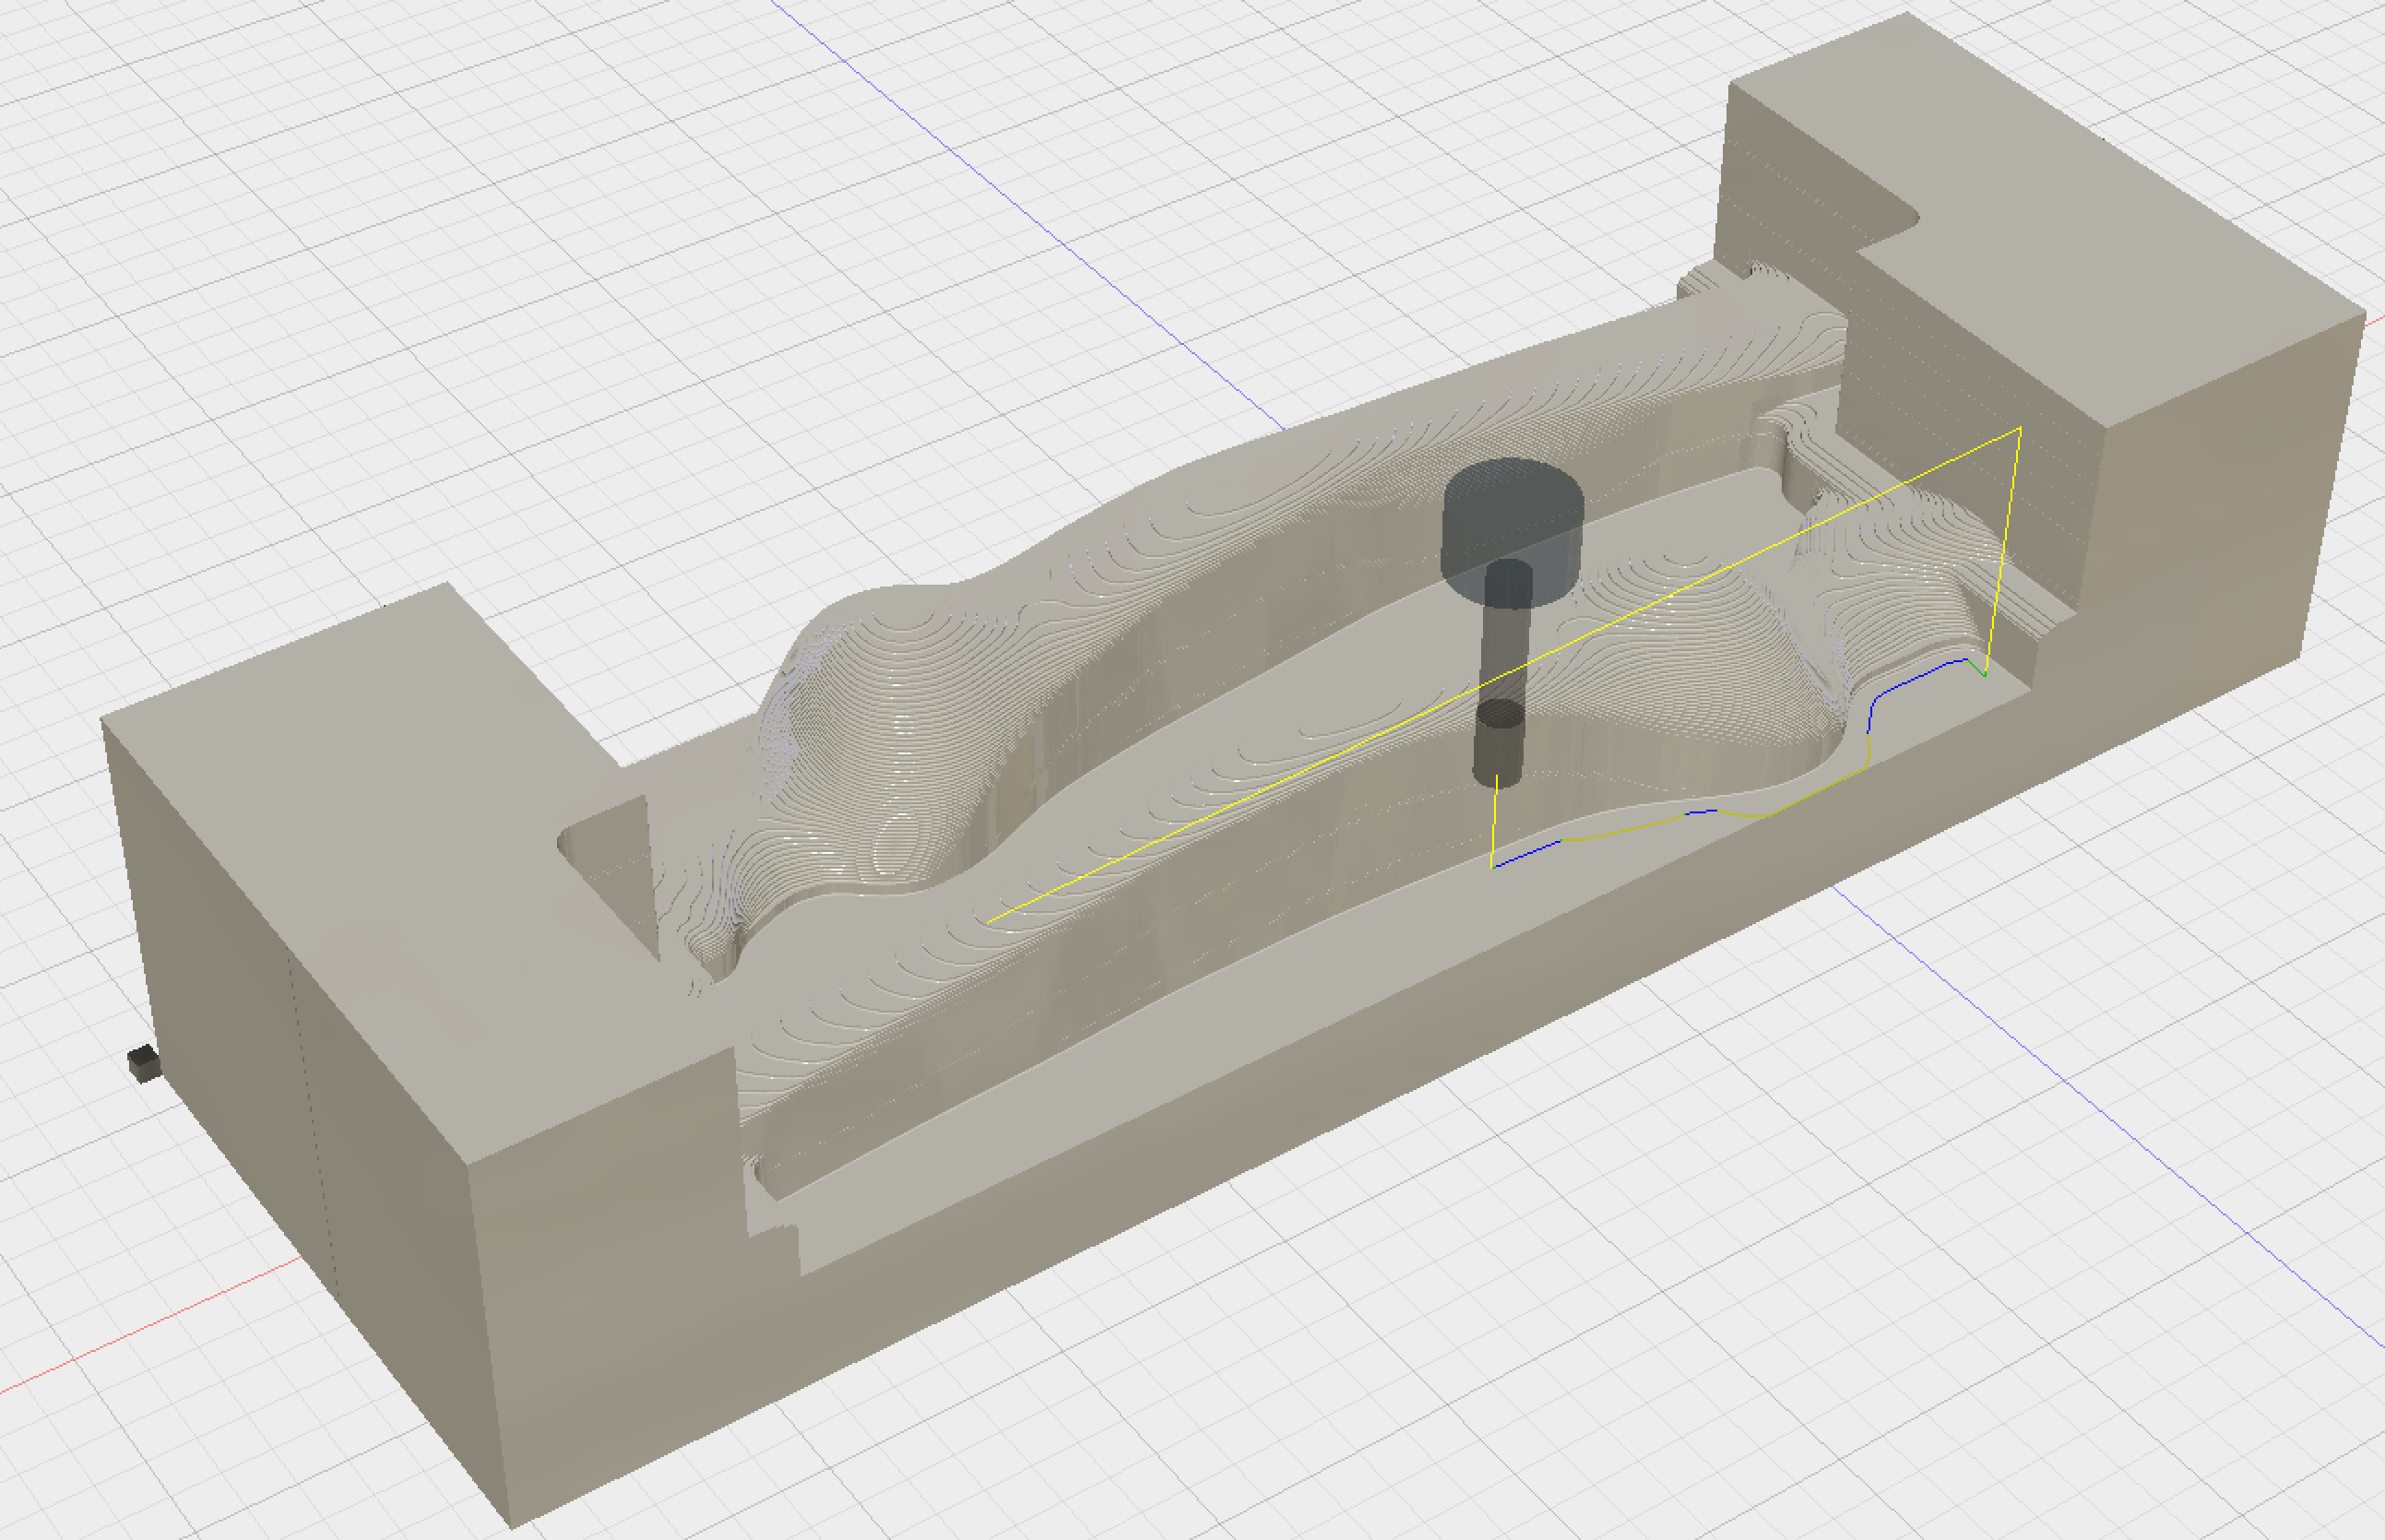 Simulation of top cut Simulation of top cut |
|||
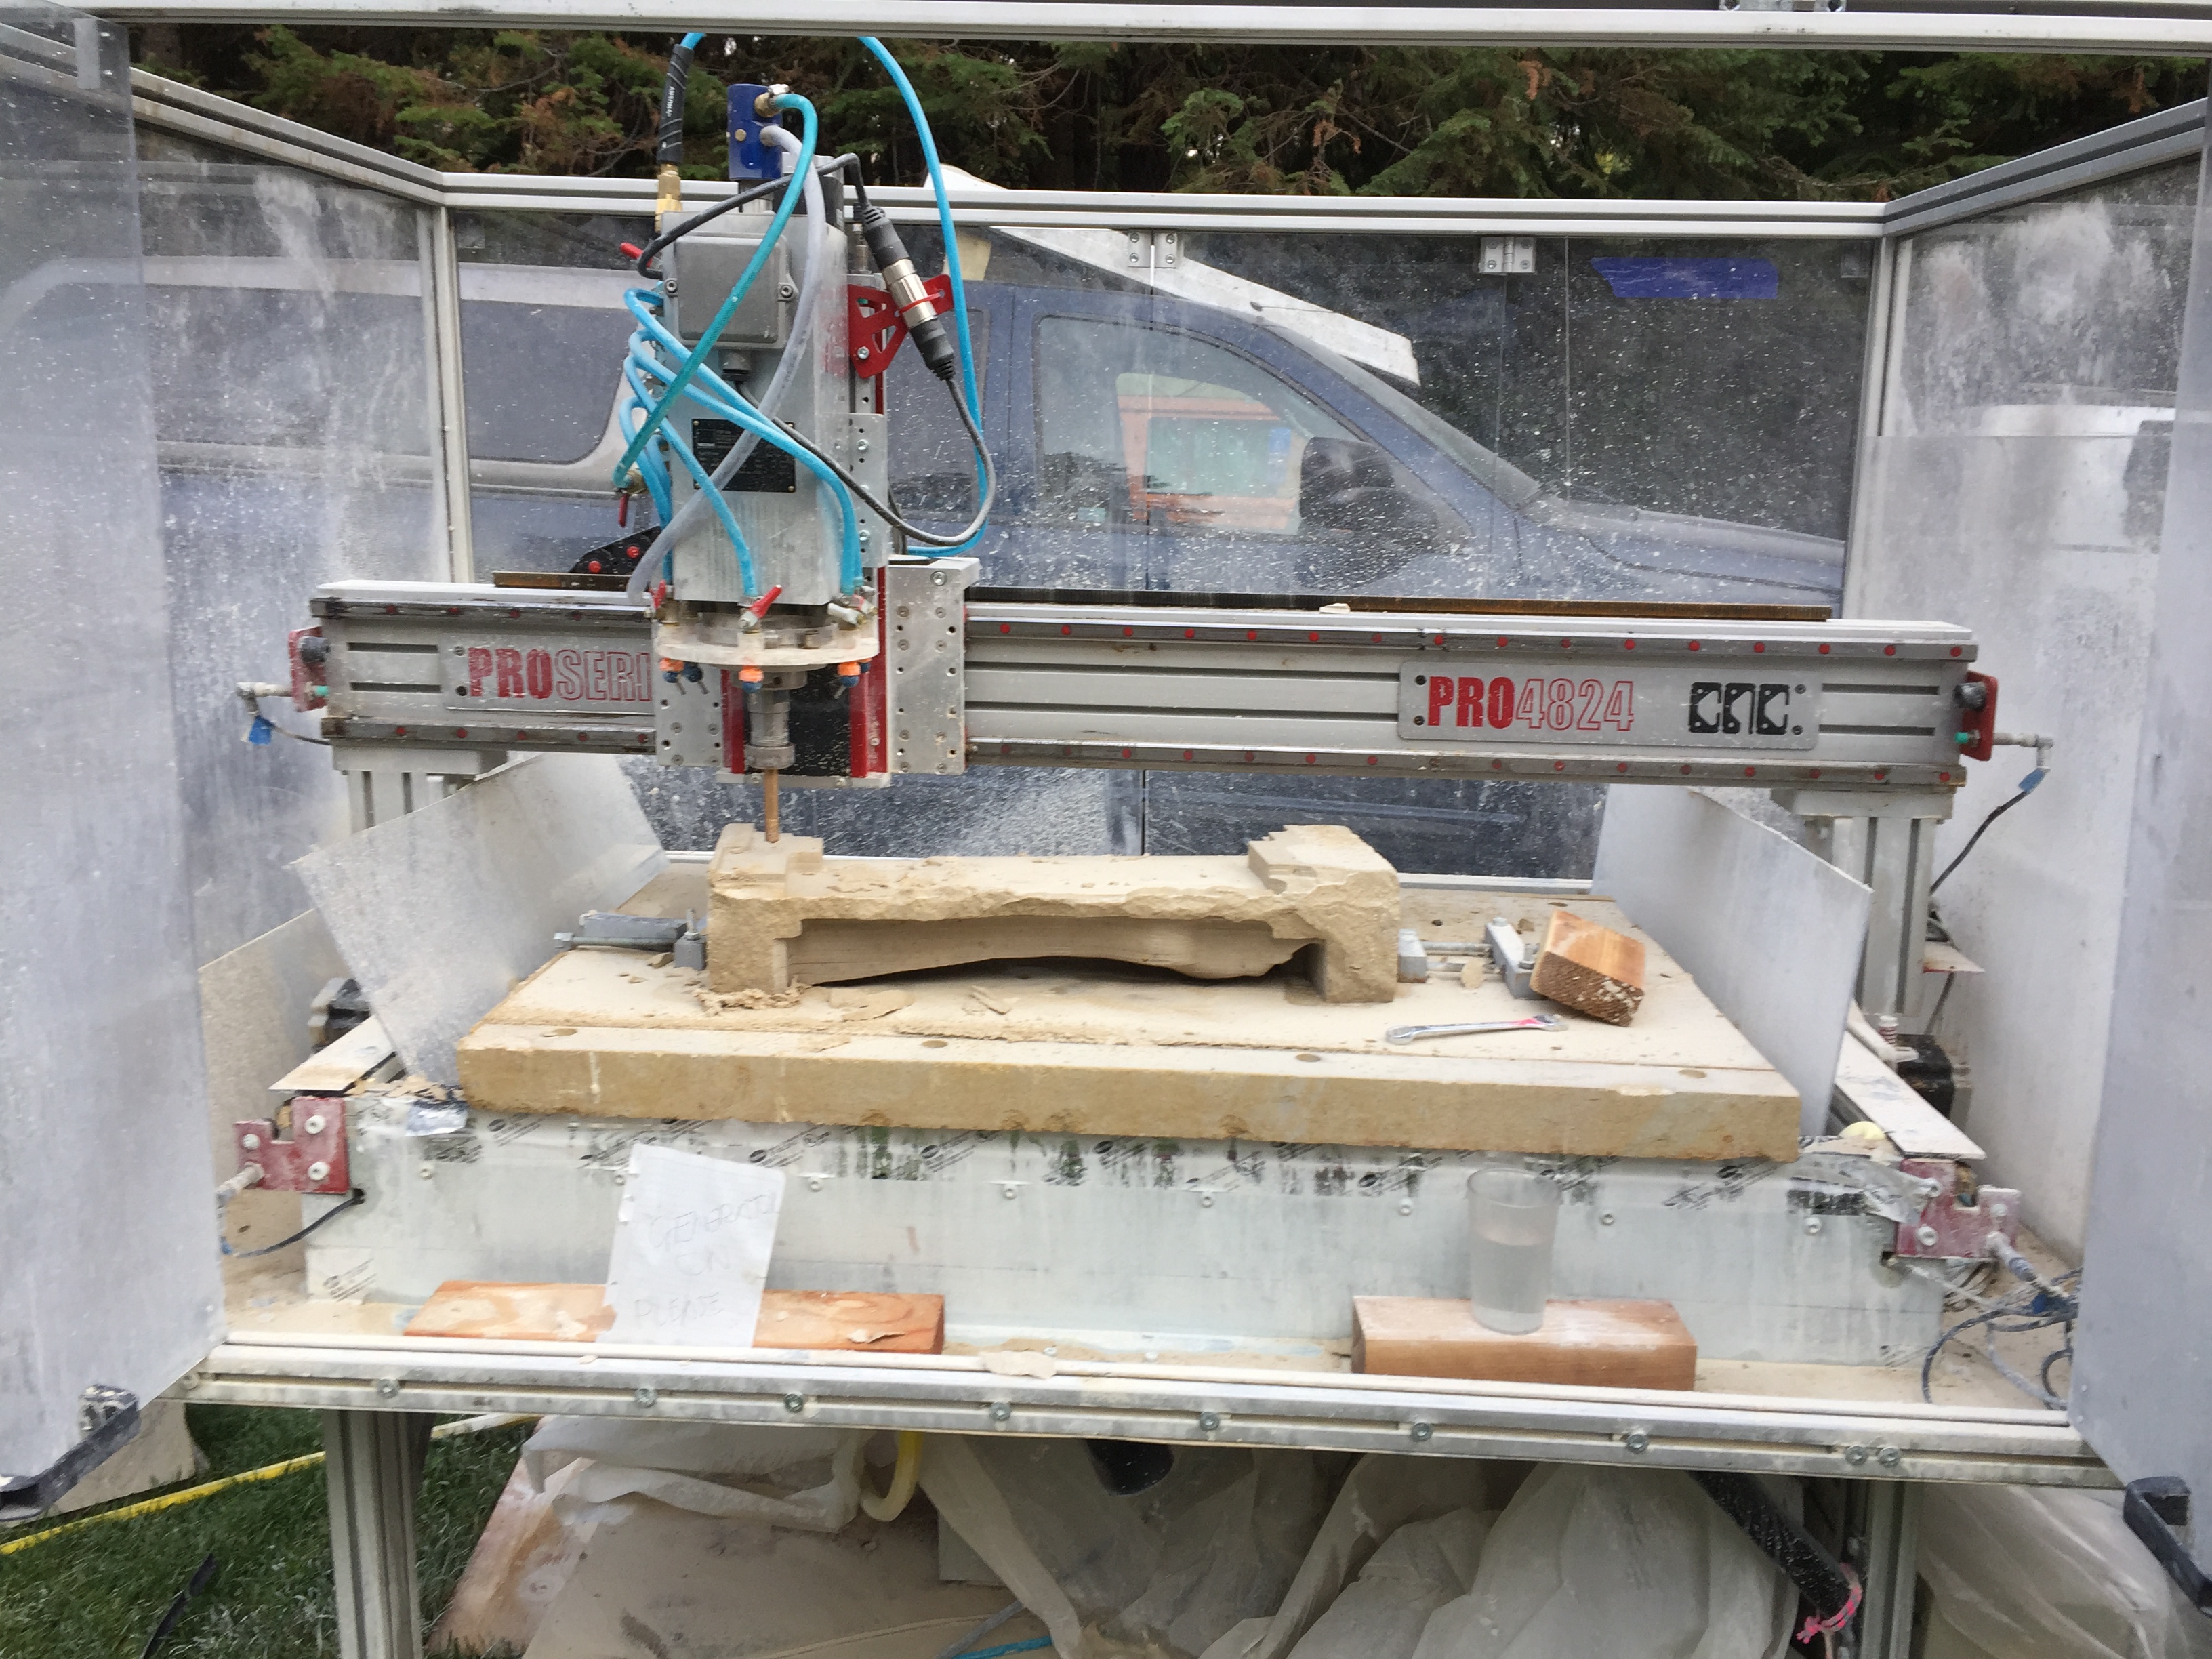 CNC Router Parts PRO4824 (4'x2'x8") setup for cutting stone. CNC Router Parts PRO4824 (4'x2'x8") setup for cutting stone. Note the stone is held in place on limestone bed (spoilboard) with a pair of clamps designed by Pat Barton. The water feed design by Carl Nelson |
 Top Cut of Abstract Female Figure. Top Cut of Abstract Female Figure. |
|||
 Left after stone was flipped and back cut thru to front. Left after stone was flipped and back cut thru to front. |
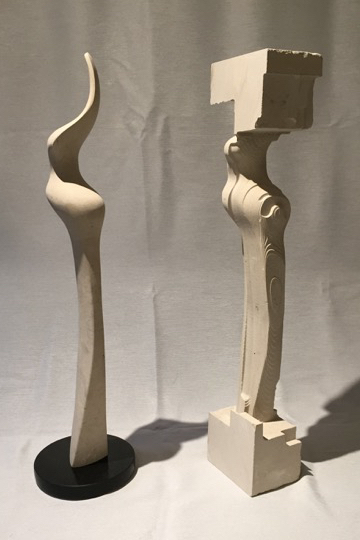
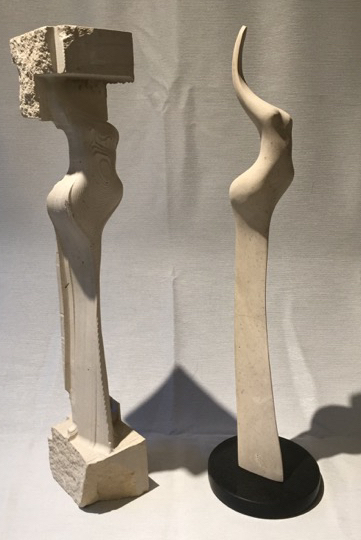 Side view of the two figures cut apart, left is produced by CNC, right is after finishg by Michael. Side view of the two figures cut apart, left is produced by CNC, right is after finishg by Michael. |
|||
 Back View of figure. Back View of figure. |
 Front View of figure. Front View of figure. |
CNC Acquisition
Let’s say after reading about my CNC experience that you think a CNC might be a useful tool to have. What are some things you need to know about the right CNC for you? The answer is, it depends on what you want to carve and how long after October of 2017 you are asking yourself the question. The market is changing, as of this writing, stone is not a common material to sculpt with a CNC, but I expect that to change.
First ask yourself: Will having a machine that cuts JUST left and right, to the back and front, up and down (X, Y and Z ) be helpful (good enough) in getting to my sculpture roughed out or close to final? If yes, then think about the size and type of stone you want to cut. If it’s really soft stone (soapstone and alabaster), and your work will be less than 8 inches high and 10”x 10” there will be great number of low cost ($300-$500) DYI kits that can be modified to handle the dust, mess, and run on 110volt house current. There will also be full solutions ($1,500-$2,500 from China ; $2,500-$5,000 USA that run on both 110 and 220volt) available to you.
If you wish to carve harder stone then stronger motors are recommended. Larger pieces of stone will require stronger frames to handle the weight and maintain accuracy of the cut. If you wish to do production runs then better enclosures and electronics might be needed. With each increment, the cost will rise. For a example, a CNC ROUTER PARTS (North Bend, WA company) with 40” deep by 40” wide by 12” high carving space that runs on 220volt single phase, and can do production level Granite, Jade, Basalt will start at $11,000 for a kit which you will modify for stone. A complete machine from Bolton Tools sold in North America (but made in China) with a 15” wide x 10” deep x 9” work area, which would also need additional work to convert to stone, would run $12,000 to $15,000 before shipping and installation. If you need/want automatic tool changing, say for rough out and detail pass, then expect to pay much more.
The above machines use what is called ‘flood cooling’ to cool the cutting tool, meaning the water is applied from outside the bit. If you want or need center fed water cooling, then expect to pay more for the spindle and more expensive center fed diamond bits and tools.
Finally, there is a used CNC market. These used industrial stone carving machines run $15,000-$100,000 and usually require a large installation space and likely 3 phase power.
To see what’s out there google: stone CNC for sale.
CNC Operational Costs
Depending on the stone and shapes you carve it is likely that your highest cost of operating the CNC will be cost of diamond and steel tool replacement. For example, for every new (never seen by you) type of stone you want to carve, you will need to learn the proper feed into the stone and speed (RPM) for a specific bit on that stone , so you get the most cutting from the bit and possibly the best finish cut on the stone. This means that you will use trial and error tests to get it right, you will likely “waste” one to two bits learning under which feeds/speeds it will be ruined, wear out, or break on the stone. I have a container (my “bits of shame”), containing bits I have bent, burned up, and broken while learning how to cut a new type of stone.
Bits from Henan Drills-King Mining Technology Co., Ltd in China with 35-40grit vacuum brazed diamonds on a 6mm (1/4”) to 12mm (1/2”) diameter shaft that is 90mm (3.5”) to 120mm (5”) long cost from $3 to $10 each. Sintered versions run $10-$15ea. These are meant to be used in a colleted chuck and run at 15,000-18,000 RPM. For more info contact Amy Geng in sales This email address is being protected from spambots. You need JavaScript enabled to view it., or check their web site: https://hndkmt.en.alibaba.com. Be aware there can be long delays between order and shipping, I usually have extra bits on hand so I have time to reorder. (BTW - contact me if you need something, or if you are making an order it’s always better to pool an order, shipping costs can be killer)
Center water fed bits like we use on angle grinders are designed to run at 4,000-6,000 RPM. The low cost CNC kits I have encountered use spindles that run at 8,000 to 20,000 RPM and are not center water fed which means you have to make certain the bit/tool is balanced and will run at the higher speeds, not fly apart, and work well enough to run with water fed from outside the tool. The exception to this is the prototype which we tested at Suttle Lake. It had a center water fed and ran from 4,500RPM to 7,500RPM and performed very well. A new machine kit similar to the one at Suttle Lake, with the special center water feed would likely sell for around $11,000-$12,000.
Center-fed tools for angle grinders are usually 5/8”- 11 threaded. Center fed tools for CNC are usually 1/2” gas threaded. 5/8 11 tools are usually less expensive, because they are lower speed and are for the mass market granite countertop industry. 1/2”gas thread tools are more expensive. If you need to use center fed water tooling, it is likely you will spend some time buying adapters and researching pricing.
The 3D design software update and maintenance costs will likely be your second highest highest on-going operation/maintenance cost after tooling replacement.
As for power costs, I can only speak to the costs of operating a 110 and 220volt CNC. Assuming you pay $0.10/kw hour, a 5 AMP router for a 110v CNC expect 0.5 kw ($0.05/hr) and for a 2.2kw spindle for a 220v CNC ($0.22 per hour) while cutting stone. A large hard stone, say a 14”x12”x4” snowflake obsidian, with 10 hours of cutting (not unusual) would cost approximately $2.20.
There will be minor additional costs for lubrication/grease, and an infrequent replacement of the spoilboard. Don’t know what a spoilboard is? Check out the sidebar on work holding and spoilboards.
Setup and Work Holding
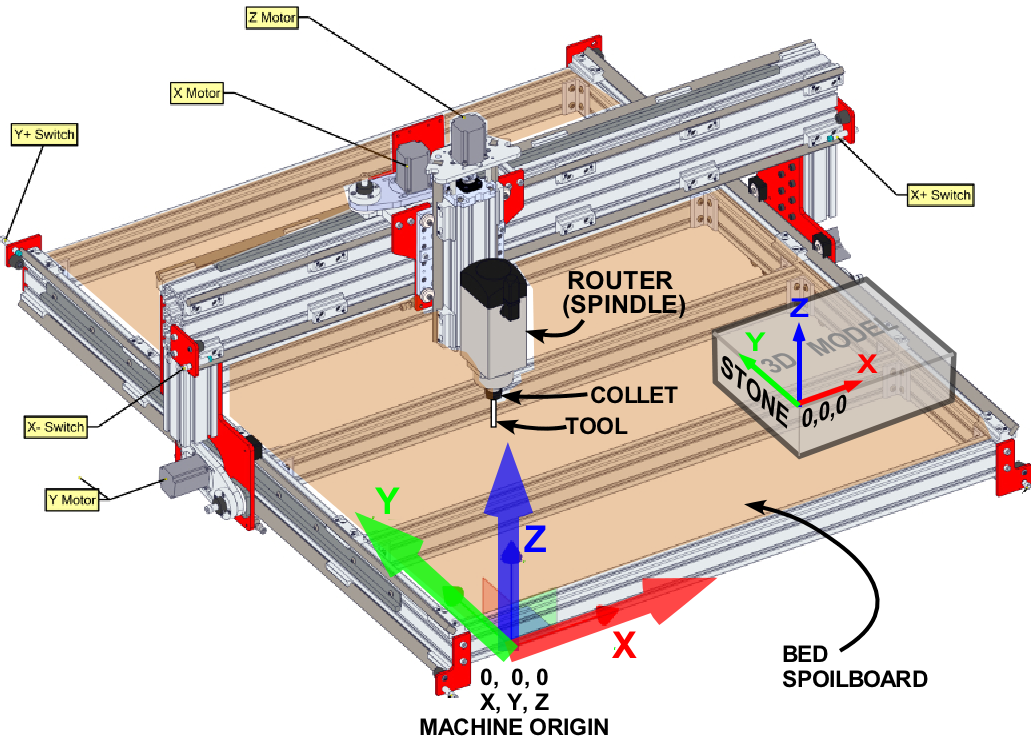
You’ve created a 3D model in your computer and you want to put it on your brand new CNC to have it cut your model from a piece of stone. To be able to do that you have to tell the CNC’s computers where the stone is secured on the flat and level bed (spoilboard) of the CNC and its orientation so the CNC’s cutting tool starts at the right point and moves in the right direction. See CNC Terminology Diagram. Note: - Sometimes when you are cutting a stone you will want to cut thru the stone into the flat level surface the stone is secured to and it will "spoil" that flat level surface, thus it is called a spoil board, although it's not a board. Rather something that is sturdy and can handle the water and weight of stone, like a marble or limestone slab)
You will use software to specify the origin (0,0,0) start point X (red), Y (green), Z (blue) of your 3D model and to do that you will make decisions about the size of the stone, how you will orient the 3D model in the stone, and how you will hold the stone on the bed of the CNC while it carves the stone. This process creates a “setup”. There is no one right answer, only what works to produce your piece of sculpture.
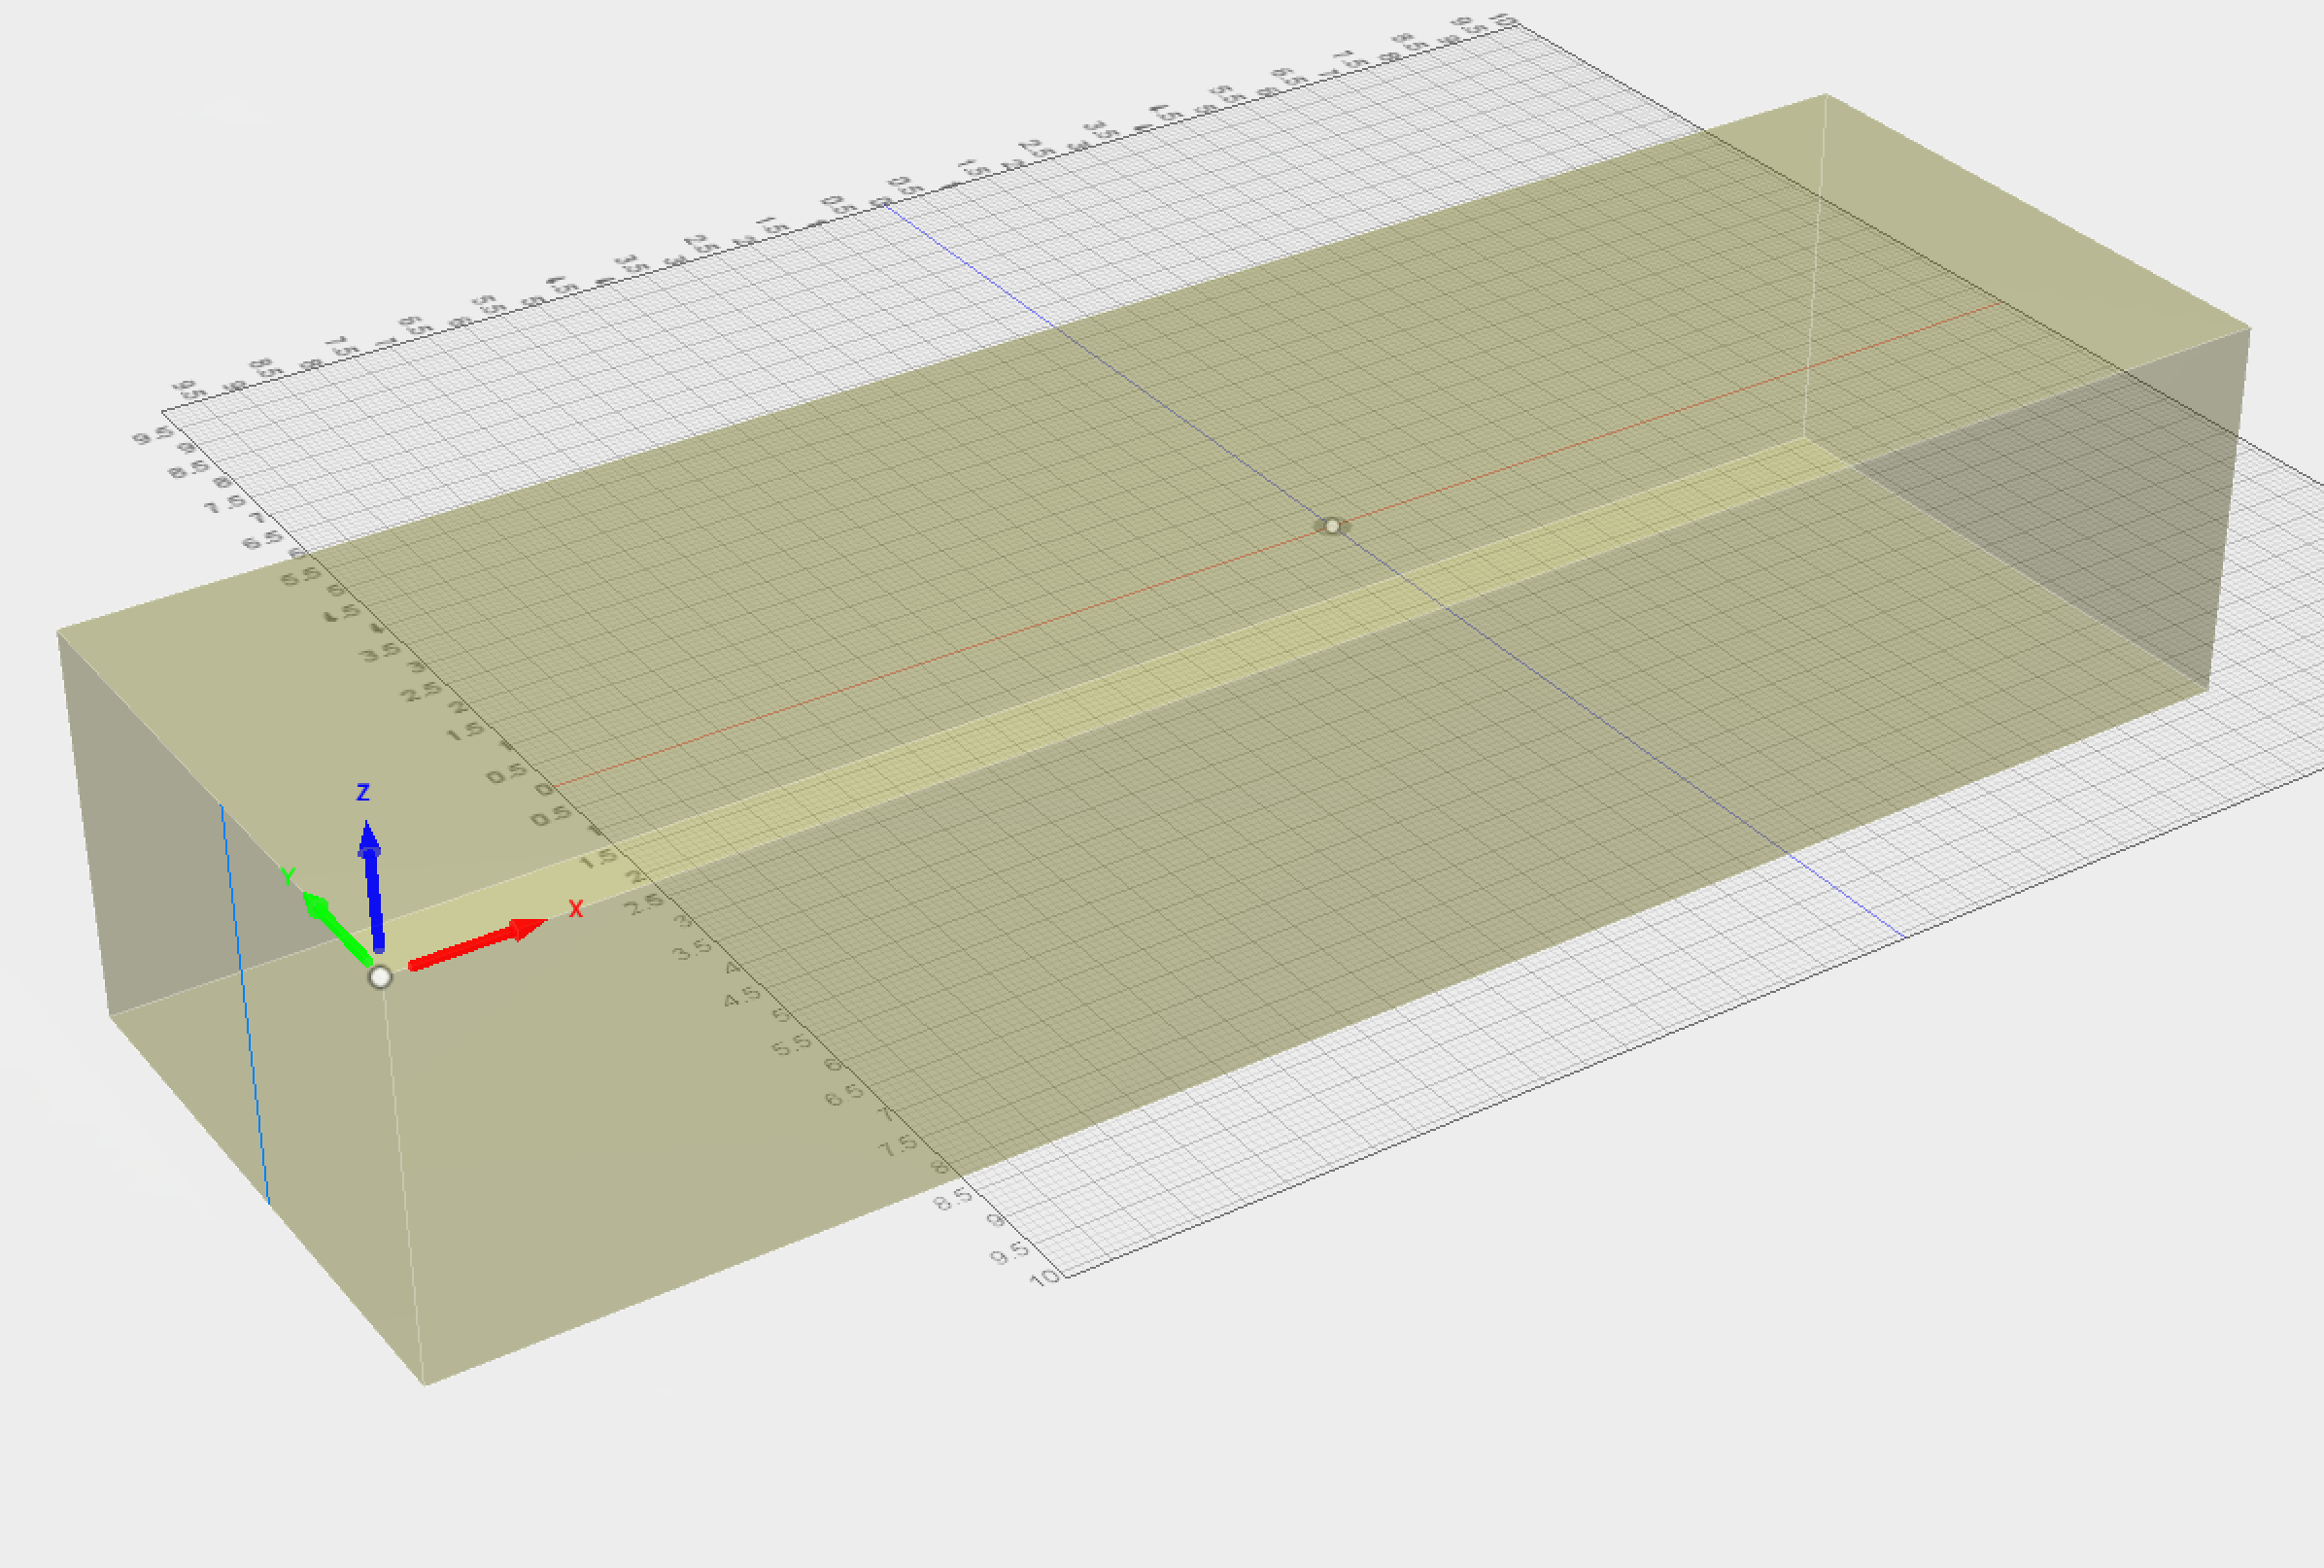
Let’s use an example of cutting a kitten from an irregular block of marble. Below is a shaded 3D model of the block of marble with X,Y, Z axises labeled. Notice how it corresponds to the X, Y, Z axises in the CNC Terminology diagram with the Z axis with positive “UP”, the “Y” moving back, and the “X” positive to the right as you face there front of the machine.
CNC TERMINOLOGY (click for larger image) |
|
You will place, within the stone, your 3D model. Below is a screen capture of how the kitten model was placed within the marble block. Notice the X (red), Y (green) , Z (blue).
Below is a picture of the actual stone superglued to a board which has been screwed and bolted to the spoilboard, which is bolted to the cross members which form the bed of the CNC.
After deciding on the setup and securing of the stone to the CNC you will select from your software one of its available methods for creating a path to cut the stone. The software I use is Fusion 360 and it provides many methods and options for creating a path. Most likely your first choose is a roughing pass to remove enough material to get the general shape cut from the stone, and then follow it with one or more finishing passes that best fit the shape and needs of your sculpture.
For each method you chose you will be asked to specify the tool, cutting depth and speed it will use to cut the stone. Depending on your design, a single pass rough cut may be all you want to do, but often you may want to use a smaller tool diameter to smooth out the steps across an area.
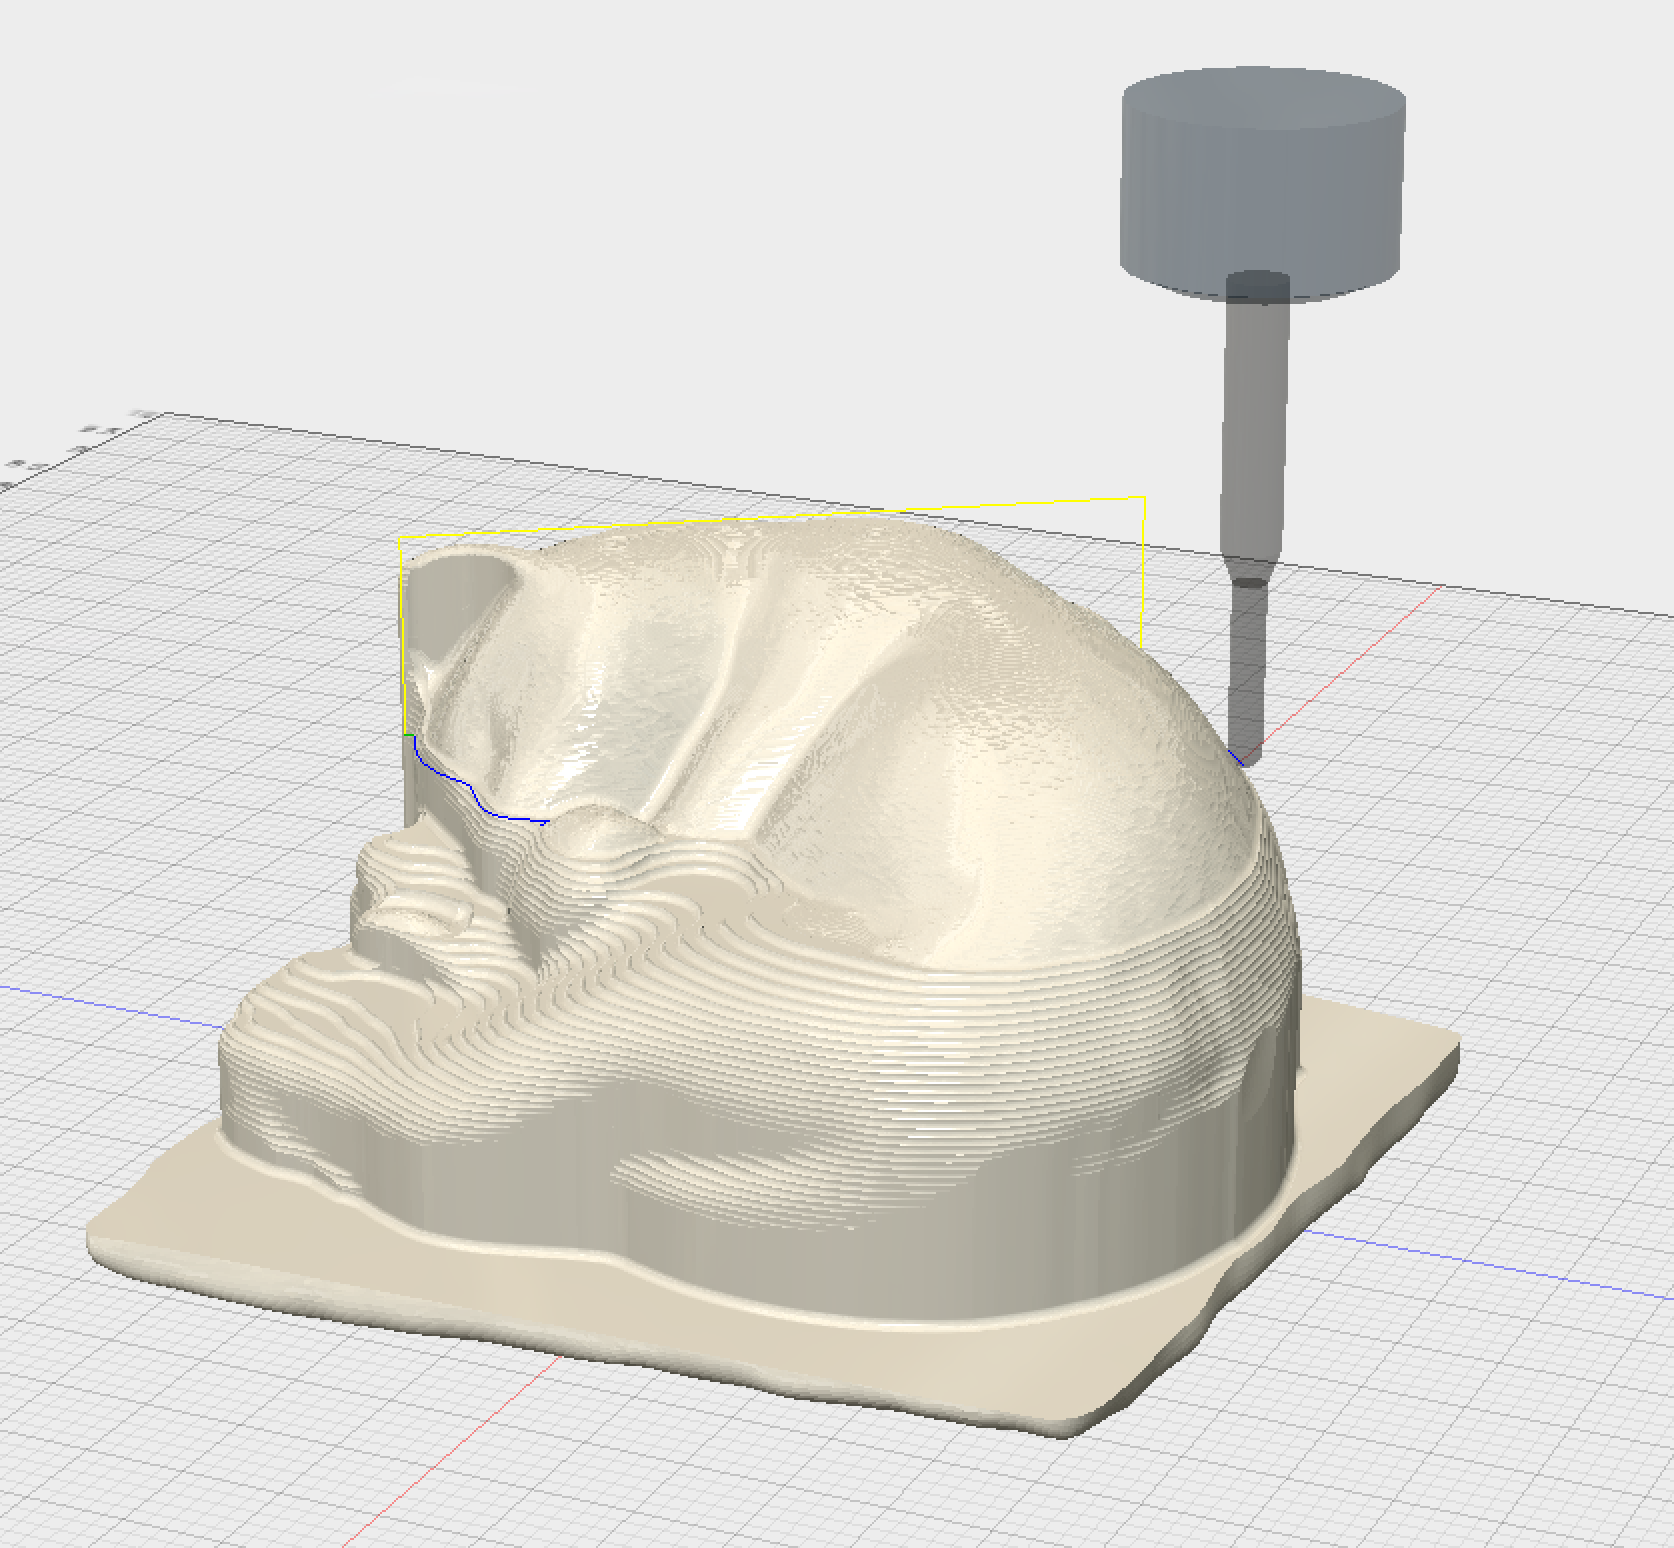
Each pass will create a cutting path, which in Fusion360 you can ask it to simulate so you can see the result and have it detect potential collisions of the tool with the stone. Collisions can occur when the tool is not long enough to get down into an area and the holder collides with the stone.
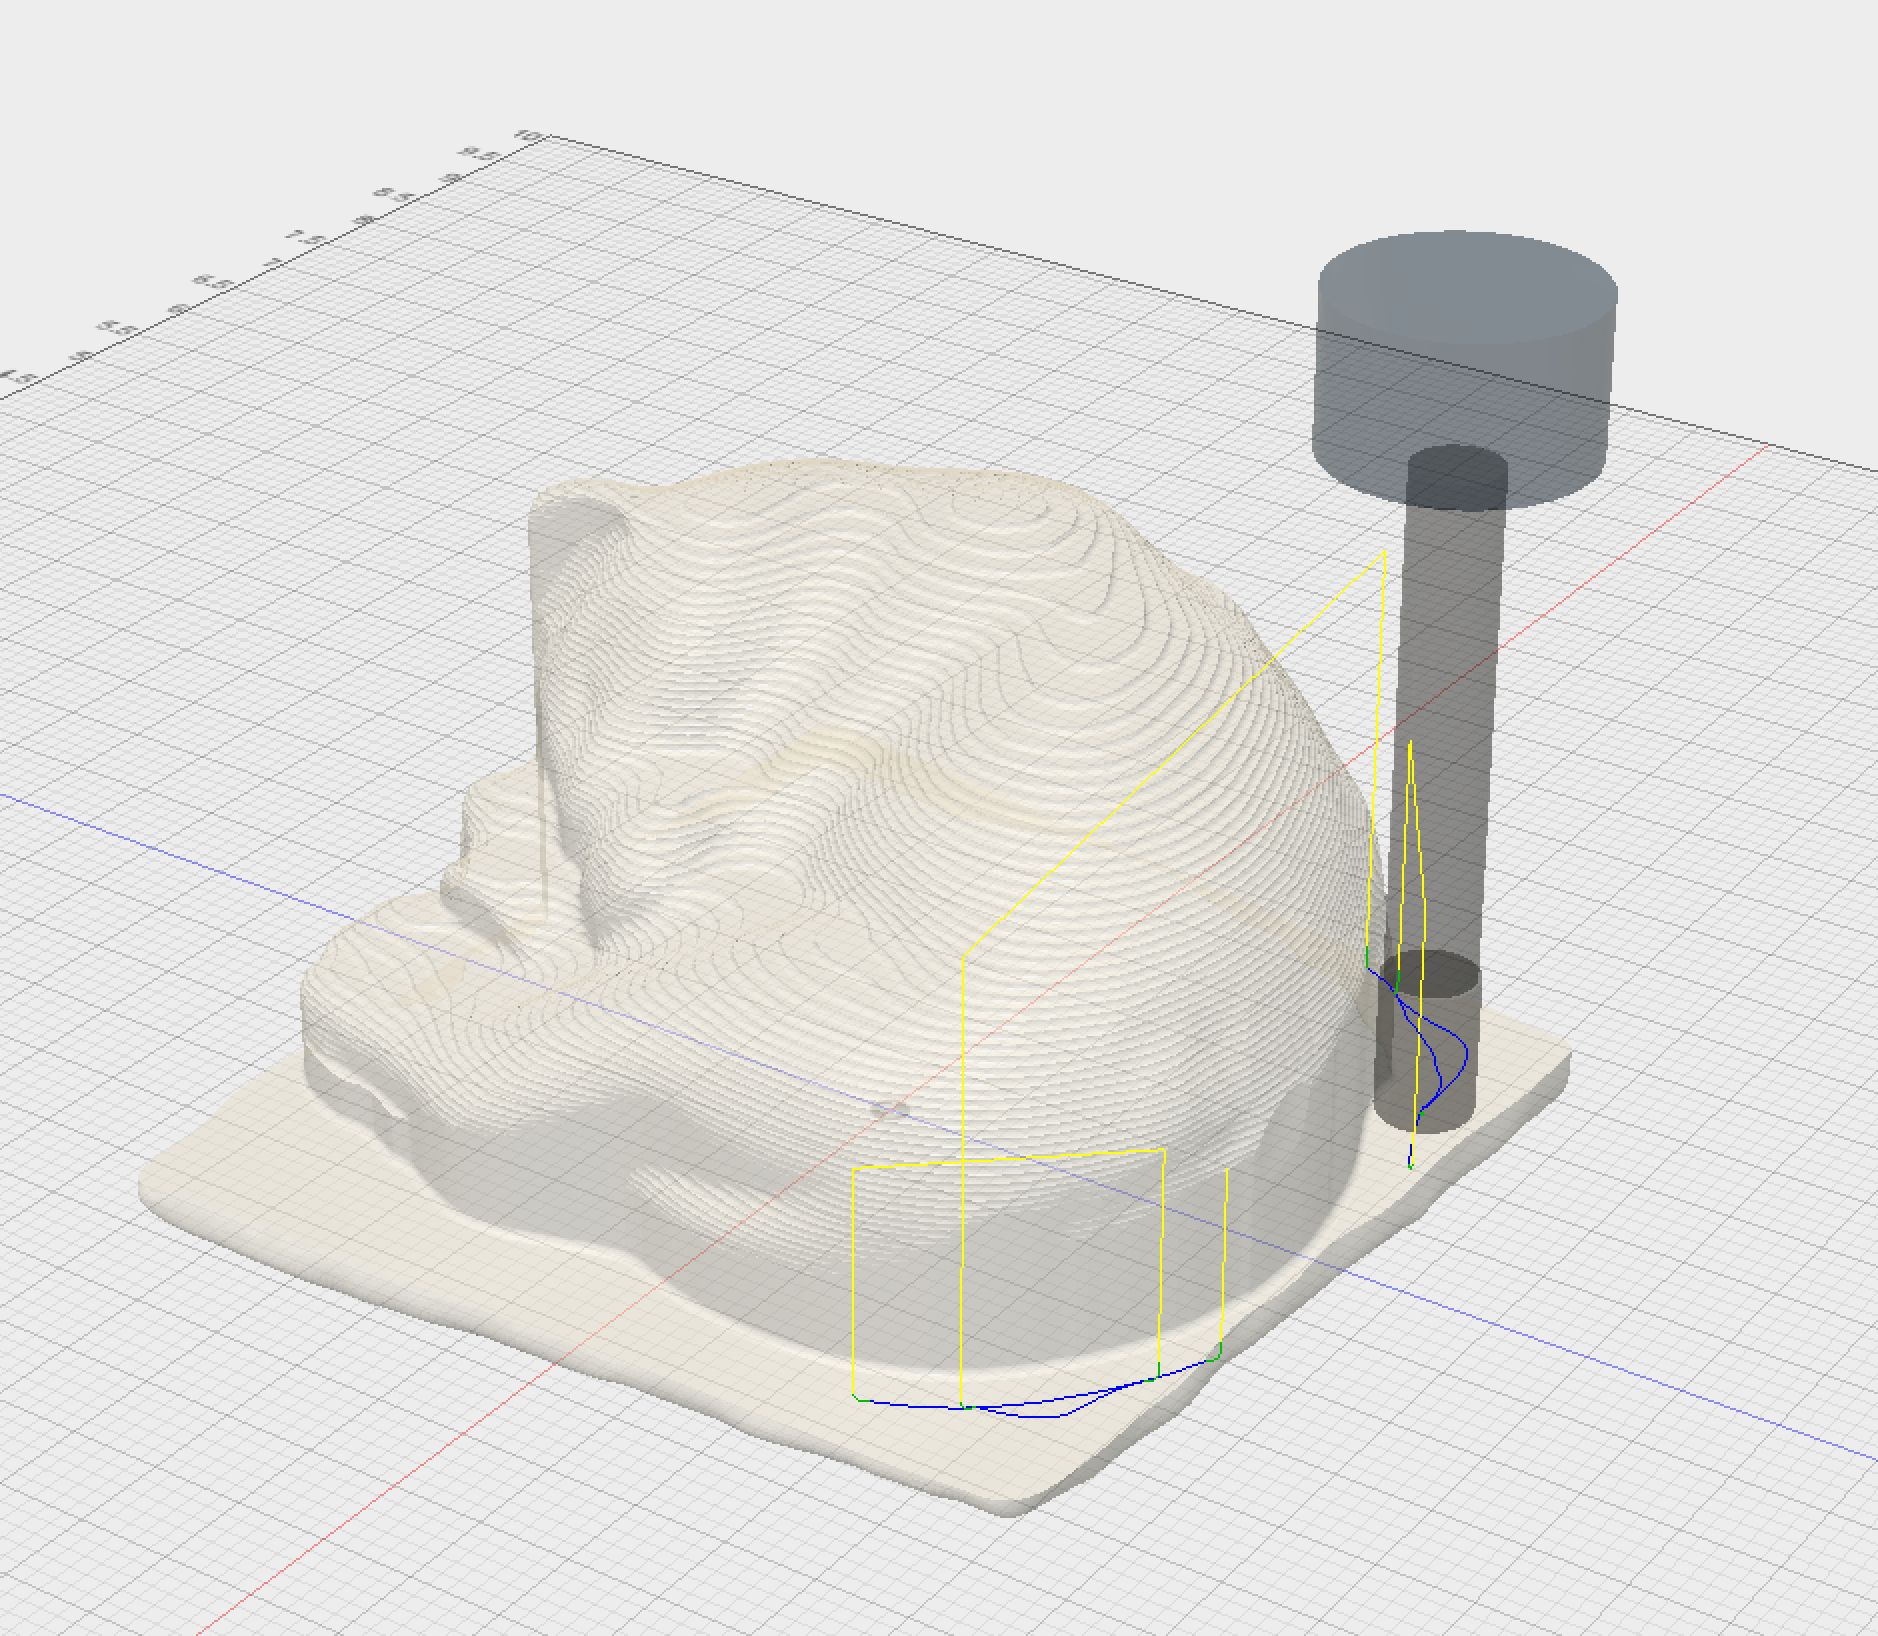 Simulation of rough cut with 10mm (.39 in) vacuum brazed “bull nose” diamond bit. Simulation of rough cut with 10mm (.39 in) vacuum brazed “bull nose” diamond bit. |
Rough Cut 10mm diamond bit. See full time lapse at: https://youtu.be/hB93F321FWo |
 Simulation of cut with 4mm (.157in) vacuum brazed “ball end” diamond bit. Simulation of cut with 4mm (.157in) vacuum brazed “ball end” diamond bit. |
 Second Pass 4mm ball end diamond bit Second Pass 4mm ball end diamond bit |
Once you are satisfied with the cutting path simulation you will generate a “G-CODE” file to load on the CNC. The G-code will contain everything to move the router into position at the origin (0,0,0), turn on the router, and move the router to the cut the stone at the speed you have specified.
You will then transfer the file with the G-CODE from your computer to the CNC computer. To properly use the file you will have “homed” the CNC so the machine origin (0,0,0) is set. You will then set the X,Y,Z (0,0,0) origin for where your stone is located by using the arrow keys on the CNC computer, or a handheld thing called a manual pulse generator to move the router head so you can get close to the stone to see/feel the position of the bit and set the “x,y,z work offest location” where you want the 0,0,0 of the stone to be. Once the work offset is set then you can load and run the G-CODE and begin the cutting process.
Monitoring the cutting process with the CNC's control software, in my case MACH3, and learning how to stop and restart the G-Code for a cutting path takes a bit of time to learn and requires attention to detail. You will become comfortable running the CNC as a regular process after you have learned the many ways things can go wrong.
After all the passes are made on a piece, your are ready to unmount and hand work to complete the details of the piece.