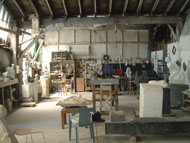
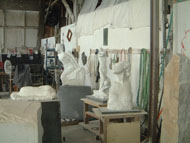
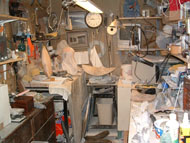
Editor: Hey gang! Hang onto your socks! here’s another glimpse into Bill’s studio designing mind. Have you bought that chop saw or called your contractor yet?
Artificial Light
For those of us who must work at night, a combination of halogen lights and “full spectrum” lights might be the best compromise to mimic the appearance of sunlight. Cheap fluorescent lights die in the cold, Jeff Brash tells me, so if you are using fluorescents but your studio isn’t heated, go for the more expensive lights. (Note, however, that many sculptors hate the light effects from normal fluorescent lights.) Equip your studio with directional lights so you can create shadows when necessary, and so you can uplight and downlight the stone to check for imperfections during final sanding. In this way, you will note details that were lost in overhead lighting. Tom Small suggests using clamp on lights with a ladder. The different step heights allow a lot of options. Suz Gentiluomo suggests inexpensive portable halogen lights - she can direct the light where she likes, and they are warm to work under. She stresses the importance of having overhead lights installed directly over your work.
Stacy Shure (out of Art City Studios) says that when tackling a direct carve, and one is lost in the stone, sometimes changing the light angle can bring angles and shapes to the stone that weren’t seen before. In a letter to the learningstone.net site, Stacy stated that “I learned at a lecture at Camp Brotherhood…that how you light your sculpture can provide striking differences in the design.” She recommended getting a few good portable halogen lights for this purpose. But one needs to observe the effect of whatever light you use on the colors of your stone. Some lights give false colors.
Tom Small adds that he sometimes uses artificial light at night at low angles to identify tool chattering and micro-planing. However, he says, if he spends enough time around the stone in natural light at all times of day (especially late afternoon and early evening) he can spot most flaws.
Floors
Concrete slabs are traditional and convenient (they allow the area to be washed down, with the water going out through a drain you’ve had the foresight to install). Jeff Brash recommends a floor gently slanting to one side to drain. Tom Small, on the other hand, can’t imagine water polishing indoors and would not be comfortable on a sloped floor, even with only a 1% pitch. But you’ll also need a dead-level area (see below). Your slab should be 6” or so above ground level. Get the concrete with reinforcing fibers mixed in, Suz Gentiluomo suggests. It is not much more money, she says, and the strength and crack resistance increase significantly. She also recommends reinforcing the concrete with rebar. It is cheap and tying it up is easy. To keep water from wicking up from under the pad, put plastic sheeting underneath it.
Concrete floors are not universally recommended. In Clive Murray-White’s letter to the learningstone.net site on shop design, he noted that he had “purposely avoided having a concrete floor, as it is very uncomfortable if you are working every day, and next to useless if you need to move wheeled objects around on it as you need to sweep up every stone chip every time you want to move anything.” Instead of wheeling objects around on a flat floor, he uses an overhead built-in gantry crane. (See below.) He lets the stone chips build up in his studio.
John VanCamp, another frequent learningstone.net contributor, agrees. John has combined the best of both worlds. His shop area is built like a clerestory pole barn: the main bay is 18’ x 24’ with an 18 foot rafter height; each side has a 10’ x 24’ shed bay with 12 foot clearance. One of the side bays has been half-enclosed to form a tool room. He has a concrete slab in the main bay. The other side bay is a stone debris floor that keeps getting higher as the slab area is swept off into it. John prefers standing all day on the rock chips rather than concrete.
Tom Small, who works primarily under the forest canopy, enjoys the feel of the forest soil underfoot, but allows as how he’ll put in a concrete slab one of these days.
Whatever kind of floor you add, Alexandra Morosco points out that it is important to have one area that is always dead level, so that when you are working, pinning, looking, or cutting a flat base, you are working against a true 90 degrees. If your floor isn’t dead level, then you’ll need to use some other method, such as a leveling plate, to ensure your working surface is true.
Walls
Height is very important, for several reasons. There are the obvious ones: you need to ensure your ceiling is high enough to allow you to work on your sculpture when it is on your work stand. And if you plan to install an overhead trolley or crane, you’ll want at least ten feet below the I-beam. But wall height is also important for reasons I wouldn’t have guessed: as Alexandra Morosco points out, the negative space around a piece is as important visually as the physical piece itself. So you’ll need enough clear negative space – uncluttered by shelves -- for pieces of the size you plan to sculpt.
So don’t build cabinets or shelves along every inch of your walls (shelves will get covered with stone dust anyway). You’ll need an empty wall space where you can look at your work, photograph it – even draw on the wall, or on a piece of sacrificial wallboard mounted on a plywood sheet.
Also remember that when you wash down your floors, your walls will get wet also. Jeff Brash recommends walls that are white (for light) and waterproof, for wash down. I had been planning to use melamine sheets instead of drywall in my studio, since it can be washed. (Now I’m thinking of moving all the dirty work outside, a là Tom Small.) And while we’re talking about walls, remember to add lots of electrical outlets. Place them not in the traditional base-board locations where they’ll get wet, but at waist level (or countertop), where they’ll be both safer and more convenient. They’ll also need to be GFI outlets. (Ed. Note: GFCI circuit breakers can protect all the outlets on a circuit.)
One ancillary benefit of building your studio on piers, for those of us who would like more tax deductions, is that if your studio is “permanent,” then you have to spread your deduction for its cost over many years, but my accountant tells me that if the studio is “movable,” then one can deduct the total cost for the studio in the first year! (That, of course, was my accountant’s advice to me: consult with your own accountant before taking this deduction.)
Doors
Design your doors extra-wide (I’ll be installing 42” doors) to ensure you can get your stone and equipment in and out, or better, install a garage or barn door.
Heating
In-floor radiant heating is wonderful if you can afford it. The components of in-floor radiant heating include ground insulation; piping laid in between concrete, or under a wood floor; a water heater; a small pump capable of handling hot water; room thermostats; and electrical wiring and gas lines. It has the reputation of presenting more in the way of up-front costs, but lower operating costs over the years, with the huge benefit (to heat lovers such as myself) of providing that wonderful feeling of heat coming up through your feet. Those who have it say you can set the room temperature considerably lower than with normal heating systems, because of the direct heat the flooring provides. If you are feeling particularly hedonistic, you can install it in a concrete pad outside, as some other sculptors have done.
In-floor radiant heating doesn’t provide “instant-on” heat, the floor has to warm up first, a process that can be lengthy. So it isn’t necessarily suitable for those who don’t know in advance when they’ll be carving. One solution would be to install the “in-floor” components when your pad is poured. Installing the in-concrete tubing is easy and inexpensive. That way you can get the rest of the components, and hook up the system, when your life becomes more predictable and you no longer need the “instant-on” heating that radiant flooring can’t provide. Another radiant-heating solution is to use under-floor electrical mats/grids. These systems also won’t provide instant heat.
Another radiant-heating option is to buy a wall or ceiling mounted radiant heater that runs off propane. Robin Putnam (another learningstone.net participant) heats a 24’x 36’ uninsulated metal shop with a 3.5 foot unit which puts out heat covering an area 21’ in diameter, at a cost of 1 gallon of propane every two hours. This would be a reasonable cost for a Sunday-afternoon carver, but a lot of money if you use your studio daily.
A simpler radiant-heat source may be your lighting system. Halogen lights throw off a lot of heat.
Wood (or propane) stoves are an obvious possibility for heating. Electric heat (such as “King” heaters in the walls) is a quick and convenient option, but expensive to use. A cheaper alternative is a unit using electrically heated oil. It looks and works like an old fashioned radiator, but plugs into a wall socket. It’s cheap (under $100), safe in water, assuming the plug doesn’t get wet, and won’t cause fires.
And finally, the simple approach, recommended by Suz Gentiluomo and Tom Small: clothing to suit the Himalayas. Here again, it’s a matter of personal choice. Suz thinks that heating a carving space is a waste of money. Me, I’m a heat sink. I won’t go out to carve unless I know I’ll be warm, even if by something as simple as a fire in a barbeque (in which case, beware your coat tails!).
The Clean Room
Or at least, the “not-so-dirty” room. While some sculptors try to do all of their “dirty” work outside, many others do it in their studios, driven inside by winter weather or neighbors objecting to noise and dust.
Ideally, inside dirty work would be done in space that has been partitioned off, in order to leave a clean place for planning, books, food, clothes, and displaying finished pieces. My fantasy clean room has a wood stove and a comfortable chair, with an end table on which to set my wine glass (or, since we’re talking fantasy here, snifter of cognac and cigar). One classy example of a “dirty” room is located on San Juan Island. The studio is divided into two areas by Plexiglas walls. The entry into the “dirty room” is though a vinyl strip door. This “dirty room” has an exhaust fan on one outside wall, and furnace filters built into the interior Plexiglas walls. The system sucks clean air from the clean room through the filters, and exhausts the dirty air outside. For this system to work, however, you have to be heating-bill-tolerant.

